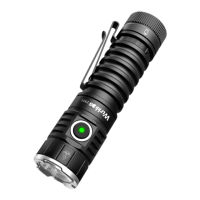
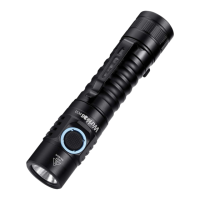
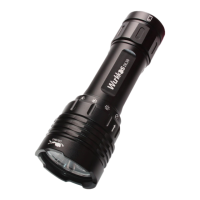
The Wurkkos TS21 is an exceptionally bright, powerful, and versatile everyday carry (EDC) flashlight, meticulously engineered for both home and professional use, as well as for various outdoor activities such as camping, hiking, or fishing. It operates on a single 21700 Li-ion rechargeable battery, offering convenient recharging via a USB-C port. The TS21 is capable of delivering a maximum output of up to 3500 lumens, with a maximum beam range of 217 meters. Its intuitive side switch provides comprehensive control over all functions, including power on/off, battery indication, output level adjustment, and mode group changes. The sophisticated Andúril user interface ensures both user-friendly and highly flexible interaction, allowing for simple one-hand operation.
Usage Features:
The TS21 offers a range of user interfaces and modes to suit different preferences and situations.
Default UI: Smooth Ramping
This mode provides a smooth transition of light intensity between the lowest (FLOOR) and highest (CEILING) levels of the smooth ramp range, with an easily accessible maximum output TURBO mode.
- Turn ON: A single-click turns the TS21 on at the previously used light output level (MEM).
- Ramp up; brighter: Hold the button to increase brightness.
- Reverse ramp: While ramping in one direction, release the button briefly and hold again to change brightness in the opposite direction.
- Ramp down; darker: Click and hold when the flashlight is ON. If performed when OFF, it ramps down from the CEILING.
- Instant top CEILING: From OFF, a double-click immediately activates the highest level.
- TURBO: From ON, a double-click toggles between turbo and the memorized level. From OFF, first click then double-click to activate turbo.
- FLOOR/MOON mode: From OFF, holding the button turns the flashlight on at the FLOOR level, indicated by a subtle "blink." Continuing to hold the button will cause it to ramp up.
- BattCheck: From OFF, a triple-click initiates a battery check, displaying the remaining charge in volts and tenths (e.g., 4 blinks, short pause, 1 blink indicates 4.1V). A "zero" is represented by a very quick blink. It is recommended to recharge batteries if the voltage is 3.1V or lower. To exit BattCheck, single-click for off or double-click for Sunset/Goodnight mode.
- Turn OFF: A single-click turns the flashlight off.
- Cycle between STEPPED and SMOOTH RAMP: With the TS21 ON, three clicks switch between these two ramping modes.
UI: Stepped Ramping
This mode offers a programmable number of brightness steps between the floor and ceiling of the stepped ramp range. The firmware optimizes the spacing of these steps on a cube root curve for an ideal mode-spacing. In STEPPED RAMPING, you can customize the number of steps. All operations are identical to smooth ramping.
- Cycle between STEPPED and SMOOTH RAMP: With the TS21 ON, three clicks switch between these two ramping modes.
UI: Momentary Mode
This mode locks the TS21 into a single-mode interface where the LEDs are only on when the button is held down. It is designed for Morse code and other signaling tasks. The brightness is set to the last-ramped level, so it's advisable to adjust this before entering momentary mode.
- Momentary mode enable: From OFF, 5 clicks enter Momentary mode. Operation is limited to holding the button to turn on the TS21 at the last brightness level.
- Momentary mode disable: Physically disconnect power by unscrewing the tailcap for a few seconds. Clicking the button will speed up the process.
UI: Muggle Mode
Muggle mode simplifies the user interface for those seeking an easier experience. It features reduced maximum output brightness and fewer functionalities. It's a very simple interface with a limited brightness range, slow smooth ramping, and no blinkies. This mode persists even after a battery change.
- MUGGLE mode enable: From OFF, 6 clicks enter Muggle mode.
- Operation in Muggle mode: Limited to one click for ON/OFF and holding to ramp up/down.
- MUGGLE mode disable: From OFF, 6 clicks exit Muggle mode.
UI: Electronic Lockout
Lockout mode prevents accidental activation of the TS21. It also functions as a momentary dim light, allowing quick tasks without unlocking the flashlight. It uses the FLOOR of the current ramping mode as the light level. With a click and hold, you can use the FLOOR of the other ramping mode.
- Electronic Lockout enable: From OFF, 4 clicks enable electronic lockout. Operation is limited to holding the button to turn on the TS21 at the floor of the last ramp range used.
- Electronic Lockout disable: From OFF, 4 clicks disable electronic lockout.
Blinkies & Strobes
Two groups of blinkies are available. To enter them, either perform 3 clicks (3C) from OFF or "2 clicks and hold" (3H) from OFF. Double-click to change to the next blinky mode.
Group 1 Blinkies / utility modes (always starts from BattCheck):
- BattCheck: Shows remaining charge in volts and tenths. Recharge if voltage is 3.1V or lower. Exit with one click for off, or two clicks for Sunset/Goodnight mode.
- Sunset / Goodnight mode: Starts at a low level, then slowly dims to moon over an hour before shutting off, ideal for bedtime. Exit with one click for off, or two clicks for Beacon.
- Beacon: Uses the last ramped level for brightness, blinking at a slow speed (once every N seconds). N is configurable in beacon config mode: Click 4 times to enter, then click during the flicker to set the number of seconds per blink.
- TempCheck: Blinks out current temperature in degrees C and allows configuration of thermal regulation settings. For example, 3 blinks, pause, 4 blinks indicate 34 degrees Celsius. A "zero" is a quick blink. To calibrate, click 4 times to enter thermal config mode.
Group 2 Strobes (remembers the last-used mode):
From OFF, "click, click, hold" (three clicks, holding the third) to start strobe mode. Double-click to change to the next strobe mode.
- Adjustments: Hold to increase brightness or strobe faster (except lightning). Click and hold to reduce brightness or strobe slower (except lightning).
- Candle mode: Simulates a flickering candle or fireplace until switched off. Triple-click adds 30 minutes to a burn-down timer, up to 4.5 hours. Adjustable brightness.
- Bike flasher: Steady output with a "stutter" once per second, designed for better visibility. Adjustable brightness.
- Party strobe/ Tactical Strobe: Motion-freezing strobe with adjustable speed. Hold to increase speed, click and hold to decrease speed. Output brightness is maximum.
- Lightning storm mode: Flashes at random brightness and speed to simulate lightning strikes. Can randomly flash at full power. Looking directly at it with dark-adapted vision may cause discomfort. The effect is enhanced with a diffuser (sold separately).
General Configuration:
All config modes share a common interface. Each has one or more options, and the TS21 cycles through its configuration numbers, confirming each click with a blink.
- Configuration number: Indicated by one or more blinks.
- "flicker": The TS21 waits for user input, flickering between two brightness levels for about 3 seconds. Click one or more times to enter a number. The flickering continues until the user stops clicking.
- Pause: After all menu options, the TS21 returns to the mode it was in before entering config mode.
Ramp Configuration:
Both SMOOTH RAMP and STEPPED RAMP are configurable. Users can set the FLOOR (lowest level), CEILING (highest level), and for STEPPED mode only, the number of steps. There are 150 output levels (level 1 is lowest, 150 is highest).
While the TS21 is ON in a ramping mode, 4 clicks enter RAMP CONFIGURATION for the current ramp.
- Floor: After one flash, click the button equal to the desired ramp level (out of 150). One click sets the lowest possible level (MOON). No clicks mean no change.
- Ceiling: After two flashes, each click lowers the ceiling level. 151 - (desired level) = Clicks. For example, to set 130/150, click 21 times. No clicks mean no change.
- Floor: Configured as above.
- Ceiling: Configured as above.
- Number of steps: After three flashes, click to set the number of steps between floor and ceiling (2 to 150). No clicks mean no change.
Thermal Configuration:
To calibrate the sensor, turn off the light and let it settle to room temperature. Go to TempCheck (from OFF: "Click Click Click", ascend with double-clicks three times). In TempCheck, click 4 times to enter thermal config mode.
Thermal config mode has two settings:
- Current temperature calibration: Click once per degree C to calibrate the sensor. For example, if ambient temperature is 21°C, click 21 times.
- Temperature limit: Sets the maximum temperature before thermal regulation begins. Click once per degree C above 30. For example, to set the limit to 50°C, click 20 times. Default is 45°C (15 clicks). The lowest settable value is 31°C (1 click). If no clicks, the value remains unchanged.
Switch Back Light:
The switch LED can be configured to behave differently when the main emitters are off, with separate modes for regular OFF mode and LOCKOUT mode, allowing users to quickly see if the light is locked. Switch LED modes typically include Off, Low, High, and Blinking.
To configure the LEDs, go to the desired mode and click the button a few times:
- OFF mode: 7 clicks
- LOCKOUT mode: 3 clicks
This changes the switch LED to the next mode. The switch LED stays on while the main emitters are on, mirroring their brightness (off, low, or high).
Protection Features:
- Low Voltage Protection (LVP): The light steps down to a lower level when the battery is low and shuts off at 2.8V if already at the lowest level. LVP adjustments occur suddenly in large steps.
- Thermal Regulation: The light adjusts output to prevent overheating, maintaining output as close as possible to the user-configured temperature limit. Thermal adjustments are gradual, in small steps, ramping smoothly across 512 internal steps to find the highest maintainable level without overheating.
Maintenance Features:
- Battery Installation: Pay close attention to proper battery installation. Incorrect installation can cause short circuits, risking fire and damage. Always ensure the negative end of the battery is visible at the tube's end before screwing the tailcap back on.
- Battery Handling: Lithium-ion batteries have high energy density and can be hazardous if short-circuited or damaged. Handle batteries carefully and dispose of damaged ones properly.
- Charging: Use the included USB-C charging cable with a 5V 2A USB charger. Recharge when the low voltage indication is given (uncommanded drop in brightness, mode change, low output, or light extinguishing). The LED power indicator flashes red during charging and turns green when fully charged.
- Long-term Storage: Remove the battery if the flashlight will not be used for an extended period.
- Accidental Activation Prevention: To prevent self-discharge or accidental activation during storage or transportation, unscrew the tailcap by half a turn or remove the battery.
- Thread Maintenance: Every 6 months, threads should be wiped with a clean cloth and then coated with a thin layer of silicone grease.
- Waterproofness: To maintain proper waterproofness, replace worn-out o-rings with approved spares (2 pieces are included with the initial order).
- Troubleshooting Contacts: Regularly clean battery contacts as dirty contacts can impair performance. If you experience flickering, intermittent shine, or failure to turn on, check for:
- Low Battery Voltage (below 2.7V): Replace with an approved, fully charged battery.
- Dirty Contacts: Clean contact points (threads, PCB board contact) with a cotton swab soaked in rubbing alcohol.
- Insulation Sticker: Ensure the insulation sticker has been removed from the battery on first use.
- Warranty: Disassembling the sealed head can damage the flashlight and voids the warranty. Wurkkos Ltd. recommends using high-quality brand batteries; damage from defective batteries voids the warranty. For issues not resolved by the above methods, refer to the warranty policy and contact your authorized distributor for refund or replacement within the warranty period.