2
Warning
The RAM module may be susceptible to damage by Electro-Static Discharge
(ESD). All industry-standard cautions should be followed to avoid ESD.
Caution
Follow all precautions listed in the Quick Start Guide that came with your thin
client for disconnecting and reconnecting the thin client.
Wyse Technical Support
To access Wyse technical resources, visit AskWyse.com. If you still have questions, you
can submit your questions using the Wyse Support Request Form
, or call Customer
Support at 1-800-800-WYSE (toll free in U.S. and Canada). Hours of operation are from
7:00 am to 7:00 pm CST, Monday through Friday.
To access international support, visit http://www.wyse.com/global
.
Related Online Resources Available at Wyse
Wyse® V90 Thin Client features can found in the Datasheet for your specific thin client
model. Datasheets are available on the Wyse Web site at:
http://www.wyse.com/serviceandsupport/support/documentindex.asp
.The Wyse®
Winterm™ 9 series Based on Microsoft® Windows® XP Embedded Reference Guide
provides information and procedures to help administrators set up a server environment,
mounting and connecting the thin client, XPe features, utilities and settings, and more. It is
available at: http://www.wyse.com/manuals
. Wyse Thin Computing Software is available
on the Wyse Web site at: http://www.wyse.com/products/software
.
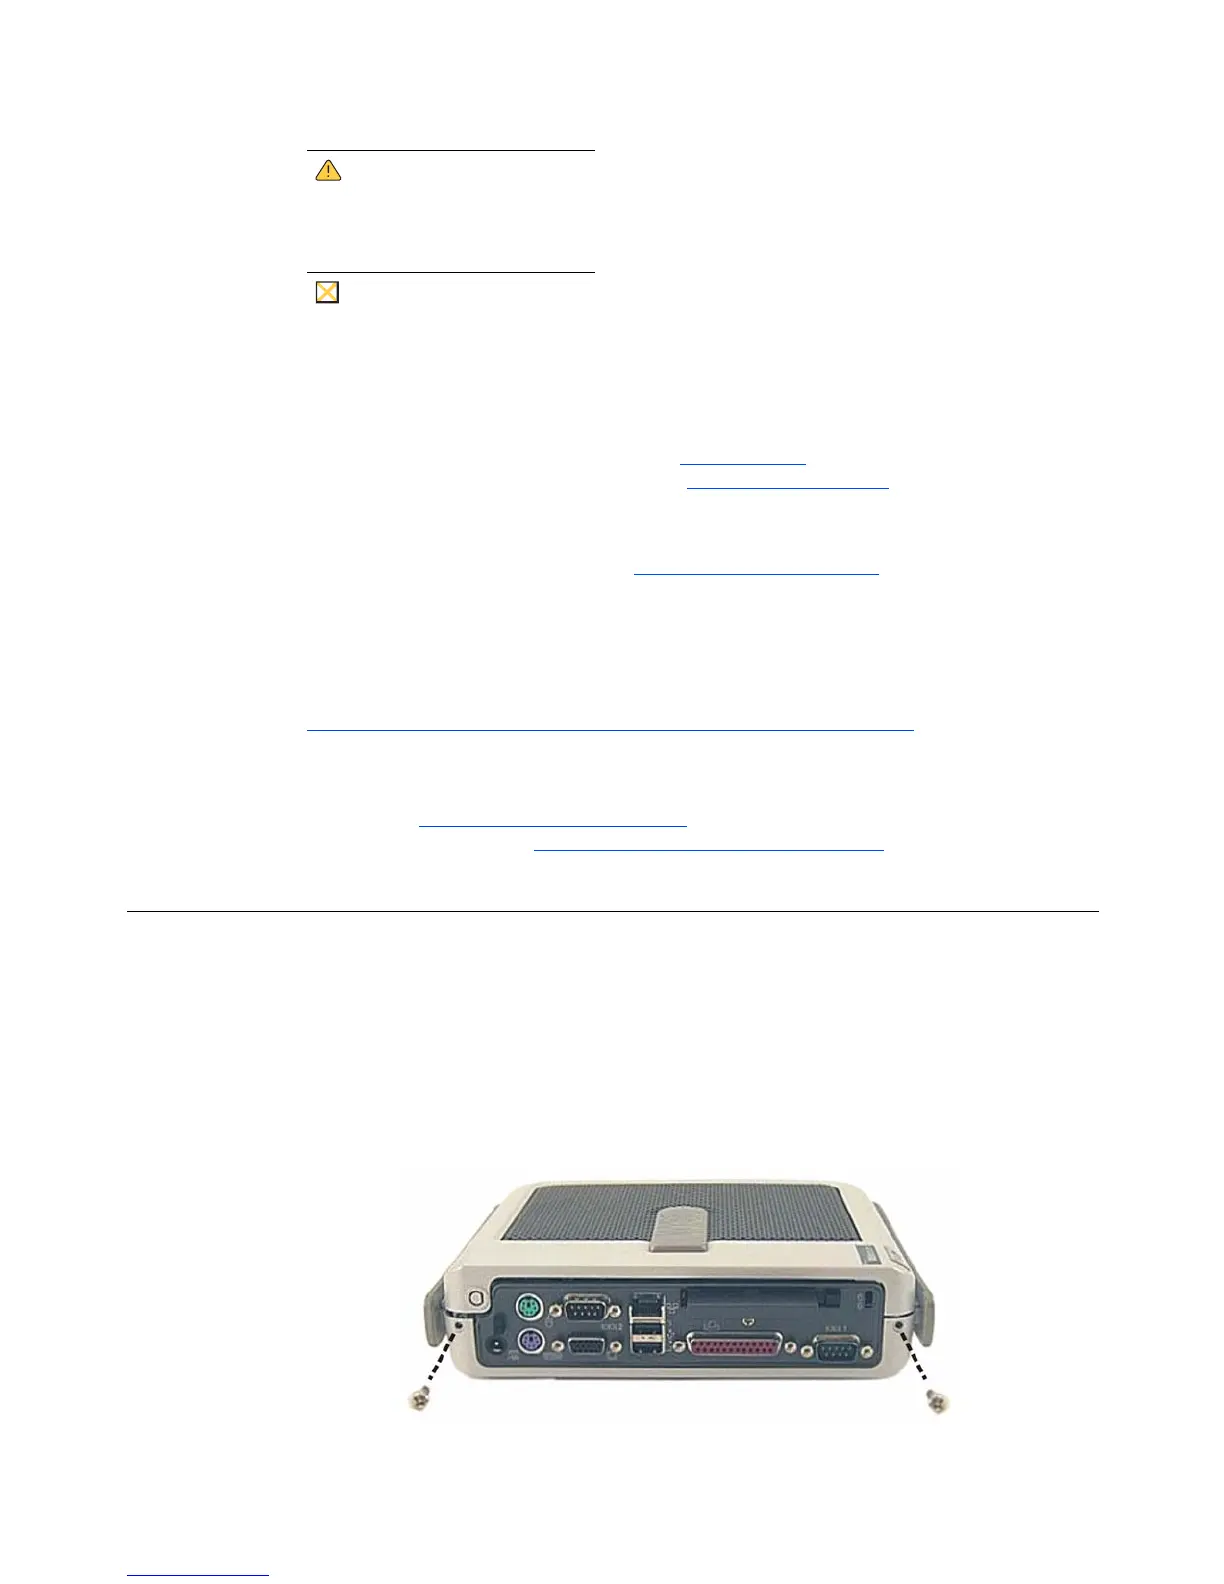
Installing the Option Kit
To install the 512-MB RAM Upgrade Option Kit in the V90 thin client:
1. Perform a proper shutdown of the thin client by ending your session and clicking the
buttons as they appear; then press the power button to turn off the thin client.
2. Unplug the power cord, power adapter, remove all of the cables from the rear of the
unit, and detach the vertical foot.
3. Remove the two screws from the rear of the thin client using a #1 Phillips Screwdriver.
 Loading...