This document provides a comprehensive guide for the X-Sense Wi-Fi Smoke Alarm, detailing its functions, installation, operation, and maintenance. It is crucial to read this manual thoroughly before installing and operating the alarm. If the alarm is for use by others, a copy of this manual should be provided to the end user.
Function Description
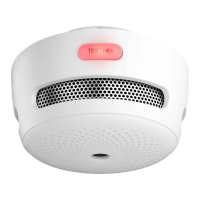
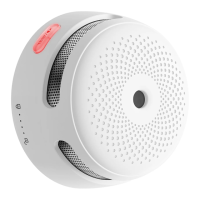
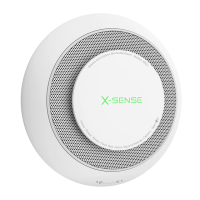
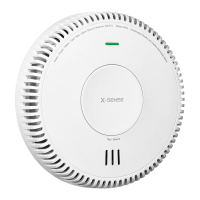
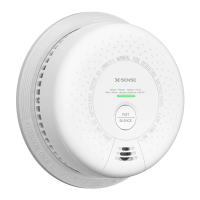
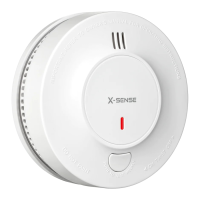
The X-Sense Wi-Fi Smoke Alarm is designed to detect smoke and alert users through an audible alarm and push notifications via a smartphone application. It is not intended to detect flames, heat, carbon monoxide, or other hazardous gases. The alarm is equipped with Wi-Fi connectivity, allowing it to integrate with the TuyaSmart/Smart Life app for remote monitoring and control. This connectivity enables users to receive notifications, check the device's status, and manage settings from their mobile devices. The alarm features a test/silence button for local testing and silencing of the alarm. It operates on a replaceable 3V CR123A lithium battery, with an advertised battery life of one year.
Usage Features
Package Contents: The package includes one alarm unit, one mounting bracket, two screws, two anchor plugs, one pin, and one user manual.
Safety Information: It is critical to pay attention to all dangers, warnings, and cautions. The alarm is not intended to alert hearing-impaired individuals, and the use of alcohol or drugs may impair one's ability to hear the alarm. Fires in chimneys, walls, roofs, different levels, or behind closed doors might not be detected. Never ignore an alarm; failure to respond can result in serious injury or death. The silence feature is for convenience only and does not correct a problem; always check for a potential problem after any alarm. Test the smoke alarm once a week. If it fails to test correctly, replace it immediately.
Set Up and Connect Smoke Alarms to Wi-Fi:
Before connecting, ensure you know your Wi-Fi network name and password and that you are connecting to a 2.4 GHz Wi-Fi network (5 GHz is incompatible).
How to connect via EZ mode (Default mode):
- Download the TuyaSmart/Smart Life app from the App Store or Google Play, or scan the provided QR code. Register an account.
- Remove the insulating film from the battery compartment to activate the alarm. The LED indicator will flash red, then continuously flash blue, indicating activation.
- Open the app, tap the "+" icon or "Add Device."
- Navigate to "Sensors" -> "Sensor/Alarm" -> "Sensor/Alarm (Wi-Fi)" to enter the Wi-Fi connecting page.
- Enter your 2.4 GHz Wi-Fi password. If you have a dual-band router with a single SSID, refer to your router manual to create separate SSIDs for 2.4 GHz and 5 GHz channels, or use the "Common router setting method" in the app.
- To enable Wi-Fi connection mode, hold the test/silence button for 3 seconds. The alarm will beep once, and the LED will rapidly flash blue.
- Select "Confirm the indicator is blinking rapidly" in the app and wait for successful connection.
- After successful connection, the LED indicator will stop flashing blue. Select "Done." The device will appear on the Home page.
Notes on EZ mode connection:
- The LED indicator flashes blue rapidly for up to 2 minutes during configuration. If connection fails, the alarm needs to be reconnected. Remove the battery briefly and restart from step 2.
- Unsuccessful connection may be due to the router, mobile phone, and alarm not being close enough, or an incorrectly entered Wi-Fi password.
How to connect via AP mode:
If EZ mode is incompatible with your mobile phone or device:
- Tap "EZ Mode" in the top right corner of the network configuration page to switch to "AP Mode."
- Insert a pin into the device pinhole on the back of the alarm and press the inside button. The alarm will beep once, and the LED will flash blue slowly, indicating AP mode.
- Select "Confirm the indicator is blinking slowly" in the app and tap "Next."
- Tap "Go to Connect" to jump to the phone's Wi-Fi setup page. Select the device's hotspot (e.g., 'Smartlife-XXXX' or 'SL-XXXX').
- After connecting to the hotspot, return to the app to start network configuration.
- After successful connection, the LED indicator will stop flashing blue, and the device will appear on the Home page.
App Settings:
- Notifications Settings: In the app's settings (gear wheel icon), you can adjust the type of notifications, including what is displayed on the screen and stored in the log. Activating many notifications may increase power consumption, shortening battery life.
- Historical Data (log): Access historical data or the log by clicking "Click for more" at the bottom of the unit's Home screen.
- Offline Notification: If you have an unstable network, enable "Offline Notification" to receive push notifications if the device cannot connect to the app. This helps monitor network stability and alarm placement. If the device is battery-powered, updates are made every 8 hours, and an offline warning is sent if contact is not made within a specified time.
Alarm Test:
- Always test the alarm when first turned on, after battery changes, or device reconfiguration. Test weekly or after being away from home.
- Briefly press the test/silence button. Holding it for more than 3 seconds will enter connection mode and clear previous settings.
- The unit will beep 3 times.
- If connected to the router, the LED indicator will flash red, then rapidly blue for several seconds, indicating connection.
- After the test, the alarm enters standby mode.
Notes on Alarm Test:
- The test function accurately tests the smoke sensing circuit without actual smoke. If the alarm fails to deliver an audible signal, refer to the troubleshooting guide. Never use an open flame to test.
- If the LED indicator flashes blue for 2 minutes during the test, the connection was unsuccessful, and the alarm needs to be reconnected (repeat Wi-Fi connection steps).
Installation Positioning:
- Prioritize installation in bedrooms and walkways, ensuring the alarm is audible in all sleeping areas. In homes with multiple bedrooms, install an alarm in each. If only one alarm is installed, place it near all bedrooms, not in a basement or furnace room.
- Install above stairways and on every floor.
- Smoke and heat spread horizontally after rising to the ceiling. Install the alarm in the middle of the ceiling if possible, ensuring a minimum distance from corners.
- If not in the middle of the ceiling, install it at least 20 inches (50 cm) from corners.
- If installed on a wall, keep it 4-12 inches (10-30 cm) below the ceiling.
- For rooms or hallways longer than 30 feet (900 cm), install multiple alarms.
- If the wall or ceiling is angled, install the alarm within 3 feet (90 cm) horizontally of the highest point.
- For stable Wi-Fi, install the alarm within the router's coverage area with minimal obstacles.
- In kitchens, ensure an easily accessible silence button and install the alarm as far as possible from the stove and sink to avoid false alarms.
Installation Method:
- Use the mounting bracket to mark screw holes on the ceiling or wall.
- Drill holes at the marks using an appropriately-sized drill bit. Insert anchor plugs and screw the mounting bracket.
- Attach the alarm to the mounting bracket and turn clockwise to lock it.
- Test the smoke alarm as per the "Alarm Test" section.
Silence Mode:
When non-hazardous smoke (e.g., steam) causes a false alarm, you can silence the device in two ways:
- Via the "App": Go to "Setting" (gear wheel) and tap the "Silence" button.
- Press the test/silence button on the alarm.
If you use the silence button, you will receive a push notification that the device is in silence mode. The red LED will flash every 5 seconds as a reminder. The alarm will automatically exit silence mode after 9 minutes.
Note: In normal standby mode, the device will not respond if you turn on the silence button.
Battery Replacement:
- Detach the smoke alarm from the mounting bracket by twisting counterclockwise.
- Pull the battery removal tab to remove the old battery. Install a new battery, matching polarity markings.
- Test the alarm, then mount it back onto the bracket by twisting clockwise to lock it.
Maintenance Features
To keep your smoke alarm in good working order, follow these steps:
- Verify the unit's alarm sound and indicator are working properly by testing it once a week.
- Clean the smoke alarm at least every 3 months. Remove the unit from the ceiling and clean the alarm cover and vents with a vacuum cleaner fitted with a soft brush attachment to remove dust and dirt.
- Never use detergents or other solvents to clean the unit.
- Avoid spraying air fresheners, hair spray, or other aerosols near the alarm.
- Do not paint the unit; paint will seal the vents and interfere with the sensor's ability to detect fire.
- Never attempt to disassemble the unit or clean inside, as this will void your warranty.
- When removed, place the smoke alarm back in its proper location as soon as possible to assure continuous protection from fire.
- When household cleaning supplies or similar contaminants are used, ensure the area is ventilated.
Troubleshooting:
- Alarm not sounding during testing: Check if the alarm is properly attached to the mounting bracket and ensure the test button is pushed firmly.
- False alarms triggered intermittently (cooking, showering): Check the alarm's location (refer to "Installation Positioning") and clean the alarm (refer to "Maintenance").
- LED indicator flashes red, alarm sounds one beep every 60 seconds: Battery is low; replace immediately.
- LED indicator flashes red, alarm sounds two beeps every 40 seconds: Alarm is malfunctioning. Clean the smoke alarm and check if it functions normally. If not, replace the device immediately.
- LED indicator flashes blue continuously during test/app displays alarm is disconnected: Alarm is disconnected from the router. Ensure it is installed within the router's coverage area (refer to "How to connect via EZ mode").
- Network configuration failed in EZ Mode: Your mobile phone may be incompatible with EZ mode. Remove the battery for a short period, reconnect, or switch to AP mode (refer to "How to connect via AP mode").
Environmental Protection:
Waste electrical products should not be disposed of with household waste. Recycle where facilities exist. Check with your Local Authority or retailer for recycling advice.