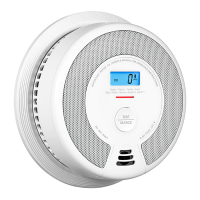
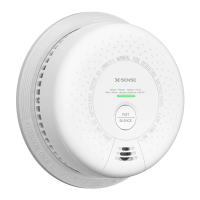
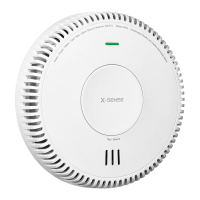
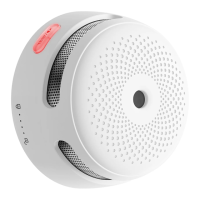
This document describes the X-Sense Wireless Interlinked Combination Smoke and Carbon Monoxide Alarm (Type B), models SC06-W and SC07-W, which are 10-year sealed battery-operated units. This user manual provides essential information for proper use and trouble-free operation, and it should be stored in a safe place for future reference.
Function Description
The X-Sense combination smoke and carbon monoxide alarms are designed to detect both smoke and carbon monoxide, conforming to regulatory requirements including EN 14604 and EN 50291 Standards.
For smoke detection, the unit employs photoelectric technology. This technology is generally more sensitive than ionization technology and is effective at detecting large particles, which are typically produced in greater amounts by smoldering fires. These types of fires can smolder for hours before igniting, with common sources including cigarettes burning in couches or bedding.
For carbon monoxide (CO) detection, the unit utilizes electrochemical sensing technology. Carbon monoxide is an odorless, tasteless, and invisible gas, often referred to as a "silent killer." This technology allows the unit to detect increased levels of carbon monoxide early, providing protection against the dangers of CO poisoning.
The alarm system is designed for indoor use only and should not be exposed to rain or moisture. It is crucial not to knock, drop, open, or tamper with the alarm, as this could lead to malfunction. The installation of this apparatus should not be considered a substitute for the proper installation, use, and maintenance of fuel-burning appliances, including appropriate ventilation and exhaust systems. Installation should be performed by a competent person, and the device is not tested for use in caravans or boats. For maximum protection, it is recommended to use smoke and CO alarms on each level and in every bedroom of your home.
Usage Features
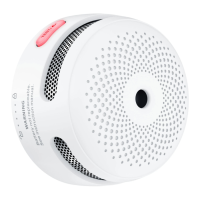
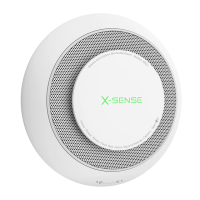
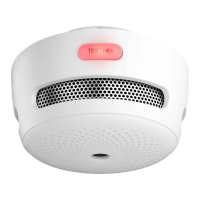
The device features a Test/Silence button, an LED indicator (Red/Green/Yellow), and a buzzer. The SC07-W model also includes an LCD display.
- SC06-W: This button is used to test the unit's electronics and to silence the alarm. For weekly testing, press and hold the button until a short beep is heard, indicating entry into test mode. The alarm returns to standby mode after testing.
- SC07-W: To test, first wake up the alarm by pressing the test button, which activates the LCD display. Then, press and hold the button again until a short beep is heard, indicating entry into test mode. The alarm returns to standby mode after testing. To conserve power, the LCD display automatically turns off after 5 minutes of inactivity.
- During a test, the alarm will sound, and the LED will flash red, but this does not indicate the presence of smoke or CO.
Silence Mode:
- Smoke Silence Mode: Pressing the test button during a smoke alarm will put the unit into silence mode for 9 minutes. If smoke concentration remains at an alarm level after this period, the alarm will resume until the concentration drops to a safe level. Otherwise, it returns to normal mode.
- CO Silence Mode: Pressing the test button during a CO alarm will put the unit into silence mode. If CO density still exceeds the alarm threshold, the unit will re-enter the alarm state. Otherwise, it exits silence mode after 9 minutes and resumes normal operation. The silence function cannot be enabled if CO concentration is above 300 ppm.
- For interconnected units, pressing the Test/Silence button on one unit can silence all. However, if the unit that detected the danger (initiating unit) is still alarming, its Test/Silence button must also be pressed to silence all interlinked units. The initiating unit cannot be re-triggered during the 9-minute silence duration, but other interconnected units can be triggered if they detect danger.
Buzzer:
The buzzer sounds when smoke or CO is present, during alarm tests, and when a fault is detected.
LED Indicator:
The LED indicator flashes in conjunction with the buzzer, indicating various states: powering on, standby, smoke or CO alarm, exiting alarm, test mode, low battery, silence mode, fault, and end-of-life.
Low Battery:
The LED indicator flashes yellow with one beep every 60 seconds. When this occurs, the unit must be deactivated and replaced as soon as possible. Pressing the test button during a low battery state will temporarily silence the signal for 10 hours.
End of Life:
After 10 years (maximum lifetime), the alarm will deliver 3 beeps, and the LED indicator will flash yellow 3 times every 60 seconds. This end-of-life signal can be temporarily silenced for 22 hours by pressing the test button. The end-of-life silence feature is limited to a total of 30 days, after which the signal cannot be silenced.
CO Alarm Levels:
The alarm is programmed to sound at specific CO concentrations and time periods:
-
30 ppm over 120 minutes
-
50 ppm for 60–90 minutes
-
100 ppm for 10–40 minutes
-
300 ppm for 0–3 minutes
-
SC06-W: When CO is detected, the LED flashes red, and the alarm issues 4 short beeps, repeating every 5.8 seconds.
-
SC07-W: When CO is detected, the CO concentration is displayed on the LCD with a blue backlight. The LED flashes red, and the alarm issues 4 short beeps, repeating every 5.8 seconds.
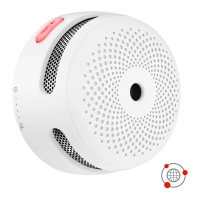
Wireless Interconnection:
X-Sense Link+ wireless interlinked alarms have a built-in RF module for connecting 2 or more units to create an interlinked network. When one unit is triggered, all interconnected alarms will sound. These models are only compatible with other X-Sense Link+ alarms. Multi-packs are pre-interconnected, but if you have multiple multi-packs, you'll need to connect them to a single network by choosing one as the base and connecting others to it.
How to Interconnect:
- Work with only 2 units at a time, ensuring both are turned on. To turn on SC06-W/SC07-W, attach the alarm to its mounting bracket and turn clockwise to lock it.
- On one unit, quickly press the test/silence button 4 times. It will beep once, and the LED will flash red slowly, indicating pairing mode.
- On the other unit, quickly press the test/silence button twice. It will beep once, and the LED will flash red rapidly, indicating it's searching for a device.
- Upon successful connection, both units will beep once and exit interconnection mode, flashing green once every 60 seconds (standby).
- To add more units, activate the new device, then quickly press the test/silence button 4 times on an already interconnected unit to put it in pairing mode. Then, quickly press the test/silence button twice on the new unit to put it in searching mode. Repeat for up to 24 alarms.
- Test all alarms after interconnection.
How to Disconnect:
Press the test/silence button 4 times (alarm beeps once), then hold the button down until it beeps once more to disconnect. Disconnected units can be reconnected or added to a new network. For multi-packs, individual alarms must be disconnected first to create a new network.
Alarm Mode (Interconnected):
- Smoke Trigger: If one smoke alarm triggers, it beeps 3 times with a red LED flash every 1.5 seconds. Other interconnected SC06-W/SC07-W units will also beep 3 times every 1.5 seconds, with the LED flashing red and green successively.
- CO Trigger: If one CO alarm triggers, it beeps 4 times with a red LED flash every 5.8 seconds. Other interconnected SC06-W/SC07-W units will also beep 4 times every 5.8 seconds, with the LED flashing red 4 times, followed by a green flash with each beep. The alarm ceases when CO concentration drops below the threshold.
- If both smoke and CO alarms are triggered simultaneously, the smoke alarm signal takes priority.
- The alarm has a relay function to extend the wireless interconnected network for wider detection coverage.
Alarm Test:
Test alarms when first turned on, after group configuration changes, and weekly. It's also recommended to test after returning from a long trip or vacation. For interconnected X-Sense Link+ alarms, test each individual alarm weekly.
- Test a Single Alarm: Press the test/silence button. The alarm will emit 2 sets of 3 long beeps followed by 2 sets of 4 quick beeps. The LED will flash red. For SC07-W, wake up the alarm first. After testing, it enters standby mode.
- Test All Interconnected Alarms: Hold down the test/silence button on one unit. The initiating unit will beep continuously with a red LED flash. Other interconnected alarms will receive the signal after 5 seconds and beep continuously with red and green LED flashes. Release the button to stop testing. Testing should be completed within 3 minutes. All units will enter standby mode afterward.
- The test function verifies circuits without actual smoke or CO. If an audible test signal fails, refer to the troubleshooting guide.
Installation Instructions:
Before installation, test interconnected alarms in their intended rooms to ensure they are within transmission range and that communication is not interfered with.
Installation Locations:
- Prioritize installation in bedrooms and walkways, ensuring the alarm is audible from all sleeping areas. In homes with multiple bedrooms, install an alarm in each. If only one smoke alarm is installed, place it near bedrooms, not in a basement or furnace room.
- Install an alarm above stairways and on every floor.
- Smoke and heat spread horizontally after rising to the ceiling, so install the alarm in the middle of the ceiling if possible, ensuring it covers all corners of the room.
- If not in the middle of the ceiling, install at least 50 cm (20 inches) from room corners.
- If wall-mounted, install 10-30 cm (4–12 inches) below the ceiling.
- For rooms or halls longer than 900 cm (30 feet), install multiple alarms.
- For angled walls or ceilings, install the alarm within 90 cm (3 feet) horizontally from the highest point.
- In multi-level homes, install at least one wireless alarm per level, keeping them in a straight vertical line with minimal obstacles for optimal signal transmission.
Locations to Avoid:
- Near large metal surfaces or wire bundles.
- Near fluorescent lights, amateur radios, electrical equipment, or other devices that transmit RF signals, as electronic noise can cause nuisance alarms.
Recommended Placement:
This alarm should be installed by a competent person and is not a substitute for proper installation, use, and maintenance of fuel-burning appliances. The manual provides a diagram showing recommended placements for smoke, CO, and combination alarms in a typical home layout, including bedrooms, halls, kitchen, family room, basement, garage, and workshop.
Mounting Steps:
- Mark three screw holes on the wall or ceiling using the mounting bracket as a guide. Drill holes 30 mm (1.18 in) deep with a Ø 6.0 mm (1/4 in) drill bit. Insert three plastic anchor plugs with a hammer.
- Attach the mounting bracket with screws. Mount the alarm into the bracket by pushing and twisting clockwise.
- Test the unit using the Test/Silence button to ensure it sounds an alarm pattern.
The device automatically activates when attached to the mounting bracket for the first time.
Deactivation of the Alarm:
- Do not deactivate the alarm until the end-of-life signal is heard.
- Once the 10-year lifetime is reached, the alarm will beep 3 times every 60 seconds.
- Once deactivated, the alarm will no longer function, cannot be reactivated, and must be replaced.
- The end-of-life signal can be silenced for up to 3 days by pressing the Test/Silence button.
- To deactivate: Peel back the shaded label obstructing the "DIS" setting, break the thin plastic guard, and twist the plastic pin upwards to the "DIS" position or insert a screwdriver into the slot and turn the dial clockwise to "DIS."
- Dispose of and replace the alarm.
Maintenance Features
To maintain the smoke/CO alarm in good working order:
- Weekly Testing: Verify the unit's alarm sound and indicators are working properly by testing it once a week.
- Monthly Cleaning: Remove the unit from the ceiling/wall and clean the alarm cover and vents with a soft brush attachment to remove dust and dirt.
- Avoid Cleaning Agents: Never use detergents or other solvents to clean the unit.
- Avoid Aerosols: Do not spray air fresheners, hair spray, or other aerosols near the alarm.
- No Painting: Do not paint the unit, as paint will seal the vents and interfere with the sensor's ability to detect smoke/CO. Do not attempt to disassemble or clean inside, as this voids the warranty.
- Prompt Reinstallation: If removed for cleaning, place the smoke/CO alarm back in its proper location as soon as possible to ensure continuous fire protection.
- Ventilation: When household cleaning supplies or similar contaminants are used, ensure the area is ventilated.
Troubleshooting:
- Alarm does not sound during a test: Check if the alarm is properly attached to the mounting bracket, ensure the test/silence button is pressed firmly, and check installation positioning for wireless signal blockage or range issues.
- Intermittent false alarms (cooking, showering): Check the alarm's location (refer to "Installation Locations") and clean the alarm (refer to "Maintenance").
- LED flashes yellow once every 60 seconds with one beep (low battery): The battery is low. Press the test/silence button once to silence for 10 hours. Replace the alarm immediately.
- LED flashes yellow 2 times every 60 seconds with 2 beeps (malfunction): The alarm is malfunctioning. Clean the alarm or press the test/silence button once to reset. If the problem persists, replace the alarm immediately.
- LED flashes yellow 3 times every 60 seconds with 3 beeps (end of life): The maximum lifetime (10 years) is reached. Push the Test/Silence button once to silence for 22 hours. Replace the alarm immediately.
- LED flashes yellow 5 times every 60 seconds during the first 3 days, and 5 times every 60 minutes during the next 4 days (low RF power): The RF power supply is low, and the RF module will no longer interconnect with other units. It will still function as a standalone unit.