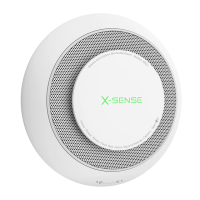
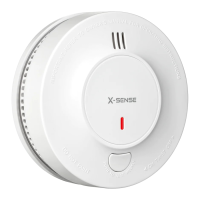
This document describes the X-Sense Hardwired Combination Smoke and Carbon Monoxide Alarm with Battery Backup, models XP04, XP05, and XP06. This device is designed for residential use to detect both smoke and carbon monoxide (CO) in a single unit. It features a photoelectric sensor for detecting large particles from smoldering fires and an electrochemical sensor for dangerous levels of CO. The alarm is powered by the home's electrical system and includes a 9V alkaline battery for backup during power outages. It complies with UL 217 and UL 2034 standards and should be installed by a qualified technician according to National Electrical Code ANSI/NFPA 70, NFPA 72, and local jurisdiction codes.
The device can operate as a standalone unit or be interconnected with other X-Sense AC and AC/DC alarms. In an interconnected system, all devices will alarm if any single device detects smoke or CO when under AC power. If AC power fails, only the AC/DC devices will continue to send and receive signals within the interconnected network. AC hardwired interconnection is specifically compatible with X-Sense XP04, XP05, XP06, XP04-S, XP05-S, and XP06-S devices.
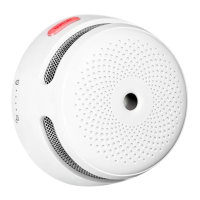
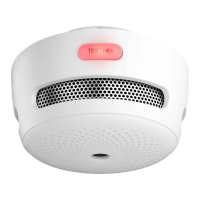
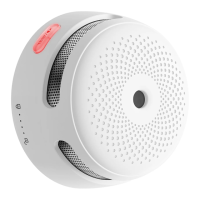
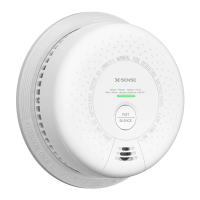
Product View and Components:
The package includes:
- Unit x 1
- Mounting Bracket x 1
- Screw x 4
- Anchor Plug x 4
- 9V Battery x 1
- Power Connector x 1
- User Manual x 1
- Warning Sticker x 2
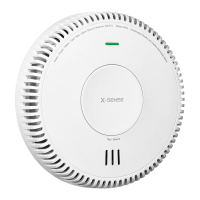
The unit features an LED Indicator (Red/Green/Yellow) that flashes to show device status, including powering on, standby mode, smoke alarm, CO alarm, alarm exit, device test, silence function, low battery, malfunction, and end-of-life signal. A Test/Silence Button allows users to check the alarm's functionality and temporarily silence an alarm. The Buzzer beeps in sync with the LED indicator to signal various statuses. The Battery Backup ensures continuous power during outages, and the replaceable 9V battery activates for this purpose. The Power Connector plugs into the device's receptacle, supplying AC power, with black for "hot," white for "neutral," and red for interconnection. The Mounting Bracket is used for installation and can be twisted counterclockwise for removal.
Installation and Placement:
Installation should be performed by a professional technician, adhering to articles 210 and 300.3 (B) of the U.S. National Electrical Code ANSI/NFPA 70, NFPA 72, and other applicable codes. The alarm should be installed on a standard 4-inch (10-cm) wiring junction box or on any ceiling/wall permitted by local codes. The power source must be 120 V AC Single Phase from a non-switchable circuit, not protected by a ground fault interrupter. For standalone operation, the insulating cap on the red line should remain. For interconnected systems, all devices must be powered by a single circuit. Up to 24 devices (including 18 alarms and 6 range extenders, with a maximum of 12 smoke alarms) can be added to a single circuit, with a maximum wiring distance of 1000 feet (305 m) between the first and last device. Interconnection is limited to single-family residences.
Before installation, power to the area must be turned off at the circuit breaker or fuse box to prevent electrical shock. The installation process involves:
- Removing any old device.
- Connecting the cables: black to "hot," white to "neutral," and red for "interconnection" using wire nuts.
- Installing the mounting bracket to the electrical box, ensuring the "WALL SIDE" faces the wall.
- Inserting the 9V battery into the battery compartment after removing the temporary foam insert. The LED indicator will flash yellow, green, and red eight times upon proper battery installation.
- Connecting the power connector to the device and tucking excess wiring into the electrical box.
- Mounting the device to the bracket by twisting clockwise until resistance is felt, aligning the LED indicator and buzzer as desired.
- Turning on power after all devices are installed. The LED indicator will light up green.
- Testing the device immediately after installation or group configuration changes. This tests the device circuits, not the smoke and CO sensors.
Recommended Locations:
- On every level, including finished attics and basements.
- Inside every bedroom or adjacent hallway to every sleeping area (if a room/hallway is >40 feet (12 m), install a device at each end).
- In every room with a fuel-burning appliance.
- In all rooms, hallways, and storage areas with temperatures between 40-100°F (4.4-37.8°C).
- On a sloped ceiling, 4-35 inches (10-90 cm) from the peak.
- At least 5 feet (1.5 m) from potential smoke/fume sources (stoves, furnaces, water heaters, space heaters).
- On the ceiling, centered in the room, at least 20 inches (50 cm) from the wall.
- On a wall, 4-12 inches (10-30 cm) below the ceiling.
- In mobile homes or older houses with poor insulation, on an inside wall with the top edge 4-12 inches (10-30 cm) below the ceiling.
Locations to Avoid:
- Garages or dusty, dirty, greasy areas.
- Bathrooms, kitchens, attics, unheated areas, recessed ceiling areas, near ceiling fans, furnaces, or furnace vents (at least 3 feet (0.9 m) horizontally from bathroom doors).
- Within 5 feet (1.5 m) of smoke sources like a stove.
- Extremely humid environments (at least 10 feet (3 m) from baths, saunas, humidifiers, vaporizers, dishwashers, laundry rooms).
- Turbulent air (near ceiling fans, heat vents, AC vents, open windows) as excessive airflow can prevent CO from reaching sensors.
- Under direct sunlight.
- Dead air spaces that prevent smoke from reaching the device.
- Near cooking appliances, dusty areas, showers, or areas where temperature drops below 40°F (4.4°C) or rises above 100°F (37.8°C).
Operating Instructions:
The device uses colored LED indicators and beeping patterns to communicate its status.
- Individual Device Test: Press the Test/Silence button. The device emits two sets of three long beeps, followed by two sets of four beeps, with the LED flashing red.
- Interconnected Device Test: Press and hold the Test/Silence button on any device. The initiating device beeps with a red LED flash. Other interconnected devices emit two sets of three long beeps with red and green LED flashes, then two sets of four beeps with a red LED flash. The test lasts up to three minutes.
Alarm Responses:
If an alarm is triggered, all interconnected alarms sound simultaneously. Smoke alarms take priority if both smoke and CO are detected.
- Smoke Alarm: Initiating device: three red LED flashes and three beeps every four seconds. Other interconnected devices: red and green LED flashes, then three red LED flashes, and three beeps every four seconds.
- Response: Locate fire source, exit immediately, follow escape plan, touch doors before opening, cover nose/mouth, call Fire Department, do not re-enter.
- CO Alarm: Initiating device: four red LED flashes and four beeps every 5.8 seconds. Other interconnected devices: four red and green LED flashes, then four red LED flashes, and four beeps every 5.8 seconds.
- Response: Call emergency services, move outside for fresh air, do not re-enter until alarms return to normal. If alarm recurs within 24 hours, repeat steps and call a qualified technician to investigate CO sources.
Silence Function:
This function temporarily silences alarms but does not resolve underlying issues. Removing the battery or disconnecting power disables protection.
- Smoke Alarm Silence: Nine minutes. If smoke concentration remains high, the alarm will reactivate.
- CO Alarm Silence: Nine minutes. If CO concentration remains high after six minutes, the alarm reactivates. Cannot be silenced if CO concentration is >300 ppm.
- Locating Source Alarm: Press Test/Silence on any device. The source alarm will continue to sound while others are silenced. The source alarm flashes red with three long beeps (smoke) or four beeps (CO).
- Low Battery Warning Silence: If the LED flashes yellow once and the buzzer beeps every 60 seconds, pressing Test/Silence mutes it for 10 hours.
- End-of-Life Signal Silence: If the LED flashes yellow three times and the buzzer beeps three times every 60 seconds, pressing Test/Silence mutes it for 22 hours. This works only within 30 days of the expiration date.
- Smoke/CO Alarm Reminder: If an alarm was triggered and returned to standby, the LED flashes red and yellow sequentially every five seconds (smoke) or every 30 seconds (CO) as a reminder. Press Test/Silence to erase. This reminder does not work when battery-powered.
CO Alarm Levels and Symptoms:
The alarm sounds when CO concentrations are detected within specific time periods:
- 70 ppm for 60-240 minutes
- 150 ppm for 10-60 minutes
- 400 ppm for 4-15 minutes
When CO reaches alarm level, it emits four short beeps and the LED flashes red every 5.8 seconds.
- 100 ppm: Slight headache, nausea, fatigue.
- 200 ppm: Dizziness and headache within 2-3 hours.
- 400 ppm: Nausea, frontal headache, drowsiness, confusion, rapid heart rate. Risk to life after >3 hours.
- 800 ppm: Severe headaches, convulsions, vital organ failures. Death possible within 2-3 hours.
Limitations:
- CO alarms may not be heard by sound sleepers, those under influence, or if sound is drowned out by other noises or closed doors.
- Not a substitute for life insurance.
- Limited lifespan; weekly testing is recommended.
- Only detects CO that reaches the sensor; may not give early warning if CO is from a remote part of the house.
- May not wake up everyone; assistance may be needed for infants or those with limited mobility.
- Doors or obstructions may prevent CO from reaching the alarm; install alarms in sleeping areas.
- May not sense CO on other levels of the house; install alarms on each level.
Technical Specifications:
- Power Supply: 120 V AC (60 Hz, 45 mA max) and 9 V Alkaline battery backup.
- Sensor Type: Smoke: Photoelectric; CO: Electrochemical.
- Product Lifespan: 10 years.
- Safety Standards: UL 217 and UL 2034.
- Smoke Sensitivity: 1.3-3.0% obs/ft.
- CO Sensitivity:
- 70 ppm for 60-240 minutes
- 150 ppm for 10-50 minutes
- 400 ppm for 4-15 minutes
- Operating Temperature: 40-100°F (4.4-37.8°C).
- Operating Relative Humidity: 10%-85% RH (non-condensing).
- Alarm Noise Level: ≥ 85 dB at 10 feet (3 m) @ 3.2 ± 0.3 kHz pulsing alarm.
- Silence Duration: ≤ 9 minutes.
Maintenance:
The device requires minimal maintenance.
- Clean with a soft, damp cloth monthly. Do not disassemble or clean the interior, as this voids the warranty.
- Do not clean with detergents, solvents, or spray air fresheners/hair spray near the device, as this may cause malfunction.
- Do not paint the device, as it will seal vents and reduce sensor sensitivity.
- Do not tamper with the device, as this may lead to electrical shock or malfunction.
- Weekly Test: Press the Test/Silence button weekly to check electronics.
- Battery Replacement: Replace the 9V lithium battery immediately when the LED flashes yellow once and beeps every 60 seconds. To replace: open the battery compartment, remove the old battery, insert a new one (matching terminals), close the compartment, and test the device. Disconnect AC power before changing the battery to avoid shock hazard if miswired.
Troubleshooting:
- Device does not alarm during test: Check wire connection, firmly press Test/Silence button.
- False alarms intermittently (cooking/showering): Avoid installing near cooking appliances, dusty areas, showers, or areas outside 40-100°F (4.4-37.8°C).
- Low battery warning (yellow flash/beep every 60 seconds): Replace battery immediately. Can silence for 10 hours.
- Malfunction (yellow flash/beep twice every 60 seconds): Clean device. If problem persists, replace.
- End-of-life signal (yellow flash/beep three times every 60 seconds): Replace battery immediately. Can silence for 22 hours.
- This alarm detects CO from combustion sources and is for home use only.
- Not for use with detector guards unless evaluated as suitable.
- Constant exposure to high/low humidity reduces battery life and impairs performance.
- The smoke and CO sensors work independently. The CO sensor does not detect fire or other gases; the smoke sensor does not detect gas, heat, or flames.
- Never ignore alarms. The silence function is for convenience, not problem resolution.
- Test weekly. Replace immediately if it fails to test correctly.
- Intended for indoor households; not for occupational safety standards. Individuals sensitive to CO should use devices with audible/visual signals for CO concentrations under 30 ppm.
- The replacement date indicates when the device may no longer detect CO accurately.
- Designed to protect individuals from acute CO effects; consult a medical practitioner for specific medical conditions.
- Do not disconnect AC power to silence a false alarm, as this disables protection.
- Smoke alarms reduce deaths but only work when properly located, installed, maintained, and if smoke reaches them.
- Smoke alarms may not wake up all individuals; create and practice escape plans.
- Smoke alarms need power; battery-powered units won't work if batteries are missing/dead, wired units won't work during extended power outages if backup battery dies.
- Dust covers must be removed for smoke to reach the sensor.
- Smoke alarms cannot detect fires if smoke doesn't reach them (e.g., closed doors). Install in every bedroom and hallway.
- Smoke alarms may not be heard due to alcohol/drugs, other noises, or hearing impairment. Special alarms are needed for the hearing impaired.
- This alarm is not a substitute for complete fire detection systems in multi-occupancy buildings or commercial/industrial facilities.
Electrical Shock Hazard:
- Turn off power at the circuit breaker/fuse box before installation/removal.
- Do not restore power until all alarms are installed.
- Do not attempt to disconnect the power connector while power is on.
- Failure to meet requirements can damage units.
- Cannot be operated from square wave, modified square wave, or modified sine wave inverters, as these produce high peak voltages that can damage the alarm.
Environmental Protection:
Waste electrical products should be recycled. Check with local authorities or retailers for recycling advice.
FCC Compliance:
This device complies with Part 15 of FCC rules, designed to provide reasonable protection against harmful interference in residential installations. It generates, uses, and can radiate radio frequency energy. If interference occurs, reorient/relocate the receiving antenna, increase separation between device/receiver, connect to a different circuit, or consult a dealer/technician. Operation is subject to two conditions: (1) device may not cause harmful interference, and (2) device must accept any interference received. Changes not expressly approved by the party responsible for compliance could void user's authority to operate the equipment.