Do you have a question about the Xiaomi Mi Smart Camera C500 Pro and is the answer not in the manual?
Step-by-step instructions for securely attaching the camera to a wall.
Procedure for inserting and using a microSD card for storage.
Explanation of LED indicator lights and their meanings during operation.
Method to reset the camera to its original factory default settings.
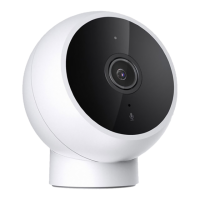
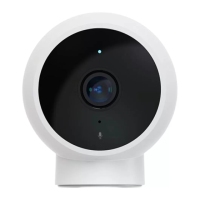
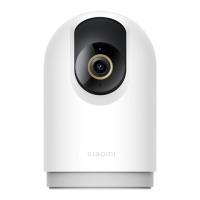
The Xiaomi Smart Camera C500 Pro is a versatile surveillance device designed for both indoor and outdoor use, offering a comprehensive suite of features for monitoring and security. This camera can be placed on flat surfaces such as desks, dining tables, and coffee tables, or securely mounted on a wall, providing flexibility in placement to suit various environments. Its compact design, featuring a lens, microphone, and indicator light on the front, and a Type-C power port, loudspeaker, and reset button on the rear, ensures a discreet yet functional presence. The microSD card slot is conveniently located and visible when the lens is facing upward, allowing for easy access for storage management.
Installation of the camera is straightforward. For wall mounting, users first mark positions for the base mounting holes on the wall using a pencil, then drill two holes of approximately 6 mm diameter and 30 mm depth. Plastic wall plugs are inserted into these holes. The base, with arrows facing outward, is then aligned with the holes, and screws are tightened into the wall plugs using a Phillips head screwdriver. Finally, the camera's grooves are aligned with the raised part on the base and turned clockwise until it locks into place. It is crucial to ensure that the wall can support at least three times the total weight of the camera and that the camera is securely fixed to prevent injury.
To begin using the camera, the charging cable is plugged into the Type-C power port on the back. The camera automatically turns on, and the indicator light quickly blinks orange, signaling it's ready for connection. It's important not to force the camera to rotate manually while it's working; if the lens positioning becomes inaccurate, calibration can be performed through the Mi Home/Xiaomi Home app. The indicator light provides visual cues about the camera's status: a solid blue light indicates a successful connection and normal operation, a blinking blue light signifies a network error, a quickly blinking orange light means it's waiting to be connected, and a slowly blinking orange light indicates an update is in progress. For optimal performance, it is recommended to use the LPS adapter cable for connection.
A key feature for local storage is the microSD card slot. Before installing or removing a microSD card, ensure the camera's power is disconnected. The lens should be adjusted upward to reveal the slot, and the microSD card inserted with the contact points facing down. The camera supports microSD cards from qualified brands with a minimum capacity of 8 GB and a maximum of 256 GB, and a read/write speed of no less than U1/Class 10 is recommended for smooth operation.
Connecting the camera to the Mi Home/Xiaomi Home app is essential for accessing its smart features. Users can scan a QR code to download and install the app or search for "Mi Home/Xiaomi Home" in their app store. Once installed, opening the app and tapping the "+" icon in the upper right corner allows users to follow instructions to add their device. The app is referred to as Xiaomi Home in Europe (except Russia), and the name displayed on the device should be considered the default. During connection, the camera's indicator light will blink orange quickly, turning blue once successfully connected. If the network changes or the camera needs to be paired with a different Xiaomi Account, the factory settings can be restored by pressing and holding the reset button for about 7 seconds until the indicator blinks orange quickly. Restoring factory settings does not delete content on the microSD card.
The Xiaomi Smart Camera C500 Pro offers real-time surveillance through the Mi Home/Xiaomi Home app. Within the camera's plugin, users can view the live surveillance feed, adjust image sharpness, change the horizontal and vertical angles of the camera, capture screenshots, record video, and make remote calls. This comprehensive control allows for effective monitoring from anywhere.
For low-light conditions, the camera features infrared night vision. It automatically switches to night vision mode based on ambient light changes. Equipped with built-in infrared night vision lights, the camera can capture clear images and videos even in complete darkness. However, for the automatic night mode to activate, complete darkness is required; otherwise, it may not turn on automatically.
Playback of recorded footage is available when a compatible microSD card is installed or a cloud storage service is purchased. In the Mi Home/Xiaomi Home app, users can tap the playback button to enter the playback interface and drag the timeline to select the desired time period for review. Variable speed playback is supported, allowing users to quickly scan through footage or review specific events in detail.
Automatic surveillance is a core security feature. When the home surveillance assistant is enabled, the camera records videos upon detecting human movement and real-time changes within its monitored area, sending push notifications to the user's app. This feature can be enabled or disabled within the camera's plugin. Users can customize surveillance schedules (all-day, daytime, nighttime, or specific intervals) and adjust alert sensitivity and alert time intervals to suit their needs.
Area surveillance further enhances security by allowing users to define specific surveillance scenes for family members, such as "key areas monitoring" or "no motion detected for a long time." Users can edit surveilled areas and set surveillance times. Upon detecting events like someone entering a key area, the app sends notifications, keeping users informed about the status of family members. This feature can be managed via the AI features page on the camera's plugin homepage in the Mi Home/Xiaomi Home app.
Video sharing is another convenient feature, allowing users to share camera access with others through the device sharing option in the app's settings menu. The recipient needs to download the Mi Home/Xiaomi Home app and sign in with a Xiaomi Account to view the shared camera feed.
Privacy is addressed with the physical lens blocking feature. When the camera is not needed, users can tap an icon on the real-time footage screen in the Mi Home/Xiaomi Home app to activate physical lens blocking. Alternatively, this feature can be enabled or scheduled for automatic activation via Settings > Camera settings > Physical lens blocking settings. The camera will automatically adjust its lens to be covered by its casing, ensuring user privacy.
Maintenance and operational considerations are important for the camera's longevity and performance. The camera is designed to operate within a temperature range of -10°C to 40°C; using it outside this range is not recommended. As a precision electronic product, it should not be installed in high humidity environments or exposed to water. To ensure optimal image quality, the lens should not face or be placed next to reflective surfaces like glass windows or white walls, as this can cause overexposed areas close to the camera and darker areas further away, or produce white images. A strong Wi-Fi signal is crucial for stable operation, and the camera should not be placed near objects that may interfere with its Wi-Fi signal, such as metal objects or microwave ovens. For user safety, a separation distance of at least 20 cm between the antenna and the user's body should be maintained under normal use conditions.
| Power Input | 5V/2A |
|---|---|
| Operating Temperature | -10°C to 45°C |
| Two-Way Audio | Yes |
| Motion Detection | Yes |
| Night Vision | Infrared Night Vision |
| Wireless Connectivity | Wi-Fi 2.4GHz/5GHz |
| Storage | MicroSD card |
| AI Features | Human detection |