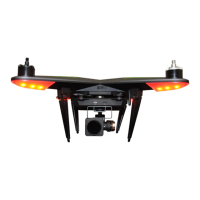
1. Hold the battery with the connectors facing down and plug it into the slot. The battery is firmly installed
when a "click" is heard.
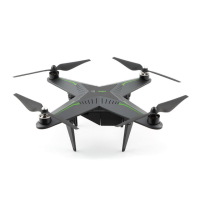
2. Connect the DC cord to the charger and plug the adapter directly into the power outlet. Verify that the LED
indicators on the charger indicate that the battery starts charging.
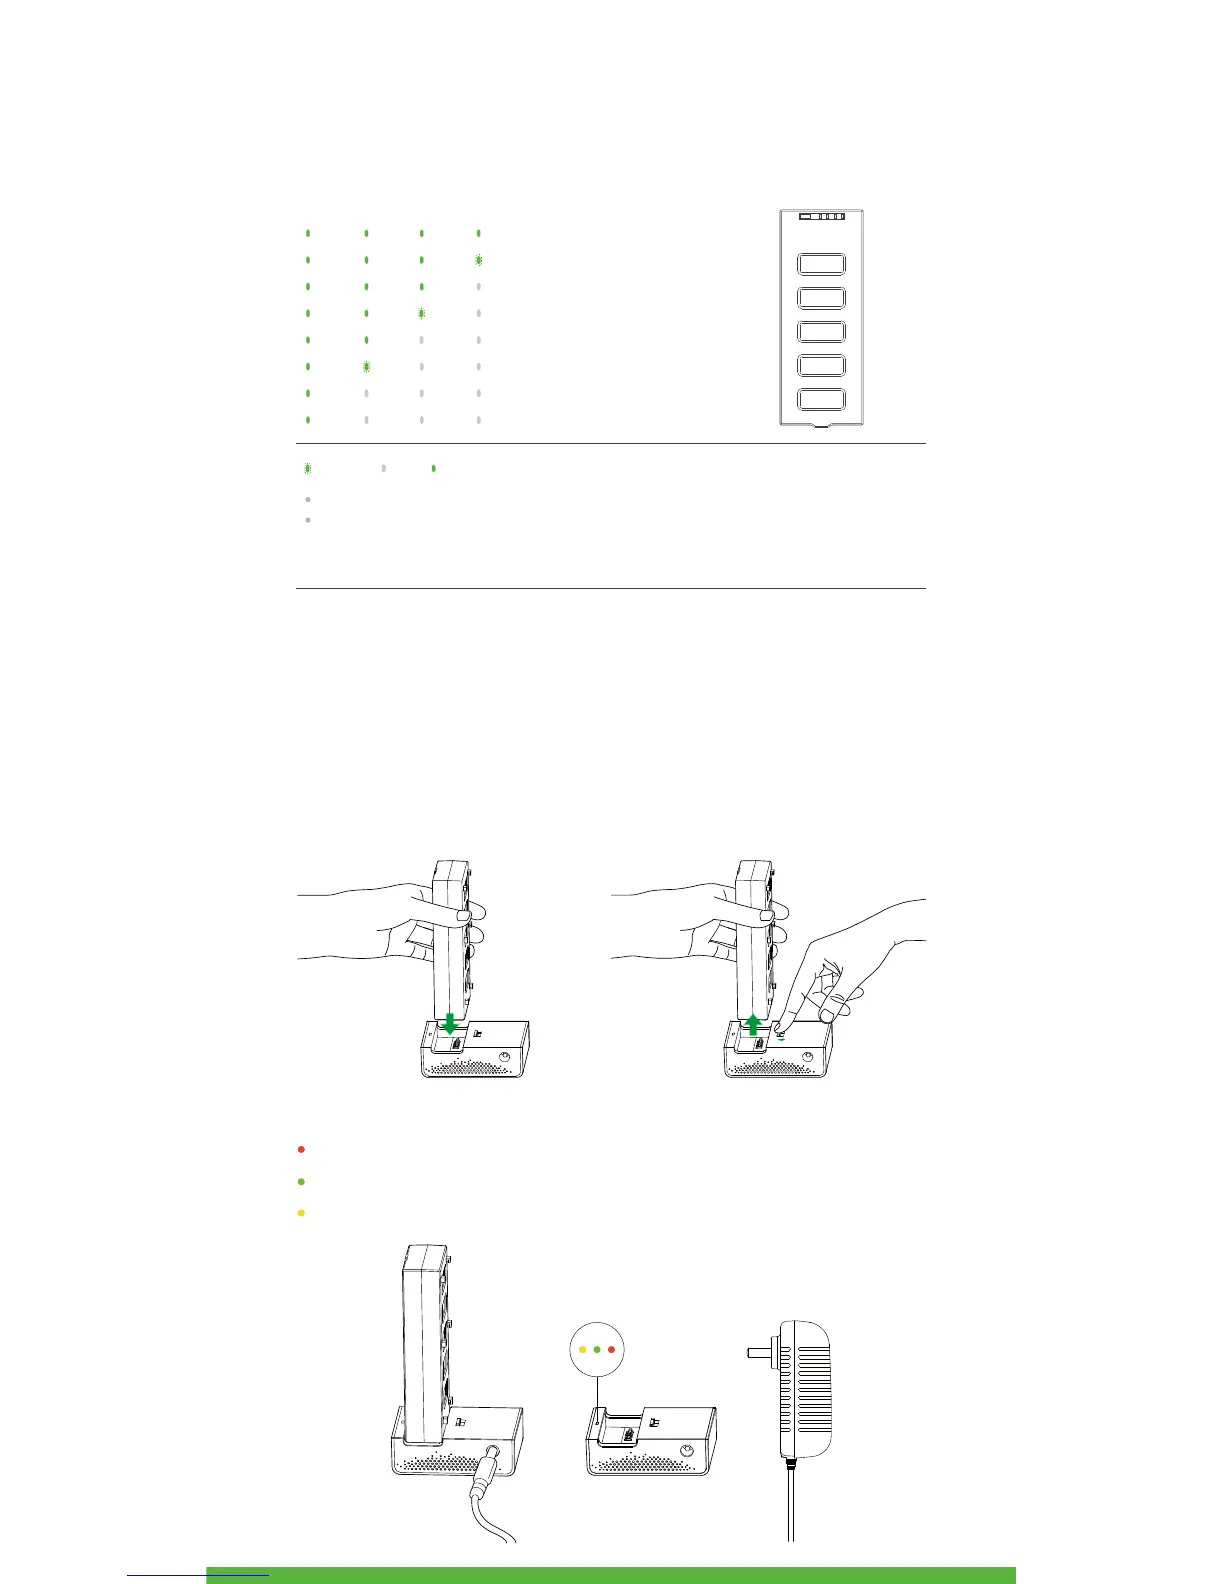
Power indicator
Press the power check button to check remaining capacity
Checking/Charging battery capacity
62.5% ~ 75%
50% ~ 62.5%
37.5% ~ 50%
25% ~ 37.5%
12.5% ~ 25%
0% ~ 12.5%
75% ~ 87.5%
LED1 LED2 LED3 LED4 Remaining capacity
87.5% ~ 100%
Off Solid
Blinking
Charging
Removing the battery
Charging the smart flight battery
Charging.
Charging completed.
Connection failed or warnings (Overload, overcurrent or battery connection failure).
Indicators status of the Charger
It is recommended not to fly the Xplorer when the remaining battery capacity is below 50%.
Press the power check button to check the remaining battery capacity and only activate your Xplorer
when the capacity is above 30%. When the remaining battery capacity is below 30%, first charge the
battery before flight.
Push the battery lock backwards and simultaneously remove the battery.