VESDA by Xtralis VESDA Commissioning Guide
www.xtralis.com 13
For Xtralis VSC: Devices Menu/Tree - Detector Form
1. Select the Smoke Threshold Tab to set new values for Day Thresholds, Night Thresholds, Change-Over
Times, and Smoke Change.
2. Select the Workdays Tab
l Set the working days of the week
l Set the start/end dates for holiday periods.
Assigning ancillary devices to a detector
An ancillary device, normally a Programmer, can only be allocated to a VESDA VLS detector. Any other
ancillary devices must remain in Address 0.
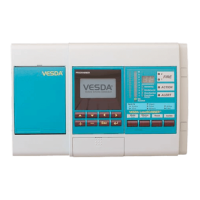
For LCD Programmer: See LCD screen 110.
1. Select the relevant ancillary device.
2. Give it the same address number as the assigned detector
3. Enter the address name/location of the display
For Xtralis VSC: Select Device Tree/Menu
1. Select the Ancillary device on the device tree
2. Select address Configuration Tab to enter the address number
3. Select address name/location tab and enter respective address name/location
You may find it easier to drag and drop instead.
Relay Setup
Latching is when the relay stays in it changed state after the condition has cleared.
For LCD Programmer: See LCD screens 71-74
1. Select screen 72 and set the relays to Energized or De-energized
2. Select screen 73 and set the relay conditions. The isolate function is non latching and cannot be altered.
3. Select screen 74 and set the relay assignments. Relays 3 and 6 are permanently fixed as Urgent Fault
and Fire 1 respectively. All relays can be assigned multiple functions.
For Xtralis VSC: Devices Menu/Tree - Detector Form
1. Use the Relays Tab to set the relay conditions to energize or de-energize when an event occurs. Relay 3
is energized and cannot be changed
2. Use the Relay Assignment Tab to assign relay functions and to latch or unlatch relays for:
l Assign Isolate and Minor Fault functions to relays
l Latch or Unlatch relays when Urgent or Minor Faults occur
l Urgent Faults are permanent assigned to Relay 3 and cannot be changed. Isolate function
is set to unlatch and cannot be changed.
3. Select the Scanner Relay Tab to assign relays and set them as Latched or Unlatched for:
l First Alarm Sector 1
l First Alarm Sector 2
l First Alarm Sector 3
l First Alarm Sector 4
4. Select Tabs Sector 1, 2 relay assignment, and Sector 3, 4 relay assignment to assign Alarm levels to
relays for Sectors 1 through 4. These Relays may be set to latch or unlatch.
 Loading...

