Do you have a question about the Xyron 900 and is the answer not in the manual?
Patented design allows changing from adhesive to laminate to magnet in seconds.
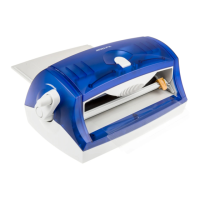
Folds up for easy storage and protects the machine and cartridge from dust and debris.
Soft and durable handle providing a smooth feel when enhancing items.
Built-in Grip/Carry Handle to take your Xyron 900 almost anywhere.
Allows trimming documents both in and out of the machine for edge finishing.
Place item flat on the tray, aligned left, and guide forward while turning the handle clockwise.
Once item is visible on the output tray, trim by sliding the blade across the material.
Lift cutter tray, slide out, and trim rest of item. For adhesive, remove mask and peel sticky-back item.
Align cutter sides with machine, slide in until it snaps and locks into place.
Loosen screw, remove old blade, slide new blade onto clear bar with sharp edge inward.
Open lid, slide cartridge into tracks with material facing open lid cover, close lid, advance film and trim.
Ensure correct cartridge installation, turn handle slowly, arrange small items, use items 1/10" thick or less.
Watch for "End-of-Roll" marker 18" from end of Laminate/Magnet cartridges; peel off laminate.
Apply pressure to edges, wipe excess adhesive with fingers, clean rollers with remover or rubbing alcohol.
Acid-Free Permanent for scrapbooking; Repositionable for windows, walls, doors; test first.
Not recommended for one-of-a-kind items; ensure space between items; two-sided allows edge cutting.
Place smaller item in middle of magnet frame to maximize material use.
Scrapbooking, memory books, rubber stamping, fabrics.
Class projects, book covers, labels, teaching aids, flash cards, certificates, awards.
Recipe cards, labels, children's projects, newspaper articles, decorations, photos.
Presentations, signs, training tools, sales forecasts, brochures, labels, business cards.
Lists various adhesive, lamination, and magnet backing cartridges with their respective applications.
Details footprint, weight, maximum thickness/width, power source, cutter assembly, and manufacturing.
| maximum document thickness | 0.10" (2.54 mm) |
|---|---|
| maximum document width | 9" (22.86 cm) |
| maximum document length | Cartridge Dependent |
| weight | 6 lbs (2.72 kg) |
|---|---|
| packed weight | 7 lbs (3.17 kg) |
| footprint width | 7.75" (19.7 cm) |
| footprint length | 14.5" (37 cm) |
| footprint height | 6.75" (17.1 cm) |