Do you have a question about the Yaber V2 and is the answer not in the manual?
Lists all items included in the projector package.
Provides instructions on how to set up the projector for optimal placement and use.
Guides on connecting iOS devices via wireless methods.
Guides on connecting Android devices via wireless methods.
Wired connection steps for Apple devices.
Wired connection steps for Android devices.
How to connect the projector to a PC or laptop via HDMI or VGA.
Guide for connecting the projector to a DVD player using AV cables.
Guide for connecting the projector to a soundbar using AV cables.
Options for adjusting picture mode, color temperature, aspect ratio, and zoom.
Options for adjusting sound modes and setting sleep timers.
Configuration options related to time settings and sleep timer.
Settings for OSD language, OSD time, software updates, and factory reset.
Chart and information on how distance affects screen size.
Information on product warranty coverage and customer support options.
Guidelines for the proper disposal of the projector unit.
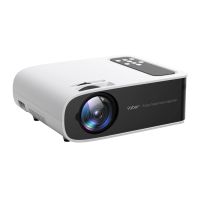
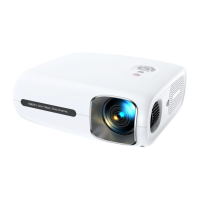
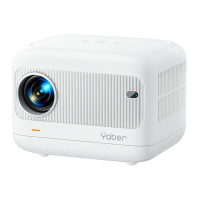
The YABER V2 Projector is an entertainment projector designed to provide a versatile and user-friendly projection experience. It supports various input sources and offers both wired and wireless projection methods, making it suitable for a wide range of applications, from home entertainment to presentations. The projector is designed with ease of use in mind, featuring intuitive controls and a clear menu system.
The primary function of the YABER V2 Projector is to project images and videos onto a screen or flat surface. It can connect to a variety of devices, including computers, DVD players, and mobile phones (both iOS and Android), to display content. The projector features a focus ring and keystone correction to ensure a clear and rectangular image, even when the projector is not perfectly aligned with the screen. It also includes an earphone port for private listening and built-in speakers for audio output.
To start the projector, users need to install two AAA batteries in the remote control, press the power key, and remove the lens cover. The projector will then display an image, and users can adjust the keystone and focus rings for optimal clarity and shape. The "S" button on the remote allows users to select the input source. The main menu provides options for various settings, including picture, sound, time, and other options.
The projector supports multiple input sources, including Screen Mirror, PC-RGB, HDMI, USB, and AV. When the "No Signal" prompt appears, users can press the "Source" button on the remote to select the desired input. Once a signal is detected, the content from the selected source will be displayed.
The YABER V2 Projector offers wireless screen mirroring for both iOS and Android devices.
The projector also supports wired connections for both iOS and Android devices using their original USB cables.
Users can connect their computer to the projector using an HDMI or VGA cable. After connecting, they select the corresponding HDMI/PC-RGB source on the projector. On the computer, they can use the Windows key + P shortcut to choose a display mode (Computer only, Duplicate, Extend, Projector only). The screen resolution can also be adjusted through the computer's display settings.
The projector can be connected to a DVD player using the supplied 3-in-1 AV cable. If the DVD player has an HDMI output, using an HDMI cable is recommended for better quality.
For enhanced audio, a soundbar can be connected to the projector using the supplied AV cable.
The "Picture Menu" allows users to adjust various image parameters, including Picture Mode (Standard, Soft, User, Vivid), Color Temperature (Medium, Warm, User, Cool), Aspect Ratio (Auto, 4:3, 16:9), and Projection Mode (Front/Rear on Desk, Front/Rear on Ceiling). The "ZOOM" function allows users to reduce the projected image size by up to 25% when playing images or videos.
The "Sound Menu" offers options to set the Sound Mode (User, Standard, Music, Movie, Sports).
The "Time Menu" includes a "Sleep Timer" function, allowing users to set a duration after which the projector will automatically shut off.
The "Option Menu" provides settings for OSD Language, OSD Time, Software Update (via USB), Restore Factory Default, and displays the current Version of the projector's firmware.
Before cleaning, the projector should be unplugged. The cabinet can be cleaned periodically with a damp cloth and mild detergent if necessary, avoiding strong detergents or solvents. The lens should be cleaned with a blower or lens paper, taking care not to scratch or damage it.
To replace the remote control batteries, users push to open the battery cover, remove old batteries, and install new AA batteries, ensuring correct polarity.
The manual emphasizes the importance of reading safety instructions to ensure the projector's longevity and prevent fires or shocks. It advises using the projector in a dark room, on a flat and dry surface, away from direct sunlight, smoke, or steam. Users should handle the projector carefully to avoid damage from falls or shaking and should not place heavy objects on top of it.
The projector is designed to operate with a 110-240 V ~ 50/60 Hz AC adapter. Users are advised to handle the power cord carefully to prevent damage, which could lead to electric shock or fire. If the projector will not be used for an extended period, the power cord should be unplugged from the outlet.
The manual includes a FAQ section to help users resolve common issues such as the indicative light not working, the remote control not turning on the projector, no image on the screen, image without sound, automatic shutdown, inability to find connected devices, and video playback issues. These solutions often involve checking connections, settings, or external factors like battery levels or obstructions.
The YABER V2 Projector is designed to be a reliable and enjoyable device, with comprehensive instructions to guide users through its setup, operation, and basic maintenance.
| Lamp Life | 100, 000 Hours |
|---|---|
| Connectivity | HDMI, USB, VGA, AV, Audio Out |
| Aspect Ratio | 4:3/16:9 |
| Resolution | 1280x720P (Native) |
| Maximum Supported Resolution | 1920x1080P |