EasyManua.ls Logo

Yaesu VX­7R - User Manual

Yaesu VX­7R
2 pages
Print Icon
To Next Page IconTo Next Page
Loading...
Basic operation of the Yaesu VX-7R
The Yaesu VX-7R is a 4-band radio which operates on 6M, 2M, 1.25M, and 70cm.
(Bold print items indicate a button to press); (Italic print items indicate an on-screen selection)
Toggling the dual receive function:
1. Press and hold [MAIN] to toggle from single to dual mode.
2. If it's in single mode, one frequency will be displayed on the screen.
3. If it's in dual mode, two frequencies will be displayed on the screen—the one in larger text is the
transmit frequency. .
Note: When in dual mode, press [MAIN] or [SUB] to switch the transmit frequency..
Entering a frequency:
1. Make sure you're in VFO mode (press [V/M] button if “MR” is displayed on screen).
2. Enter the frequency (must use 6 digits).
Setting duplex (+/-):
1. Press [MON/F] and then press [0/SET] to enter Set mode.
2. Use the dial to scroll to “Basic Setup: 7 RPT SHIFT” .
3. Press [MAIN] to select the desired setting (“-RPT”, “+RPT”, “SIMP”).
4. Press [PTT] to save the setting.
Entering PL tone:
1. Press [MON/F] and then [8/TONE].
2. Press [MAIN] until TONE” appears on the screen.
3. Then rotate the dial one-click clockwise so that “TSQ/DCS/DTMF: 2 TONE SET” is displayed.
4. Press [BAND] which will activate a blinking line underneath the tone frequency.
5. Press [MAIN] until the desired frequency is displayed.
6. Press [BAND] then [PTT].
Adjusting power level:
1. Press [MON/F].
2. Press the button until the desired power level is set.
Note: Four power levels are available: L1-L3 (which will be displayed on the bottom middle of the
screen). When no power level is indicated, high power is used.
Saving frequency (and settings) to memory channel:
1. Press and hold [MON/F].
2. Quickly rotate the dial to select the desired memory channel (you must do this within of 5 seconds!).
Note: An asterisk (*) next to the channel number indicates an empty channel.
3. Press [MON/F] to store the frequency in the specified channel.
4. Press [V/M] to return to memory mode.
5. Press [MON/F] and then [0/SET].
6. Rotate the dial to select “Basic Setup: 11 NAME SET” .
7. Press [BAND] which will enable a blinking line, indicating it's ready to enter a name.
Prepared by K7TAY, k7tay@oregonaces.org
Question and Answer IconNeed help?

Do you have a question about the Yaesu VX­7R and is the answer not in the manual?

Summary

Yaesu VX-7 R Dual Receive and Frequency Operations

Toggle Dual Receive Mode

Switch between single and dual frequency display modes for the Yaesu VX-7R radio.

Enter Frequency on VX-7 R

Procedure for inputting a specific frequency into the Yaesu VX-7R radio using VFO mode.

Set Duplex Offset (+;-)

Configure the duplex offset setting (+/- or SIMP) for the Yaesu VX-7R using the Set mode.

Enter PL Tone Settings

Steps to enter and set the PL (Private Line) tone frequency on the Yaesu VX-7R.

Adjust VX-7 R Power Level

Guide to adjusting the transmitter power level on the Yaesu VX-7R radio, from L1 to L3.

Save Frequency and Settings to Memory

Instructions for saving a frequency and associated settings to a memory channel on the Yaesu VX-7R.

Yaesu VX-7 R Advanced Memory and WIRES Operations

Name Memory Channels

Procedure for naming memory channels on the Yaesu VX-7R using the alphanumeric keypad.

Disable WIRES Mode

How to disable the WIRES feature on the Yaesu VX-7R, which sends a tone at transmission start.

Overview

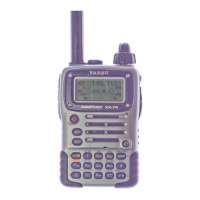
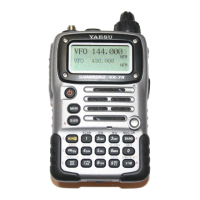
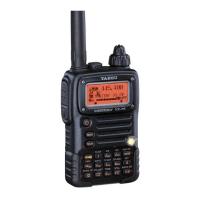
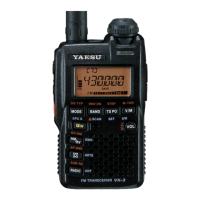
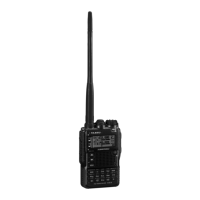
The Yaesu VX-7R is a versatile 4-band amateur radio designed for communication across the 6-meter, 2-meter, 1.25-meter, and 70-centimeter bands. This manual provides a comprehensive guide to its operation, covering everything from basic frequency entry to advanced memory management and feature customization.

Function Description

The primary function of the Yaesu VX-7R is two-way radio communication. It supports both single and dual receive modes, allowing users to monitor one or two frequencies simultaneously. In dual receive mode, the radio clearly indicates the transmit frequency by displaying it in larger text on the screen. Users can easily switch the transmit frequency between the two monitored channels using the [MAIN] or [SUB] buttons.

The radio operates in VFO (Variable Frequency Oscillator) mode for direct frequency entry, and also supports memory mode for storing and recalling frequently used frequencies and settings. It includes features for setting duplex offsets (positive, negative, or simplex) and for enabling PL (Private Line) tones, which are essential for accessing many repeaters and for selective calling.

A key feature is its adjustable power output, offering multiple power levels to conserve battery life or to achieve maximum range when needed. The radio also includes a "WIRES" feature, which can be disabled, that transmits a tone at the beginning of each transmission, often used for internet-linked repeater systems.

Important Technical Specifications

  • Bands of Operation: 6M, 2M, 1.25M, and 70cm.
  • Frequency Entry: Requires 6 digits for direct entry in VFO mode.
  • Memory Channels: The radio supports memory channels for storing frequencies and associated settings. An asterisk (*) next to a channel number indicates an empty channel.
  • Power Levels: Four power levels are available: L1, L2, L3, and high power (indicated by no power level display).
  • Naming Memory Channels: Memory channels can be assigned alphanumeric names of up to 8 characters. The alphanumeric keypad allows for toggling through various characters associated with each key (e.g., [2] key offers A, B, C, a, b, c, 2).

Usage Features

Toggling Dual Receive:

To switch between single and dual receive modes, press and hold the [MAIN] button. In single mode, one frequency is displayed. In dual mode, two frequencies are displayed, with the transmit frequency shown in larger text. To change the transmit frequency in dual mode, press [MAIN] or [SUB].

Entering a Frequency:

Ensure the radio is in VFO mode (if "MR" is displayed, press [V/M]). Then, directly enter the desired 6-digit frequency.

Setting Duplex (+/-):

  1. Press [MON/F] then [0/SET] to enter Set mode.
  2. Rotate the dial to navigate to "Basic Setup: 7 → RPT SHIFT".
  3. Press [MAIN] to select the desired setting: "-RPT" (negative offset), "+RPT" (positive offset), or "SIMP" (simplex).
  4. Press [PTT] to save the setting.

Entering PL Tone:

  1. Press [MON/F] then [8/TONE].
  2. Press [MAIN] until "TONE" appears on the screen.
  3. Rotate the dial one click clockwise to display "TSQ/DCS/DTMF: 2 → TONE SET".
  4. Press [BAND] to activate a blinking line under the tone frequency.
  5. Press [MAIN] until the desired tone frequency is displayed.
  6. Press [BAND] then [PTT] to save.

Adjusting Power Level:

  1. Press [MON/F].
  2. Press the dedicated power button (represented by a square icon with an arrow pointing up from the bottom left corner) repeatedly until the desired power level is set. The power levels L1-L3 will be displayed at the bottom middle of the screen. If no power level is indicated, the radio is operating at high power.

Saving Frequency (and Settings) to Memory Channel:

  1. Press and hold [MON/F].
  2. Within 5 seconds, quickly rotate the dial to select the desired memory channel. An asterisk (*) indicates an empty channel.
  3. Press [MON/F] to store the frequency in the selected channel.
  4. Press [V/M] to return to memory mode.
  5. To name the channel: Press [MON/F] then [0/SET].
  6. Rotate the dial to select "Basic Setup: 11 → NAME SET".
  7. Press [BAND] to enable a blinking line, indicating readiness for name entry.
  8. Use the alphanumeric keypad to enter the name (up to 8 characters). Rotate the dial one click clockwise to advance to the next character. Press the desired key repeatedly to cycle through the characters associated with it (e.g., [2] for A, B, C, a, b, c, 2).
  9. Press [PTT] to save the memory name.

Maintenance Features

Disabling "WIRES" Mode:

The Yaesu VX-7R includes a WIRES feature that transmits a tone at the beginning of each transmission. It is strongly recommended to disable this feature if not using a WIRES-linked system.

  1. Press the dedicated WIRES button (represented by a square icon with an arrow pointing up from the bottom left corner, similar to the power level button but context-dependent) to toggle WIRES on/off.
  2. When WIRES is disabled, the computer icon (a square icon with a monitor-like display) will not be visible in the upper left corner of the screen. This visual indicator confirms that the feature is off.

The manual emphasizes the use of bold print for buttons and italic print for on-screen selections, making it easy for users to follow instructions. The clear, step-by-step instructions ensure that both new and experienced users can effectively operate and customize their Yaesu VX-7R radio.

Yaesu VX­7R Specifications

General IconGeneral
BrandYaesu
ModelVX­7R
CategoryTwo-Way Radio
LanguageEnglish

Related product manuals