Do you have a question about the Yale EF-PETPIR and is the answer not in the manual?
Explains how to enter Test mode, its duration, and LED indication upon motion detection.
Details the function of the LED, indicating motion detection and test mode status.
Refers to pre-formed openings for flexible installation on walls or in corners.
Configures the automatic transmission of supervisory signals to the control panel or smart hub.
Allows adjustment of the PIR sensor's sensitivity to detect motion at high or low levels.
A security feature that detects unauthorized opening or removal of the device.
Specifies the required battery type and quantity for powering the device.
Identifies the screw used to secure the device's cover, ensuring tamper protection.
A feature designed for easy removal or insertion of batteries.
Provides guidance on positioning the PIR for optimal pet immunity and avoiding false alarms.
Details the function of Jumper 2 for enabling or disabling periodic supervisory signal transmission.
Explains how Jumper 3 adjusts PIR sensitivity for detecting motion at high or low levels.
Describes the automatic one-minute power-saving sleep timer after motion detection.
Explains what the LED flash signifies, including low battery, tamper, or test mode.
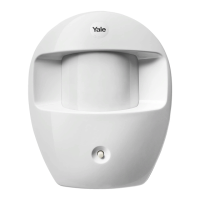
The Yale Smart Living Pet Friendly PIR Motion Detector (EF-PETPIR) is a security device designed to detect motion while being immune to pets weighing less than 25kg. It is compatible with Yale 'SR' and 'EF' Series Alarm Kits.
The primary function of the PIR Motion Detector is to sense movement within its detection area and trigger an alarm or send a signal to a control panel or smart hub. It incorporates pet immunity to prevent false alarms caused by household pets.
| Brand | Yale |
|---|---|
| Model | EF-PETPIR |
| Category | Security Sensors |
| Language | English |