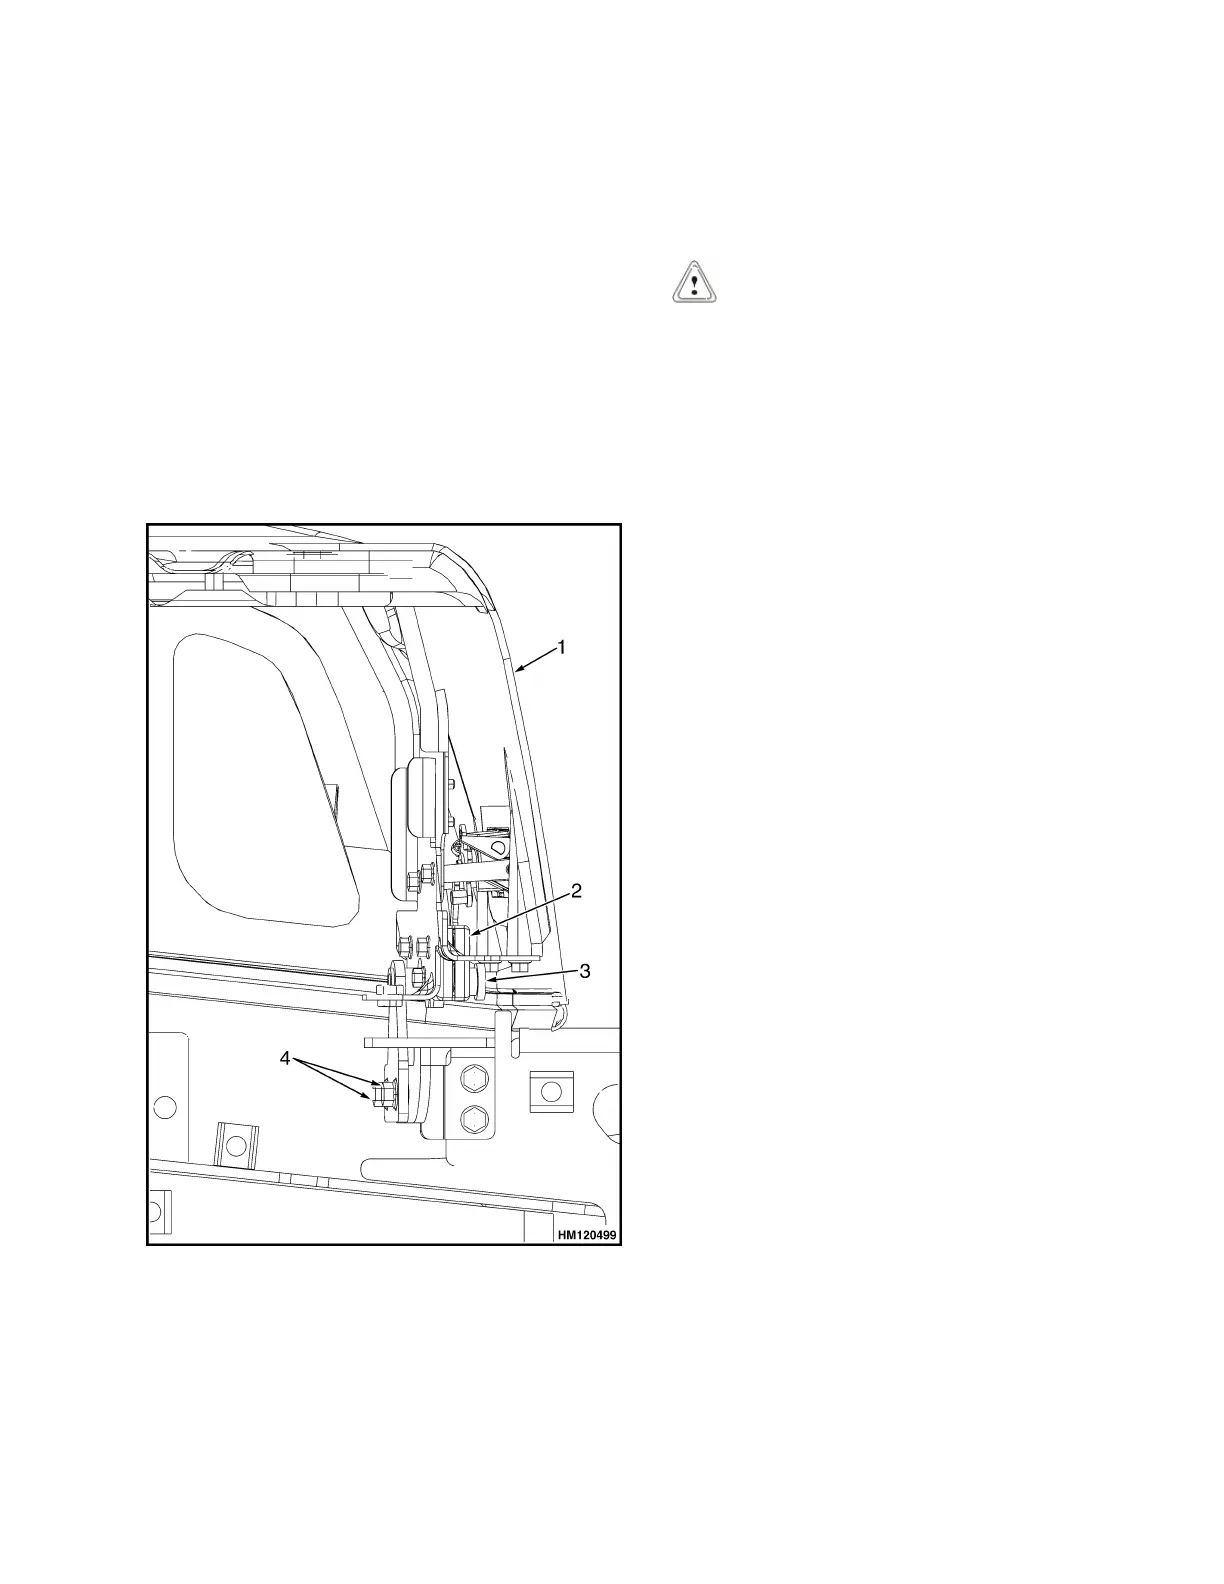
4. Install latch striker in highest slot position. Check
that latch striker is in center of jaws of hood latch
when hood closes. Open and close hood to en-
sure that center pin strikes hood latch properly
and that the stop screw contacts the frame. A
properly closed hood MUST click twice on the
hood latch. If the hood latch does not close prop-
erly, loosen capscrews on the back of center pin
and adjust center pin up or down as required for
correct alignment. See Figure 8.
5. Push down until hood just touches rubber
bumper. Make sure latch striker is still in center of
hood latch. Open hood and tighten capscrews for
latch.
1. HOOD
2. HOOD LATCH
3. CENTER PIN
4. CAPSCREW
Figure 8. Hood Latch Adjustment
6. Check operation of hood latch. Have an operator
sit in seat. Make sure hood is fully closed (two
clicks). Also check that hood touches rubber
bumper. If necessary, repeat Step 5.
CAUTION
When installing the seat to the hood, DO NOT use
an impact wrench to install the capscrews. Dam-
age can be caused to the threads on the screws
and in the holes.
7. Place seat on the hood and thread seat wire har-
ness through the hole in the hood. See Figure 3.
8. Align holes in the seat with the holes in hood. In-
sert washers and capscrews. Tighten capscrews
to 18 N•m (159 lbf in).
9. If truck is equipped with a non-swivel seat, tie ca-
ble clips to seat wire harness and insert harness
into seat wire harness brackets under hood. If
truck is equipped with a swivel seat, secure seat
harness to bracket. See Figure 3.
10. Install seal plate using three capscrews. See Fig-
ure 6.
11. Install kick panel onto truck. See Figure 4.
12. Install dash to top of cowl. See Figure 5. Install
four clips to attach dash to kick panel.
13. Install upper steering column cover to dash.
14. Using four capscrews, install left and right front
side covers to frame. See Figure 4.
15. Using two capscrews, install left and right fender
covers to front of overhead guard legs.
16. Using two capscrews, install left and right rear
side covers to frame. See Figure 4.
17. Install floor mat and floor plate.
18. If truck is equipped with an LPG tank, swing LPG
tank into position on back of counterweight.
19. Adjust the steering column and seat positions.
0100 YRM 1243 Steering Column
11