Table 6. Proc_Cal_004: Lift Valve Output Threshold (Continued)
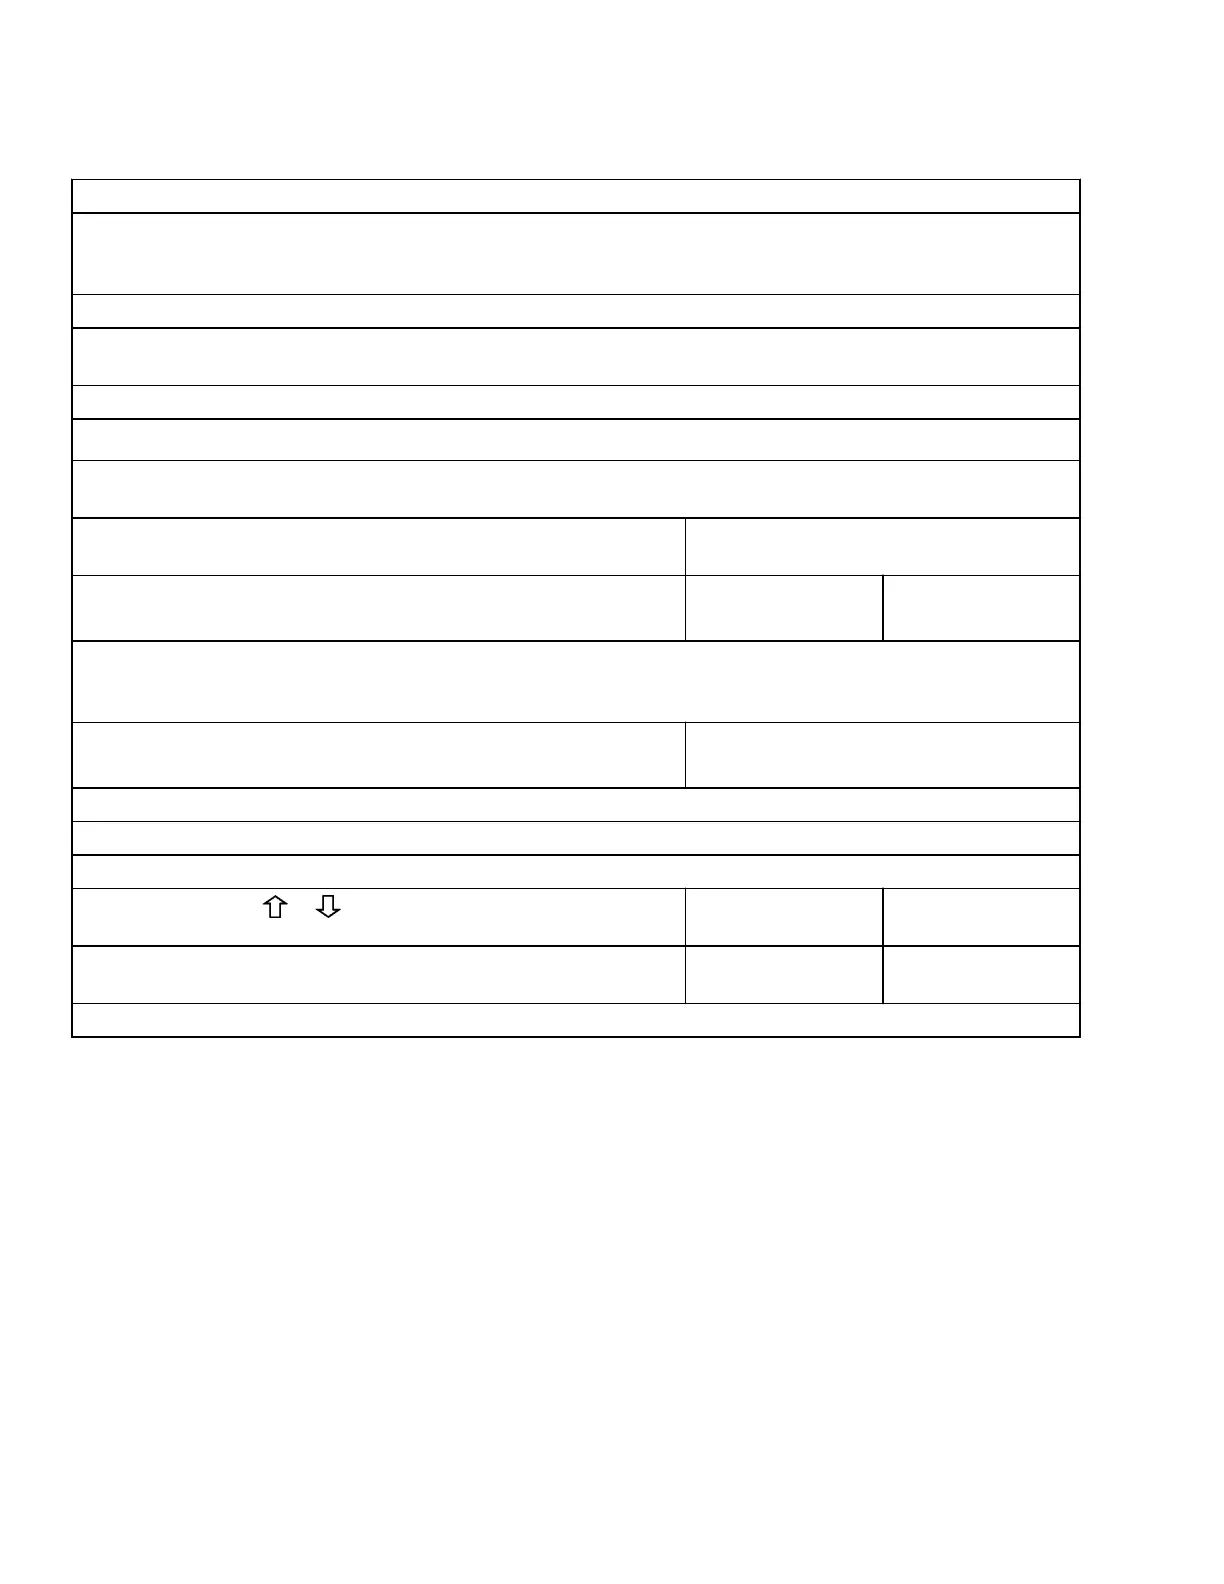
2. JOYSTICK
1. TILT BACK 2. AUX 1
DIRECTION A ↑
DIRECTION B ↓
3. LIFT ↓
4. ↑ LOWER
5. AUX 2
DIRECTION A ↑
DIRECTION B ↓
6. TILT FORWARD
7. SEAT ARMREST
Action 3: SLOWLY Activate (Feather) Lift Control.....
Action 4: Until the pressure is 0.7 MPa (100 psi) above the standby pressure. Note that the pressure reading
may oscillate. Hold control steady and.....
Action 5: WATCH for Attachment Movement. When it first starts to move slowly, HOLD control steady and.....
Press * One Time while holding control.
Action 6: STOP activating the Lift Control. LOOK at the display.
Go to the calibration step below that matches your display.
If You See..... Result out of range
Repeat Calibration
Press * One Time
You Will See: Lift Valve Output
Press * at Creep
Return to Action 3.
Pressure Method: Perform Actions 3, 4, and 6 again.
Visual Method: Perform Actions 3, 5, and 6 again.
If You See..... Lower Valve Output
Press * at Creep
To Continue with Calibrations.....
Go to Action 2 of Proc_Cal_005.
To Quit and Save....
Step 1: Press or
Until You See: Lower Valve Output
Back 1 Level
Step 2: Press * One Time
You Will See: Calibrations
Back 1 Level
Perform Proc_Cal_003: Save and Exit.
Proc_Cal_004: Lift Valve Output Threshold 8000 YRM 1134
12 Confidential/Proprietary - Do Not Copy or Duplicate