11
4. Mounting Alarm Devices
5
Positioning the Door/Window Contact
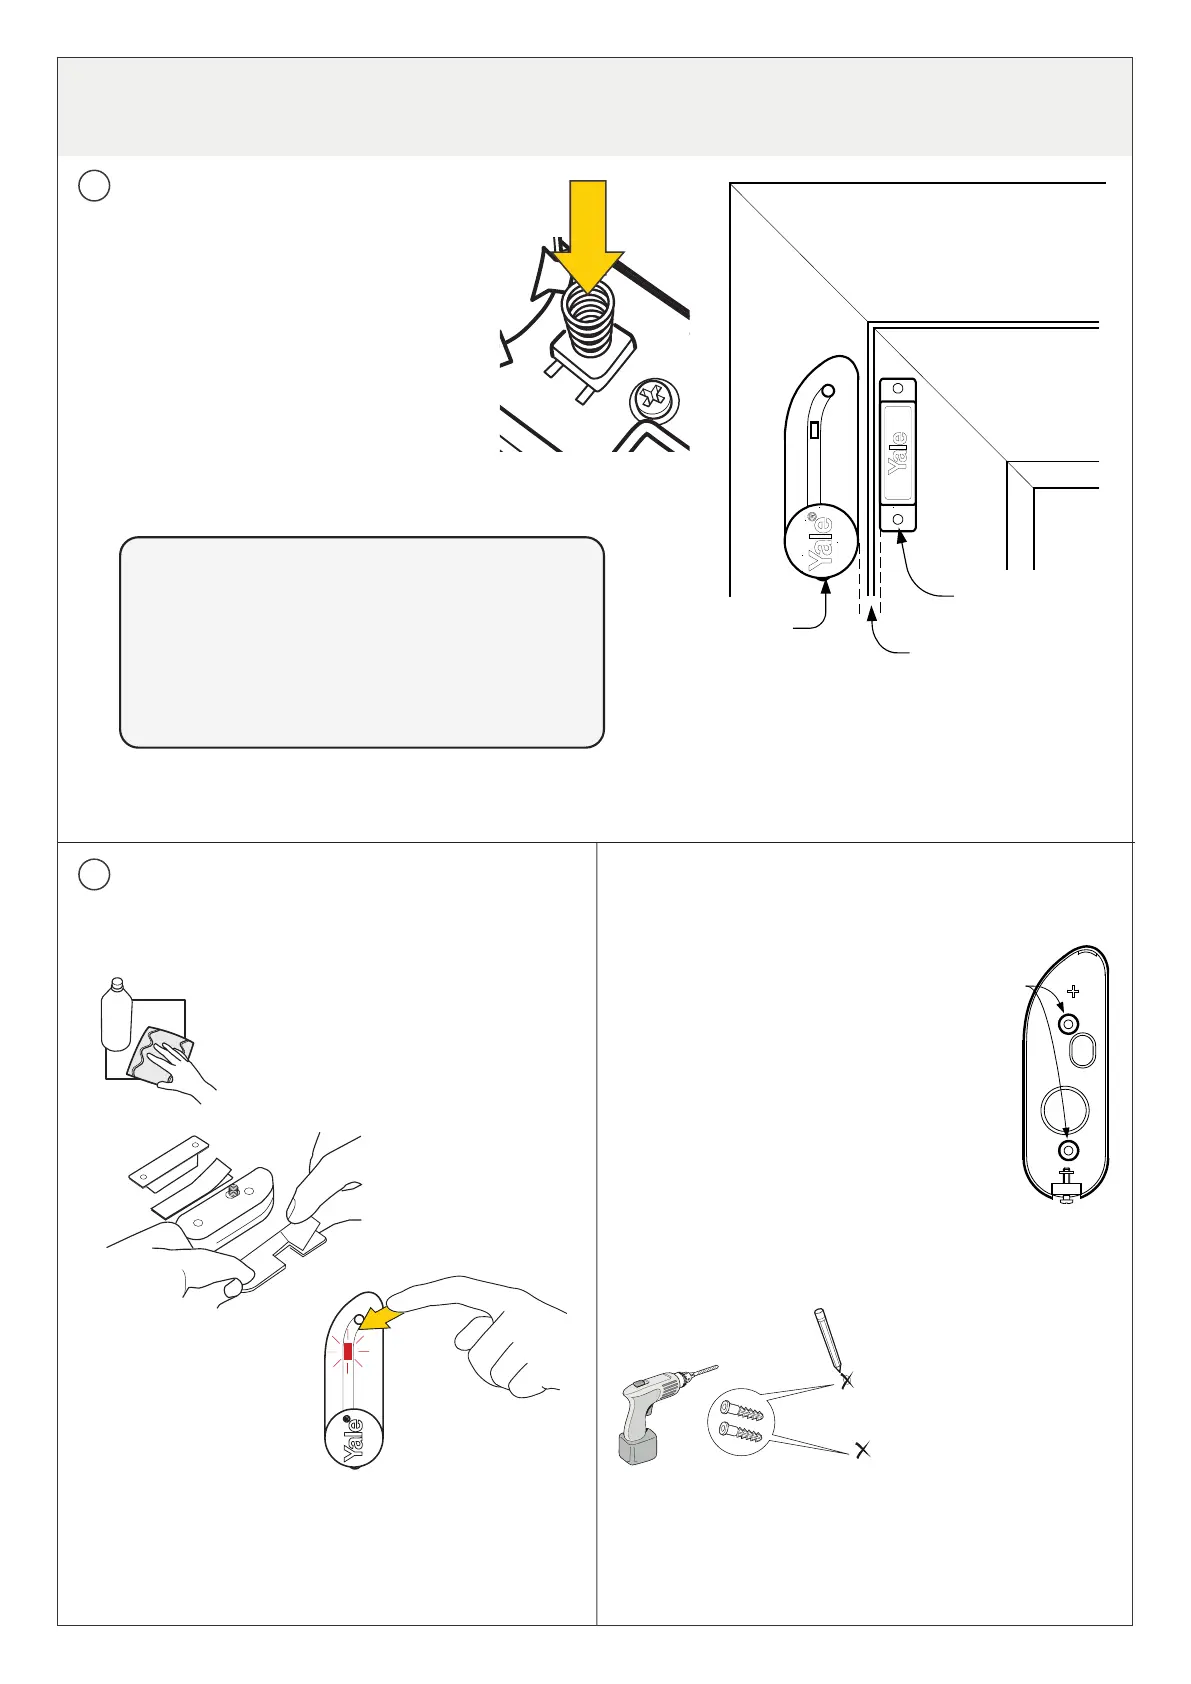
1 Find a location where the Door/Window
Contact is to be mounted. It should be
mounted between the door and frame
or window and frame as shown. The
magnet is to go on the door/window while
the sensor is to be placed on the frame.
Windows can be protected in a similar
way to doors. Make sure the tamper
switch spring is fully depressed.
Frame
Door/Window
Gap no more
than 8mm
Magnet
Sensor
The gap between the magnet and sensor should
be a maximum of 8mm closed.
Simple test to see whether the magnet is in
range of the sensor: hold the magnet and sensor
in place and then pull them apart. If the sensor
LED lights up it implies the two items are within
range.
i
6
Mounting the Door/Window Contact
a) Using adhesive pads
1 Clean the mounting surface
2 Remove the protective film from one
side of the adhesive pad and apply
to the back of the sensor and
magnet.
3 Remove the
remaining
protective film
and firmly press
into place.
4 Test sensor by pressing
the Learn button and
opening and closing
the door/window. The
LED on the Door/
Window Contact Sensor
should light when the
door/window is opened.
Installation is complete.
b) Using screws and wall plugs
1 Loosen the bottom screw
and open the Door/Window
Contact.
2 Knock out the holes on the base as
shown.
3 Drill holes into the mounting
surface using the holes in the
knockouts on the base as
template.
4 Fit wall plugs (if required) and secure with the screws
provided.
5 Fit sensor
back together
and tighten screw.
6 Test sensor by pressing
the learn button and
opening and closing
the door/window.
The LED on the Door/Window Contact Sensor should
light when the door/window is opened. Installation is
complete.

 Loading...