CRANKCASE
5-57
EAS25550
DISASSEMBLING THE CRANKCASE
1. Place the engine upside down.
2. Remove:
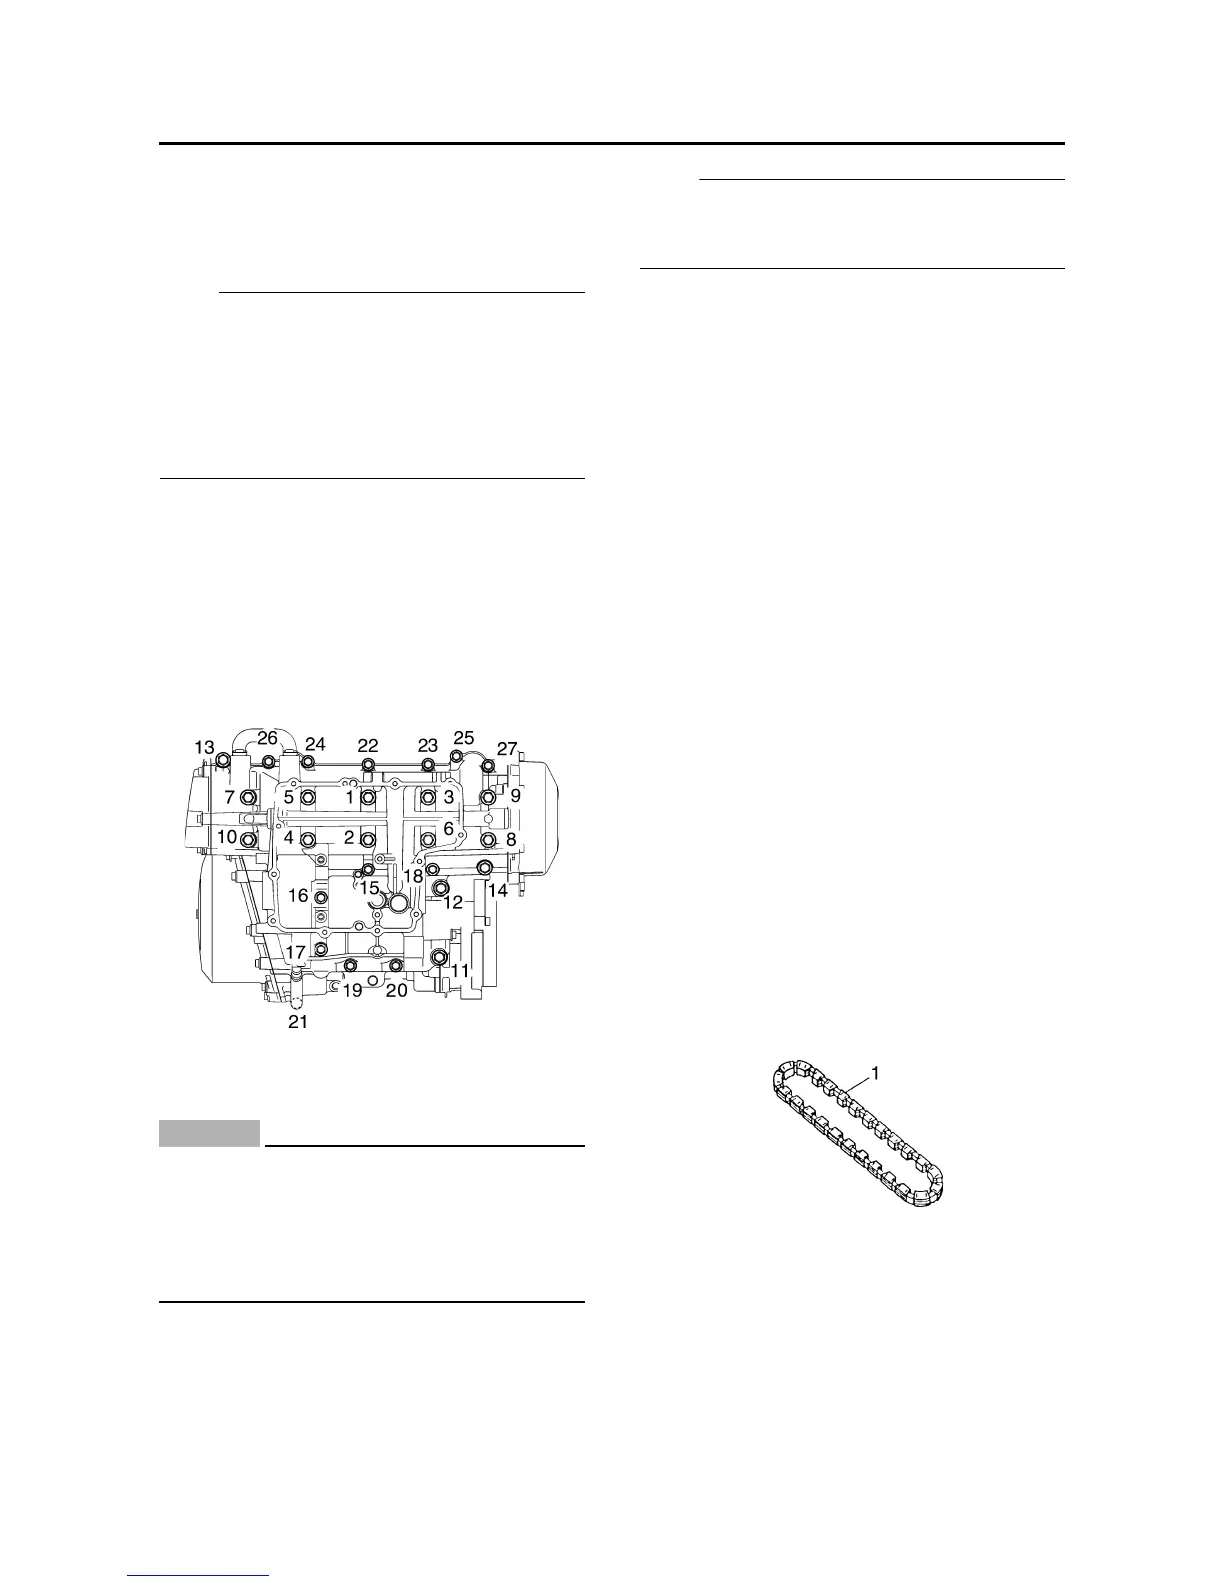
• Crankcase bolts
NOTE:
• Loosen each bolt 1/4 of a turn at a time, in
stages and in a crisscross pattern. After all of
the bolts are fully loosened, remove them.
• Loosen the bolts in decreasing numerical
order (refer to the numbers in the illustration).
• The numbers embossed on the crankcase
indicate the crankcase tightening sequence.
M8 × 85 mm (3.3 in) bolts: “1”–“7”, “10”
M8 × 115 mm (4.5 in) bolts: “8”, “9”
M8 × 65 mm (2.6 in) bolts: “11”, “12”
M6 × 65 mm (2.6 in) bolts: “13”, “14”
M6 × 55 mm (2.2 in) bolts: “15”, “22”–“26”
M6 × 45 mm (1.8 in) bolts: “16”, “19”, “20”
M6 × 65 mm (2.6 in) bolts: “17”, “27”
M6 × 75 mm (3.0 in) bolt: “18”
M6 × 100 mm (3.9 in) bolt: “21”
3. Remove:
• Lower crankcase
CAUTION:
ECA13900
Tap on one side of the crankcase with a
soft-face hammer. Tap only on reinforced
portions of the crankcase, not on the
crankcase mating surfaces. Work slowly
and carefully and make sure the crankcase
halves separate evenly.
4. Remove:
• Dowel pins
5. Remove:
• Crankshaft journal lower bearing
(from the lower crankcase)
NOTE:
Identify the position of each crankshaft journal
lower bearing so that it can be reinstalled in its
original place.
EAS25580
CHECKING THE CRANKCASE
1. Thoroughly wash the crankcase halves in a
mild solvent.
2. Thoroughly clean all the gasket surfaces
and crankcase mating surfaces.
3. Check:
• Crankcase
Cracks/damage → Replace.
• Oil delivery passages
Obstruction → Blow out with compressed
air.
EAS4S81034
CHECKING THE BEARINGS AND OIL
SEALS
1. Check:
• Bearings
Clean and lubricate the bearings, then
rotate the inner race with your finger.
Rough movement → Replace.
2. Check:
• Oil seals
Damage/wear → Replace.
EAS25620
CHECKING THE OIL PUMP DRIVE CHAIN
1. Check:
• Oil pump drive chain “1”
Damage/stiffness → Replace the oil pump
drive chain, oil pump drive sprocket and oil
pump shaft as a set.
2. Check:
• Oil pump drive sprocket
Cracks/damage/wear → Replace the oil
pump drive sprocket and the oil pump drive
chain as a set.
 Loading...