EasyManua.ls Logo

Yamaha Clavinova CLP-311 User Manual

Yamaha Clavinova CLP-311
28 pages
To Next Page IconTo Next Page
Page #1 background imageLoading...
Page #1 background image
;;;;;;;;;;;;
;
;;;;;;;;;;
;
;
;;;;;;;;;;
;
;
;;;;;;;;;;
;
;
;;;;;;;;;;
;
;
;;;;;;;;;;
;
;
;;;;;;;;;;
;
;
;;;;;;;;;;
;
;
;;;;;;;;;;
;
;
;;;;;;;;;;
;
;
;;;;;;;;;;
;
;
;;;;;;;;;;
;
;
;;;;;;;;;;
;
;
;;;;;;;;;;
;
;
;;;;;;;;;;
;
;
;;;;;;;;;;
;
;;;;;;;;;;;;
IMPORTANT
Check your power supply
Make sure that your local AC mains voltage matches the
voltage specified on the name plate on the bottom panel. In
some areas a voltage selector may be provided on the bottom
panel of the main keyboard unit near the power cord. Make
sure that the voltage selector is set for the voltage in your area.
The voltage selector is set at 240V when the unit is initially
shipped. To change the setting use a “minus” screwdriver to
rotate the selector dial so that the correct voltage appears next
to the pointer on the panel.
WICHTIG
Überprüfung der Stromversorgung
Vergewissern Sie sich vor dem Anschließen an das Stromnetz,
daß die örtliche Netzspannung den Betriebsspannungswerten
auf dem Typenschild an der Unterseite des Instruments
entspricht. In bestimmten Verkaufsgebieten ist das Instrument
mit einem Spannungswähler an der Unterseite neben der
Netzkabeldurchführung ausgestattet. Falls vorhanden, muß der
Spannungswähler auf die örtliche Netzspannung eingestellt
werden. Der Spannungswähler wurde werkseitig auf 240 V
voreingestellt. Zum Verstellen drehen Sie den Spannungsregler
mit einem Schlitzschraubendreher, bis der Zeiger auf den
korrekten Spannungswert weist
IMPORTANT
Contrôler la source d’alimentation
Vérifiez que la tension spécifiée sur le panneau arrière
correspond à la tension du secteur. Dans certaines régions,
l’instrument peut être équipé d’un sélecteur de tension situé sur
le panneau inférieur du clavier à proximité du cordon d’alimen-
tation. Vérifiez que ce sélecteur est bien réglé en fonction de
la tension secteur de votre région. Le sélecteur de tension est
réglé sur 240 V au départ d’usine. Pour modifier ce réglage,
utilisez un tournevis à lame plate pour tourner le sélecteur afin
de mettre l’indication correspondant à la tension de votre
région vis à vis du repère triangulaire situé sur le panneau.
IMPORTANTE
Verifique la alimentación de corriente
Asegúrese de que tensión de alimentación de CA de su área
corresponde con la tensión especificada en la placa de
características del panel inferior de la unidad del teclado
principal, cerca del cable de alimentación. Asegúrese de que
el selector de tensión esté ajustado a la tensión de su área. El
selector de tensión se ajusta a 240V cuando la unidad sale de
fábrica. Para cambiar el ajuste, emplee un destornillador de
cabeza “recta” para girar el selector de modo que aparezca la
tensión correcta al lado del indicador del panel.

Other manuals for Yamaha Clavinova CLP-311

Question and Answer IconNeed help?

Do you have a question about the Yamaha Clavinova CLP-311 and is the answer not in the manual?

Yamaha Clavinova CLP-311 Specifications

General IconGeneral
BrandYamaha
ModelClavinova CLP-311
CategoryMusical Instrument
LanguageEnglish

Summary

Power Supply and Initial Checks

Voltage Verification

Ensure local voltage matches the unit's requirements.

Special Message Section

Safety Markings and Environmental Policies

Explains unit markings and environmental policies.

Battery and Disposal Notices

Information on battery care and product disposal.

Name Plate Location

Identifies the location of the name plate for product details.

Important Safety Instructions

General Safety Precautions

Key safety guidelines for using electrical and electronic products.

Introduction

Key Features of the CLP-311

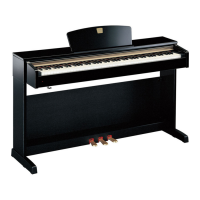
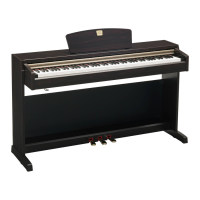
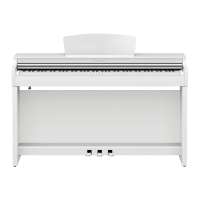
Highlights the advanced features of the Clavinova.

Taking Care Of Your Clavinova

Care and Maintenance Guidelines

Advice on cleaning, placement, and handling the instrument.

Voltage Selector Information

Reminder on checking the voltage selector.

The Control Panel

Main Controls Overview

Description of the main controls and their functions.

Control Panel Features Continued

Recorder, Demo, and Pedal Controls

Explains buttons for recording, demos, and pedal functions.

Music Stand Operation

Instructions for using the music stand.

Connections and Ports

Audio and External Device Connections

Connecting external tone generators and audio systems.

MIDI and Headphone Jacks

Details on MIDI ports and headphone connections.

Selecting & Playing Voices

Power On and Volume Setup

Steps to turn on the unit and set initial volume.

Choosing and Playing Voices

How to select and play different instrument voices.

Playing Demonstration Tunes

Engaging Demo Mode and Selecting Tunes

Steps to activate and choose demo tunes.

Controlling Demo Playback

Adjusting volume and navigating demos.

The Dual Mode

Activating and Using Dual Mode

How to play two voices simultaneously.

Adjusting Dual Voice Balance and Octaves

Method for balancing volumes and shifting octaves.

The Pedals

Pedal Functions

Details on soft/sostenuto and damper pedal operations.

Transposition

Keyboard Pitch Shifting

How to shift the keyboard pitch up or down.

Pitch Control

Fine-Tuning Pitch

Adjusting pitch higher or lower with fine increments.

Restoring Standard Pitch

Method to reset pitch to standard A3=440 Hz.

Metronome and Tempo Control

Metronome Settings

Activating, setting volume, and time signature.

Tempo Adjustment

Ways to set tempo using controls and keys.

Using the Recorder

Recording Process and Data

Steps to record, data captured, and limits.

Recorder Playback and Management

Playback and Settings Management

Playing back recordings, managing settings, and erasing data.

Fast Forward Playback

Quickly scanning through recordings.

MIDI Functions

MIDI Basics and Messages

Introduction to MIDI and common message types.

MIDI Channel and Transpose Settings

Channel Selection and Transpose Function

Setting MIDI channels and transpose function.

Other MIDI Functions Overview

List of Additional MIDI Functions

Listing of other MIDI functions available.

MIDI Control Management

Local Control and Program Change

Managing local control and program change messages.

Control Change Management

Managing control change message reception and transmission.

Advanced MIDI Modes

Multi-Timbre and Split Modes

Using Multi-Timbre and Split modes for MIDI control.

Bulk Data Dump Function

Transmitting recorder memory data to external devices.

Troubleshooting

Common Issues and Solutions

Addresses common problems like no sound or pedal issues.

Optional Accessories

Available Options and Modules

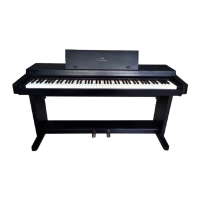
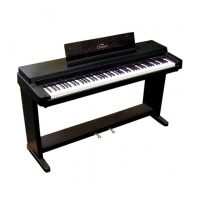
Lists optional accessories like benches and expander modules.

Keyboard Stand Assembly

Parts Identification and Preparation

Identifying and removing parts from the box.

Attaching Pedal Box and Side Panels

Connecting side panels to the pedal box.

Attaching Center Panel

Installing the center panel between the side panels.

Keyboard Stand Assembly Continued

Connecting Keyboard Unit to Stand

How to attach the main keyboard unit to the stand.

Connecting Pedal Cord to Unit

Routing and connecting the pedal cord.

Voltage Selector and Adjuster Setup

Setting voltage selector and adjusting stand height.

Keyboard Stand Assembly Steps

Installing Main Unit and Connecting Pedal Cord

Securing the keyboard and connecting the pedal cord.

Voltage Selector and Height Adjuster Configuration

Setting voltage and adjusting stand feet for stability.

Keyboard Stand Assembly Final Steps

Placing and Securing Keyboard Unit

Positioning and attaching the main unit to the stand.

Connecting Pedal Cord and Setting Voltage

Connecting pedal cord and setting voltage selector.

Pedal Height Adjustment

Fine-tuning pedal stability and effect.

MIDI Data Format Reference

MIDI Message Formats

Detailed format for MIDI note, control, and system exclusive messages.

Tempo and Panel Data Formats

Formats for tempo and panel data transmission.

CLP-311 Specifications

Technical specifications of the CLP-311 model.

Regulatory Compliance Notices

FCC Requirements for US Users

FCC compliance rules for US users regarding modifications and cables.

UK Mains Connection Safety

Safety instructions for connecting the mains lead in the UK.

Related product manuals