EasyManua.ls Logo

Yamaha Clavinova CLP-930 User Manual

Yamaha Clavinova CLP-930
66 pages
To Next Page IconTo Next Page
Page #1 background imageLoading...
Page #1 background image
IMPORTANT
Check your power supply
Make sure that your local AC
mains voltage matches the volt-
age specified on the name plate
on the bottom panel. In some ar-
eas a voltage selector may be
provided on the bottom panel of
the main keyboard unit near the
power cord. Make sure that the
voltage selector is set for the volt-
age in your area. The voltage se-
lector is set at 240V when the unit
is initially shipped. To change the
setting use a “minus” screwdriver
to rotate the selector dial so that
the correct voltage appears next
to the pointer on the panel.
WICHTIG
Überprüfung der Stromversorgung
Vergewissern Sie sich vor dem An-
schließen an das Stromnetz, daß die
örtliche Netzspannung den
Betriebsspannungswerten auf dem
Typenschild an der Unterseite des In-
struments entspricht. In bestimmten
Verkaufsgebieten ist das Instrument
mit einem Spannungswähler an der
Unterseite neben der Netzkabel-
durchführung ausgestattet. Falls vor-
handen, muß der Spannungswähler
auf die örtliche Netzspannung einge-
stellt werden. Der Spannungswähler
wurde werkseitig auf 240 V voreinge-
stellt. Zum Verstellen drehen Sie den
Spannungsregler mit einem Schlitz-
schraubendreher, bis der Zeiger auf
den korrekten Spannungswert weist.
IMPORTANT
Contrôler la source d’alimentation
Vérifiez que la tension spécifiée sur
le panneau inférieur correspond à
la tension du secteur. Dans certai-
nes régions, l’instrument peut être
équipé d’un sélecteur de tension si-
tué sur le panneau inférieur du cla-
vier à proximité du cordon d’alimen-
tation. Vérifiez que ce sélecteur est
bien réglé en fonction de la tension
secteur de votre région. Le sélec-
teur de tension est réglé sur 240 V
au départ d’usine. Pour modifier ce
réglage, utilisez un tournevis à lame
plate pour tourner le sélecteur afin
de mettre l’indication correspondant
à la tension de votre région vis à vis
du repère triangulaire situé sur le
panneau.
IMPORTANTE
Verifique la alimentación de
corriente
Asegúrese de que tensión de ali-
mentación de CA de su área corres-
ponde con la tensión especificada en
la placa de características del panel
inferior. En algunas zonas puede
haberse incorporado un selector de
tensión en el panel inferior de la
unidad del teclado principal, cerca del
cable de alimentación. Asegúrese de
que el selector de tensión esté
ajustado a la tensión de su área. El
selector de tensión se ajusta a 240V
cuando la unidad sale de fábrica. Para
cambiar el ajuste, emplee un destorni-
llador de cabeza “recta” para girar el
selector de modo que aparezca la
tensión correcta al lado del indicador
del panel.
ENGLISH
DEUTSCH
FRANÇAIS
ESPAÑOL

Table of Contents

Question and Answer IconNeed help?

Do you have a question about the Yamaha Clavinova CLP-930 and is the answer not in the manual?

Yamaha Clavinova CLP-930 Specifications

General IconGeneral
Number of Keys88
Touch SensitivityHard/Medium/Soft/Fixed
Polyphony64
EffectsReverb, Chorus
MetronomeYes
Keyboard TypeGraded Hammer Effect
Sound SourceAWM (Advanced Wave Memory)
Pedals3 (Damper, Soft, Sostenuto)
Speakers16cm x 2 + 5cm x 2
Included AccessoriesBench
Voices14 (10 Voices + 4 Variations)

Summary

Special Message Section

Product Safety Markings

Explains graphic symbols for safety warnings on the enclosure.

Precautions

Warning

Basic precautions to avoid serious injury, electrical shock, fire, and other hazards.

Caution

Precautions to avoid physical injury or damage to the instrument or property.

The Control Panel

Power and Volume Controls

How to turn the instrument on/off and adjust master volume.

The Control Panel Continued

Selecting & Playing Voices

Voice Selection and Playback

How to select voices, utilize touch response, and add effects.

The Split Mode (CLP-950)

The Pedals

Damper, Sostenuto, and Soft Pedals

Detailed functions of the three foot pedals.

Using the User Song Recorder

Recording Process

Steps for setting up and initiating recording of performances.

Using the User Song Recorder Continued

Starting, Stopping, and Managing Recordings

How to start, stop, change settings, and erase recorded tracks.

Playback and Synchro Start

Playing back recorded songs and using Synchro Start for playback.

The Function Mode Continued

Dual Mode Functions (F3)

Detailed settings for Dual Mode, including balance, detune, and octave shifts.

MIDI Functions Overview (F7/F8)

Introduction to MIDI functions and channel selection.

CLP-950 Split Mode Functions (F4)

The Function Mode Continued

Connecting to a Personal Computer

Macintosh Computer Connection

Instructions for connecting to Apple Macintosh computers.

Connecting to a Personal Computer Continued

IBM-PC/AT Computer Connection

Instructions for connecting to IBM-PC/AT computers.

USB Interface Connection

Connecting the Clavinova via a USB interface.

Factory Preset Recall

Troubleshooting

Sound and Pedal Issues

Troubleshooting no sound, pedal malfunction, or radio/TV interference.

Noise and Distortion Issues

Addressing speaker noise, mobile phone interference, and distorted external audio.

Voice Descriptions

MIDI Data Format

MIDI Data Format Continued

MIDI Implementation Chart

CLP-950: Keyboard Stand Assembly

CLP-950: Keyboard Stand Assembly Continued

Main Unit and Speaker/Pedal Cord Connection

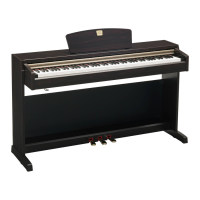
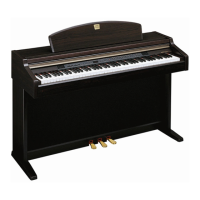
Attaching the main unit and connecting speaker/pedal cords.

CLP-950: Keyboard Stand Assembly Continued

Voltage Selector and Rear Panel Attachment

Setting the voltage selector and attaching the rear panel.

CLP-930: Keyboard Stand Assembly

CLP-930: Keyboard Stand Assembly Continued

Rear Panel and Main Unit Installation

Attaching the rear panel and installing the main unit onto the stand.

CLP-930: Keyboard Stand Assembly Continued

Pedal Cord, Voltage Selector, and Adjuster

Connecting pedal cord, setting voltage, and adjusting the stand's height adjuster.
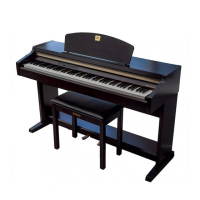
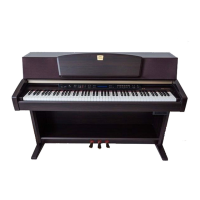
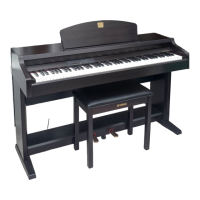
Specifications

IMPORTANT SAFETY INSTRUCTIONS

Related product manuals