EasyManua.ls Logo

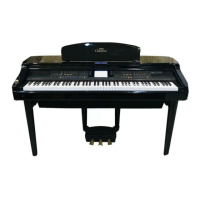
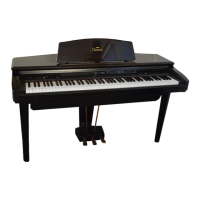
Yamaha Clavinova CVP-92 User Manual

Yamaha Clavinova CVP-92
148 pages
To Next Page IconTo Next Page
Page #1 background imageLoading...
Page #1 background image
IMPORTANT
Check Your Power Supply
Make sure that your local AC mains
voltage matches the voltage speci-
fied on the name plate on the bottom
panel. In some areas a voltage se-
lector may be provided on the bottom
panel of the main keyboard unit near
the power cord. Make sure that the
voltage selector is set for the voltage
in your area. The voltage selector is
set at 240V when the unit is initially
shipped. To change the setting use a
“minus” screwdriver to rotate the se-
lector dial so that the correct voltage
appears next to the pointer on the
panel.
WICHTIG
Netzspannung überprüfen
Vergewissern Sie sich vor dem An-
schließen an das Stromnetz, daß die
örtliche Netzspannung den Betriebs-
spannungswerten auf dem Typenschild
an der Unterseite des Instruments ent-
spricht. In bestimmten Verkaufs-
gebieten ist das Instrument mit einem
Spannungswähler an der Unterseite
neben der Netzkabeldurchführung aus-
gestattet. Falls vorhanden, muß der
Spannungswähler auf die örtliche Netz-
spannung eingestellt werden. Der
Spannungswähler wurde werkseitig auf
240 V voreingestellt. Zum Verstellen
drehen Sie den Spannungsregler mit
einem Schlitzschraubendreher, bis der
Zeiger auf den korrekten Spannungs-
wert weist
IMPORTANT
Vérifiez la source d’alimentation
Vérifiez que la tension spécifiée sur
le panneau arrière correspond à la
tension du secteur. Dans certaines
régions, l’instrument peut être équipé
d’un sélecteur de tension situé sur
le panneau inférieur du clavier à
proximité du cordon d’alimentation.
Vérifiez que ce sélecteur est bien
réglé en fonction de la tension sec-
teur de votre région. Le sélecteur de
tension est réglé sur 240 V au dé-
part d’usine. Pour modifier ce ré-
glage, utilisez un tournevis à lame
plate pour tourner le sélecteur afin
de mettre l’indication correspondant
à la tension de votre région vis à vis
du repère triangulaire situé sur le
panneau.
IMPORTANTE
Compruebe la alimentación de su área
Asegúrese de que tensión de alimen-
tación de CA de su área correspon-
de con la tensión especificada en la
placa de características del panel
inferior de la unidad del teclado prin-
cipal, cerca del cable de alimenta-
ción. Asegúrese de que el selector
de tensión esté ajustado a la tensión
de su área. El selector de tensión
se ajusta a 240V cuando la unidad
sale de fábrica. Para cambiar el ajus-
te, emplee un destornillador de ca-
beza “recta” para girar el selector de
modo que aparezca la tensión co-
rrecta al lado del indicador del pa-
nel.
ENGLISH
DEUTSCH
ESPAÑOL
FRANÇAIS
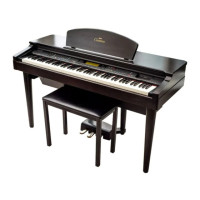
Table of Contents

Other manuals for Yamaha Clavinova CVP-92

Questions and Answers:

Yamaha Clavinova CVP-92 Specifications

General IconGeneral
TypeDigital Piano
Touch SensitivityYes
Styles100
DisplayLCD
Headphones2
AUX OutYes
AUX InYes
Foot ControllerYes
FootswitchYes
Sound SourceAWM (Advanced Wave Memory)
EffectsReverb, Chorus
RecorderYes
ConnectivityUSB to Host
MIDIIn/Out
Amplifiers20W
Keyboard88-key Graded Hammer
Polyphony32
Speakers12cm x 2

Summary

CHAPTER 1: Getting Ready

Features of the CVP-94/92

Overview of the main features and capabilities of the Yamaha Clavinova CVP-94/92 keyboard.

Setting Up the CVP-94/92

Instructions for setting up the instrument, including the music stand, key cover, power, and headphones.

CHAPTER 2: Help Mode and Demo

Using the Help Mode

Guide on how to access and use the instrument's built-in help system for explanations.

Demo Play

Instructions on how to activate and use the demonstration playback feature of the instrument.

CHAPTER 3: Voices

Selecting Voices

Detailed steps on how to select and choose from the instrument's extensive voice library.

Dual Mode

Instructions for playing two different voices simultaneously in a layered sound.

Split Mode

Guide on how to assign different voices to the left and right sections of the keyboard.

CHAPTER 4: Accompaniment Styles

Selecting Accompaniment Styles

Guide on choosing and applying various musical styles for automatic accompaniment.

Playing with the Auto Accompaniment

How to use the auto accompaniment feature with different chord input methods.

Custom Style

Guide on creating, recording, and saving original accompaniment styles.

CHAPTER 5: Registrations

Registrations (Registering/Recalling Panel Setups)

How to save and recall complete panel setups for quick access to preferred settings.

CHAPTER 6: Song Control

Song Playback

Instructions for playing back recorded songs and songs from disks.

Song Recording

Comprehensive guide to recording your own musical performances to floppy disks or internal memory.

CHAPTER 7: The Utility Functions

Keyboard

Settings related to keyboard performance, including tune, transpose, and touch response.

Disk

Operations related to disk management, including formatting, copying, deleting, and transforming files.

MIDI

Settings for MIDI communication, including channel transmission and local control.

Backup

How to set up backup for various parameter groups to retain settings.

CHAPTER 8: Others

The Connectors

Description of the various input and output terminals available on the instrument.

Connecting to a Personal Computer

Instructions for establishing a direct connection to Macintosh and IBM-PC/AT computers.

Related product manuals