25
※②
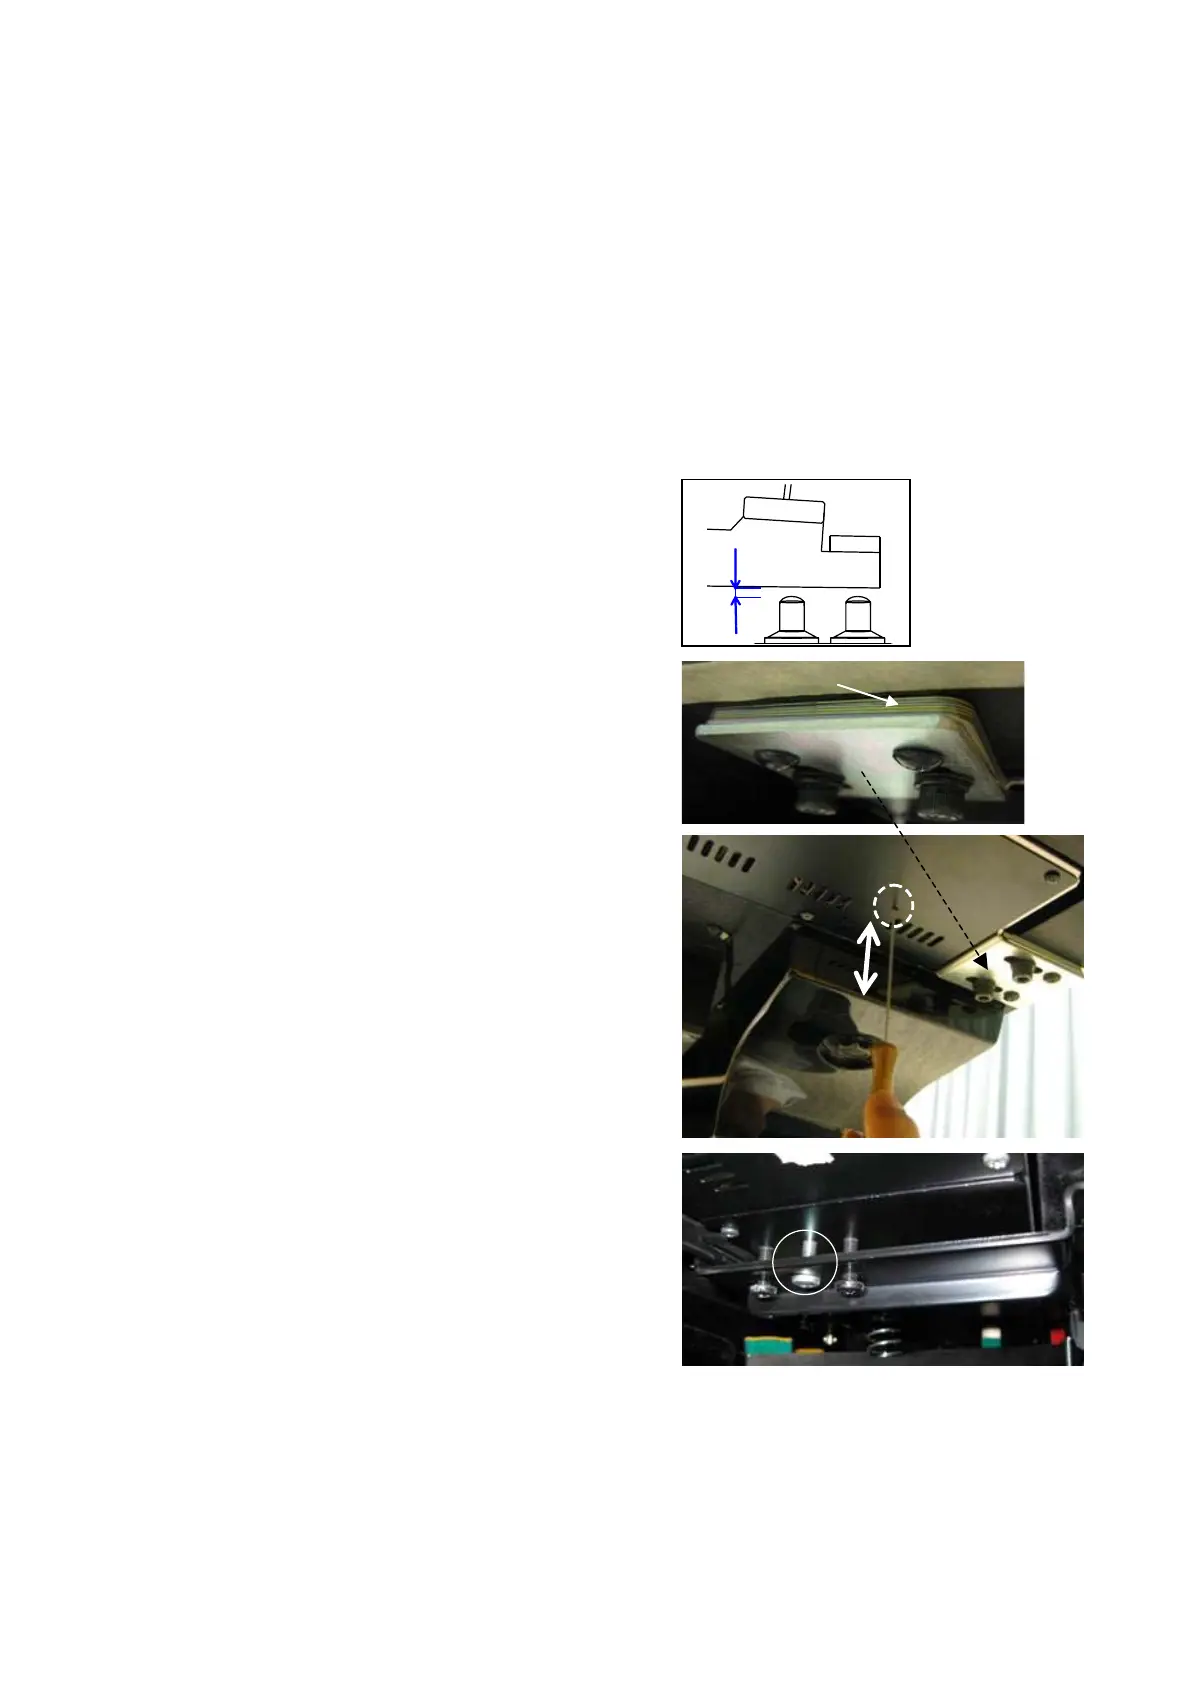
C. Adjusting the Key Drive Unit
When shipped from the factory, the key drive unit is adjusted to the following positions
and measurements.
Clearance does not require adjusting under normal circumstances. However, when the
unit is replaced, etc., the measurements should be adjusted to those given below.
Position: Use the three keys in the lower, upper, and middle registers of the key drive
unit to check the clearance between the lower side of the keyboard rear end and the
plunger head of the key drive unit.
Basic Measurement:
Clearance 0.5mm to 1.0mm (b).
Adjustment: Use the special spacers (※②) to
increase or decrease the lower and upper
register of the key drive unit.
Use the screw on the adjustment bracket to
adjust the middle register (※③).
Checking: In the manufacturing stage, after
a special spacer (1mm) is placed underneath
the plunger head, the action is installed, and
then checked to see how much hammers have
risen.
When the spacer is added but the hammer
does not rise
clearance is more than 1mm.
If the hammer rises more than 5mm
There is no clearance and they are in
contact.
In the field, a hole allows the plunger to be
pushed up from underneath the key drive
using a wire, etc.
You can feel for play when pushing up.
※③
b
Hole
27