8
EMX7 Owner’s Manual
Quick Start Guide
Getting Sound to the Speakers/
Connection Example
Rear Panel
(See page 14.)
2.3.
Passive
speakers
AC power
cord
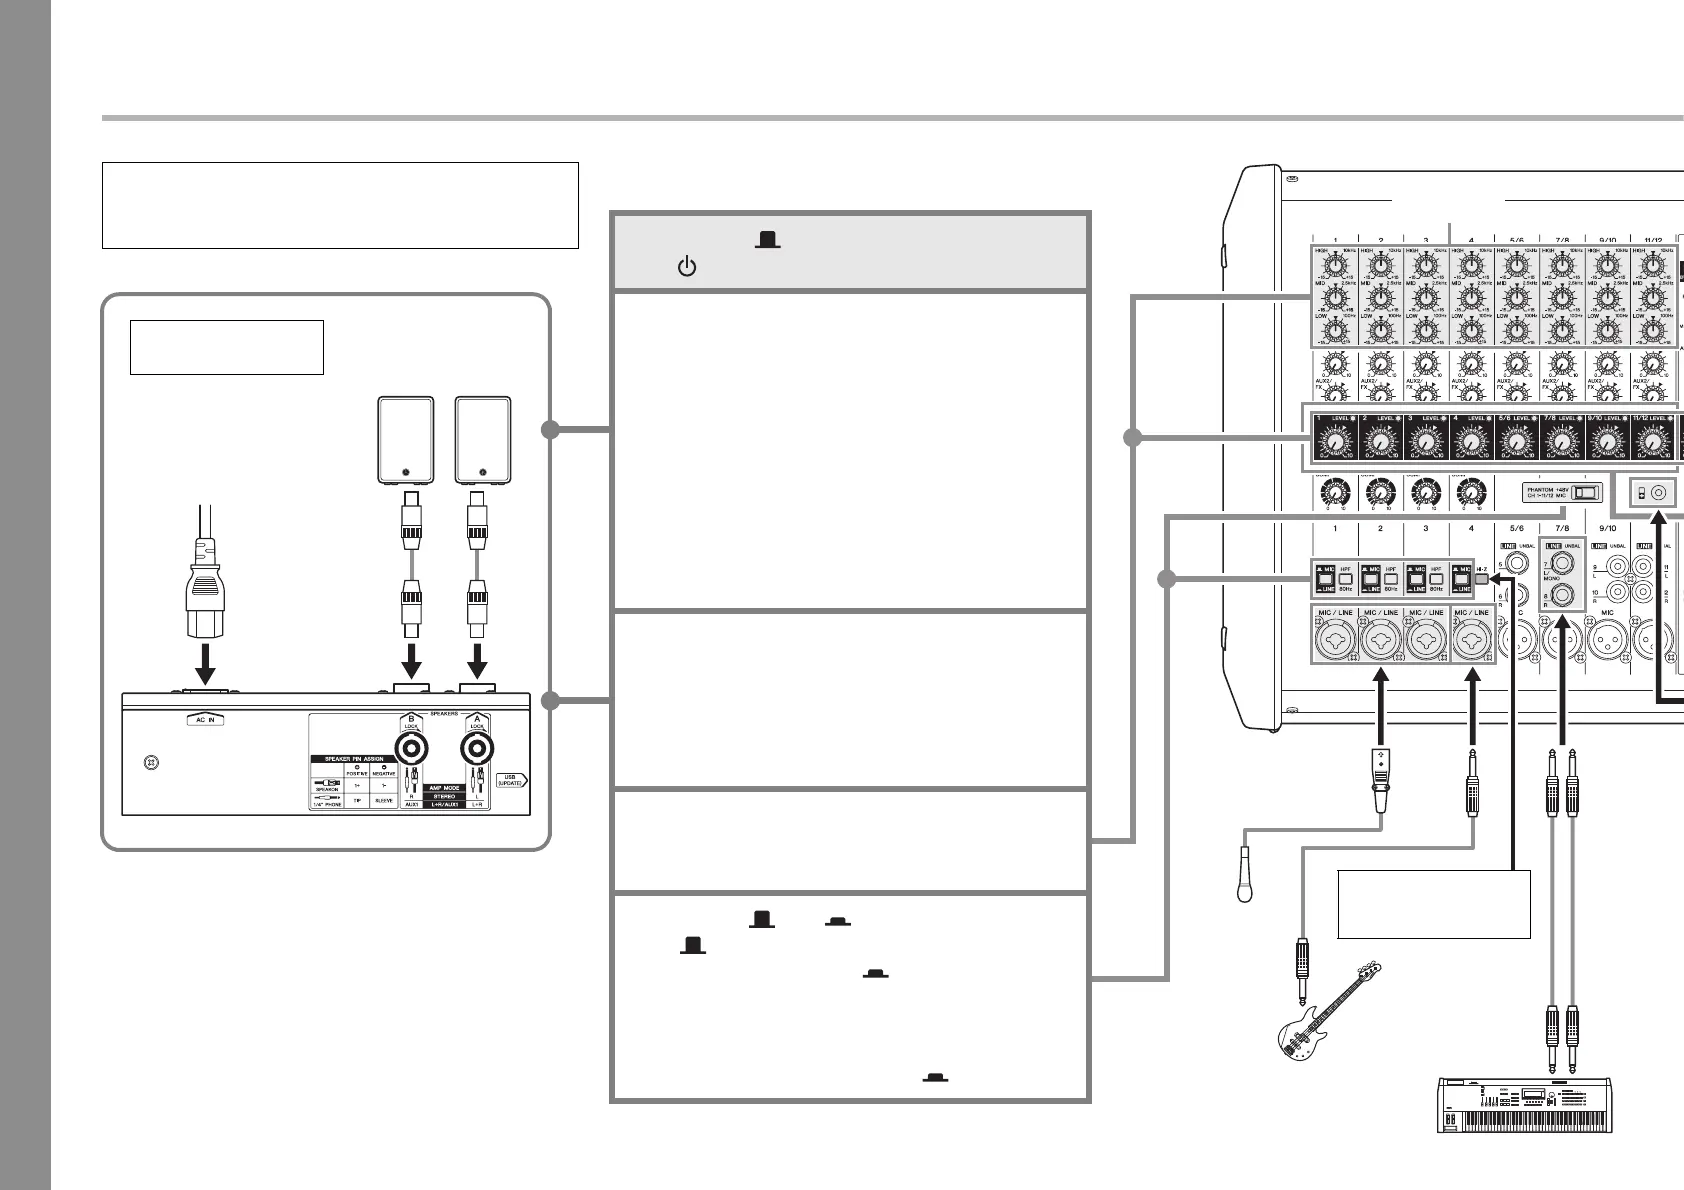
1. Turn off ( ) all switches (including the
[ ] (Power) switch).
2. Connect the devices you intend to use.
(The diagram to the right shows a connection example.
Also refer to the diagram to the left.)
Precautions for Connecting the Speakers
• Connect a single passive speaker (a speaker without an
internal amplifier) to the respective [SPEAKERS A/B]
jacks. Sending the signal from both [SPEAKERS A/B]
jacks to a single speaker may result in malfunction.
• Make sure to insert the speaker cables all the way inside
until secure.
• Use speaker cables that have insulated connector handles
(housing).
• For details about speaker connection, see page 22.
3. Connect the included power cord.
Connection order:
Mixer [AC IN] jack Power outlet
4. Turn all [LEVEL] controls and MASTER
[LEVEL] controls to “0” and set the equal-
izer controls to the [ ] position.
5. Set the [ MIC/ LINE] switch to the
“ MIC” position for microphone con-
nection, and to the “ LINE” position for
connection of an instrument or audio
device. When connecting a condenser
microphone, set the [PHANTOM +48V]
switch to the ON position ( ).
NOTE
When removing the power cord, do so in the reverse order.
(Power outlet Mixer [AC IN] jack)
Microphone
× 3
Electric bass guitar
Keyboard
Turn the [Hi-Z] switch on.
(See section i on page
12.)
Connection
Example
Equalizer
controls


 To Next Page