Starter motor
5-45
Removing the starter motor
Before removing the starter motor, make
sure to disconnect the negative battery ter-
minal.
1. Remove:
• Starter motor
See “Starter motor” (7-26).
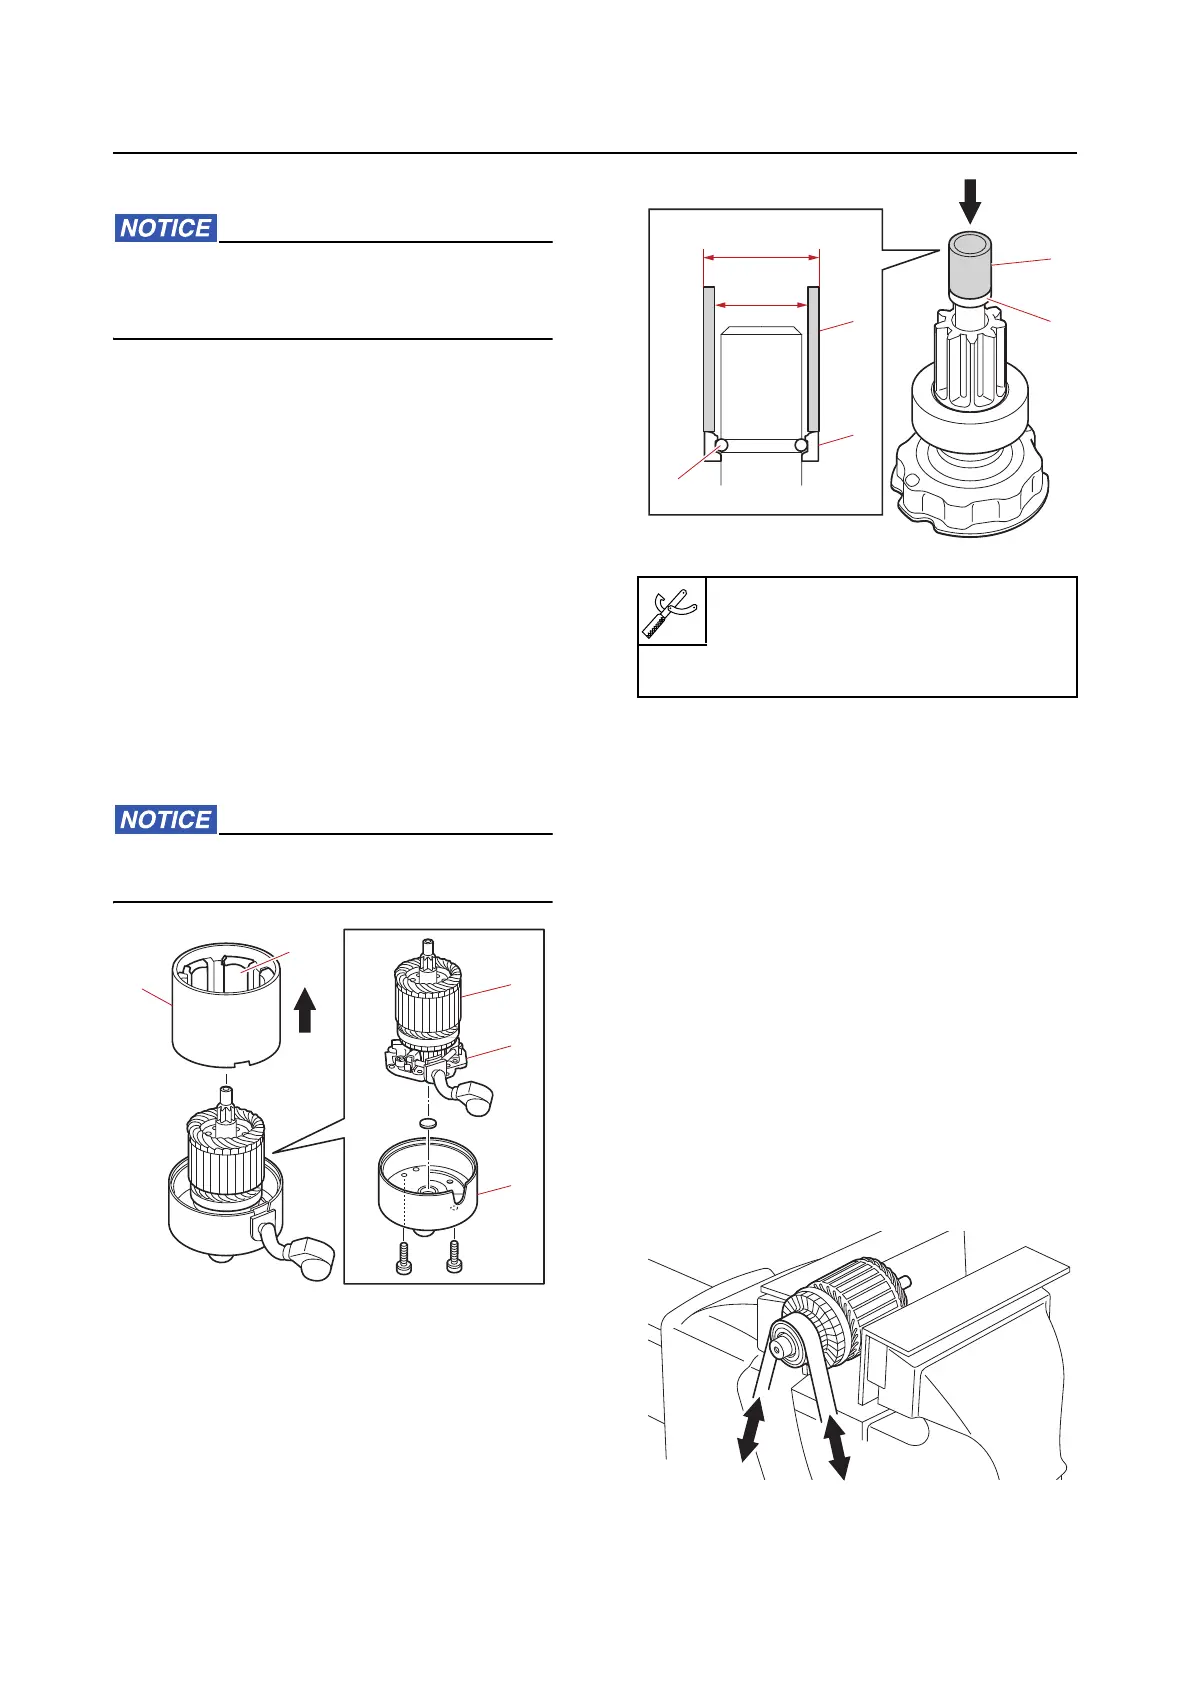
Disassembling the starter motor
1. Remove:
• Stator
• Bracket screw
• Bracket
• Armature
a. Remove the stator “1”.
b. Remove the armature “2” along with
the brush holder assembly “3” from
the bracket “4”.
Do not disassemble the stator. Do not re-
move the magnets “5” from it.
2. Remove:
• Pinion stopper
• Clip
a. Push the pinion stopper “1” down, and
then remove the clip “2”.
Checking the starter motor pinion
1. Check:
• Pinion teeth
Cracked/worn Replace the pinion.
2. Check:
• Pinion movement
Not smooth Replace.
a. Turn the pinion counterclockwise to
check that it operates smoothly and
turn it clockwise to check that it locks
in place.
Checking the armature (starter motor)
1. Check:
• Commutator
Dirty Clean using 600-grit sandpaper
and compressed air.
Pipe “3”
(commercially available)
“a”: 18.0 mm (0.71 in)
“b”: 13.0 mm (0.51 in)



 To Next Page