UB99
7
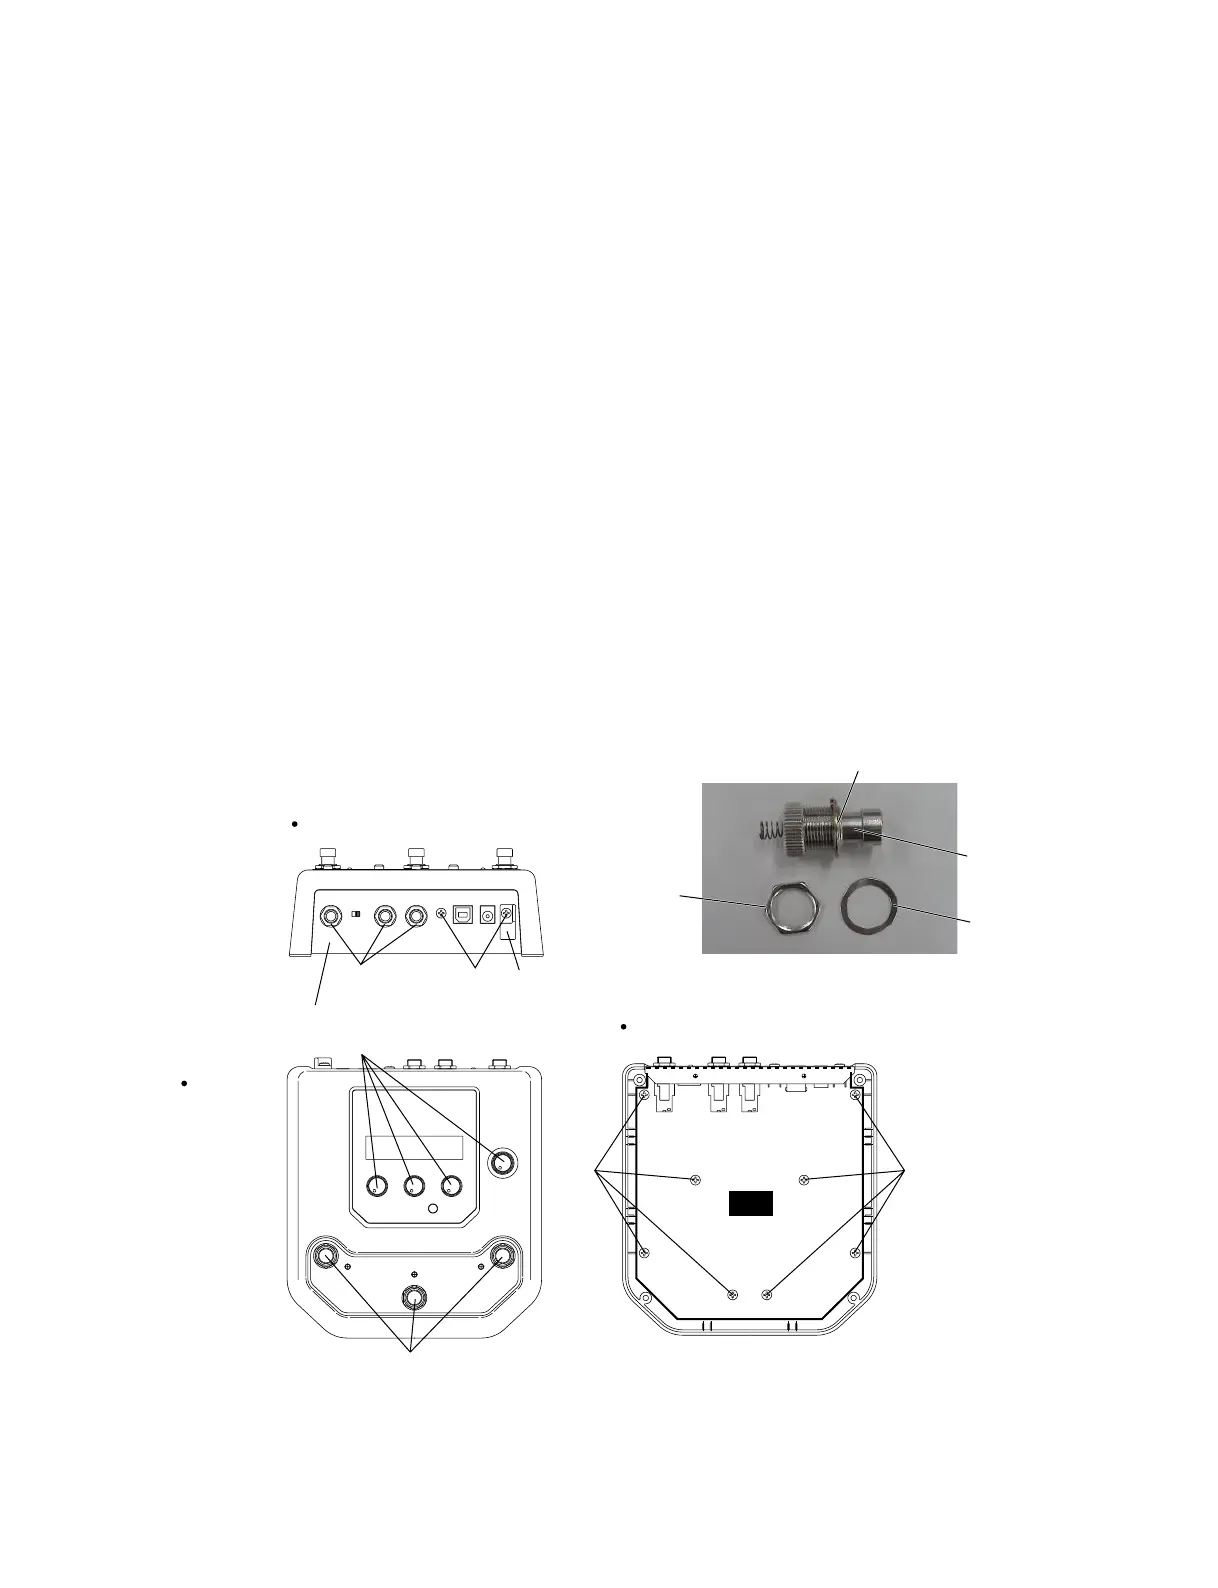
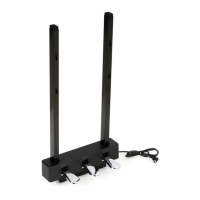
Fig.2
[110]
Knob(ノブ)
Rear panel(リアパネル)
Foot switch(フットスイッチ)
Hexagonal nut(特殊六角ナット)
Foot switch
(フットスイッチ)
Spring Washer
(バネ座金)
Hexagonal nut
(特殊六角ナット)
AC Cord Column
(ACコードコラム)
Flat Washer
(特殊平座金)
[120]
[130]
[90] [90]
DM
[90]: Bind Head Tapping Screw-P 3.0X8 MFZN2BL (EP630220)
[110]: Bind Head Screw 3.0X8 MFZN2BL (VA295800)
[120]: Hexagonal Nut 9.0 12X2 MFNI33 (LX200060)
[130]: Flat Washer 9.0X14X0.5 MFNI33 (VL802300)
Rear view
Top view
Bottom view
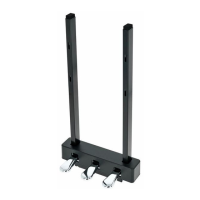
2. Rear Panel (Time required: About 3 minutes)
2-1. Remove the bottom case. (See Procedure 1.)
(Fig. 2)
2-2. Remove the two (2) screws marked [110], the three
(3) hexagonal nuts marked [120] and the three (3)
flat washers marked [130] from the rear panel. AC
cord column and the rear panel can then be removed.
(Fig. 2)
2. リアパネル(所要時間:約 3 分)
2-1. ボトムケースを外します。(1 項参照)
2-2. リアパネル面より[110]のネジ2 本と[120]の特殊六
角ナット 3 個、[130]の特殊平座金 3 個を外し、AC
コードコラムとリアパネルを外します。(図 2)
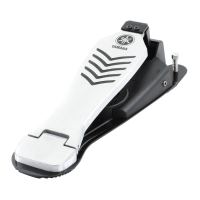
4. Foot Switch (Time required: About 3 minutes)
4-1. Remove the bottom case. (See Procedure 1.)
4-2. Remove the rear panel. (See Procedure 2.)
4-3. Remove the DM circuit board. (See Procedure 3.)
4-4. Remove the hexagonal nut of the foot switch. The foot
switch can then be removed. (Fig.2, Photo. 1)
4. フットスイッチ(所要時間:約 3 分)
4-1. ボトムケースを外します。(1 項参照)
4-2. リアパネルを外します。(2 項参照)
4-3. DM シートを外します。(3 項参照)
4-4. フットスイッチの特殊六角ナットを外し、フットス
イッチを外します。(図 2、写真 1)
Photo. 1
3. DM Circuit Board
(Time required: About 3 minutes)
3-1. Remove the bottom case. (See Procedure 1.)
3-2. Remove the rear panel. (See Procedure 2.)
3-3. Remove the four (4) knobs from the front panel.
3-4. Remove the eight (8) screws marked [90]. The DM
circuit board can then be removed. (Fig. 2)
(図2)
(+バインドPタイト)
(+バインド小ネジ)
(特殊六角ナット)
(特殊平座金)
(写真1)
3. DM シート(所要時間:約 3 分)
3-1. ボトムケースを外します。(1 項参照)
3-2. リアパネルを外します。(2 項参照)
3-3. フロントパネルのノブを 4 個外します。(図 2)
3-4. [90]のネジ8本を外し、DMシートを外します。(図2)