- 7 -
LIVE
CLUB
CLASSICAL
PRESET
ENTERTAIN
STEREO
MOVIE
STRAIGHT
2
3
SOURCE
RECEIVER
AV
AUDIO
SCENE
TV
TV VOL TV CH
MUTE
RETURN DISPLAY
TOP MENU
POP-UP/MENU
VOLUME
PROGRAM
1
PURE
DIRECT
MUTE
INPUT
4
4
31
2
75 6
V-AUX
431 2
USB
MULTI
NET
PHONO
TUNER
DOCK
4
REC
ON SCREEN
OPTION
ENTER
SIRIUS
HOLD TAG PRG SELECT
[ A ]
RECEIVER A
ENTER, Cursor
5
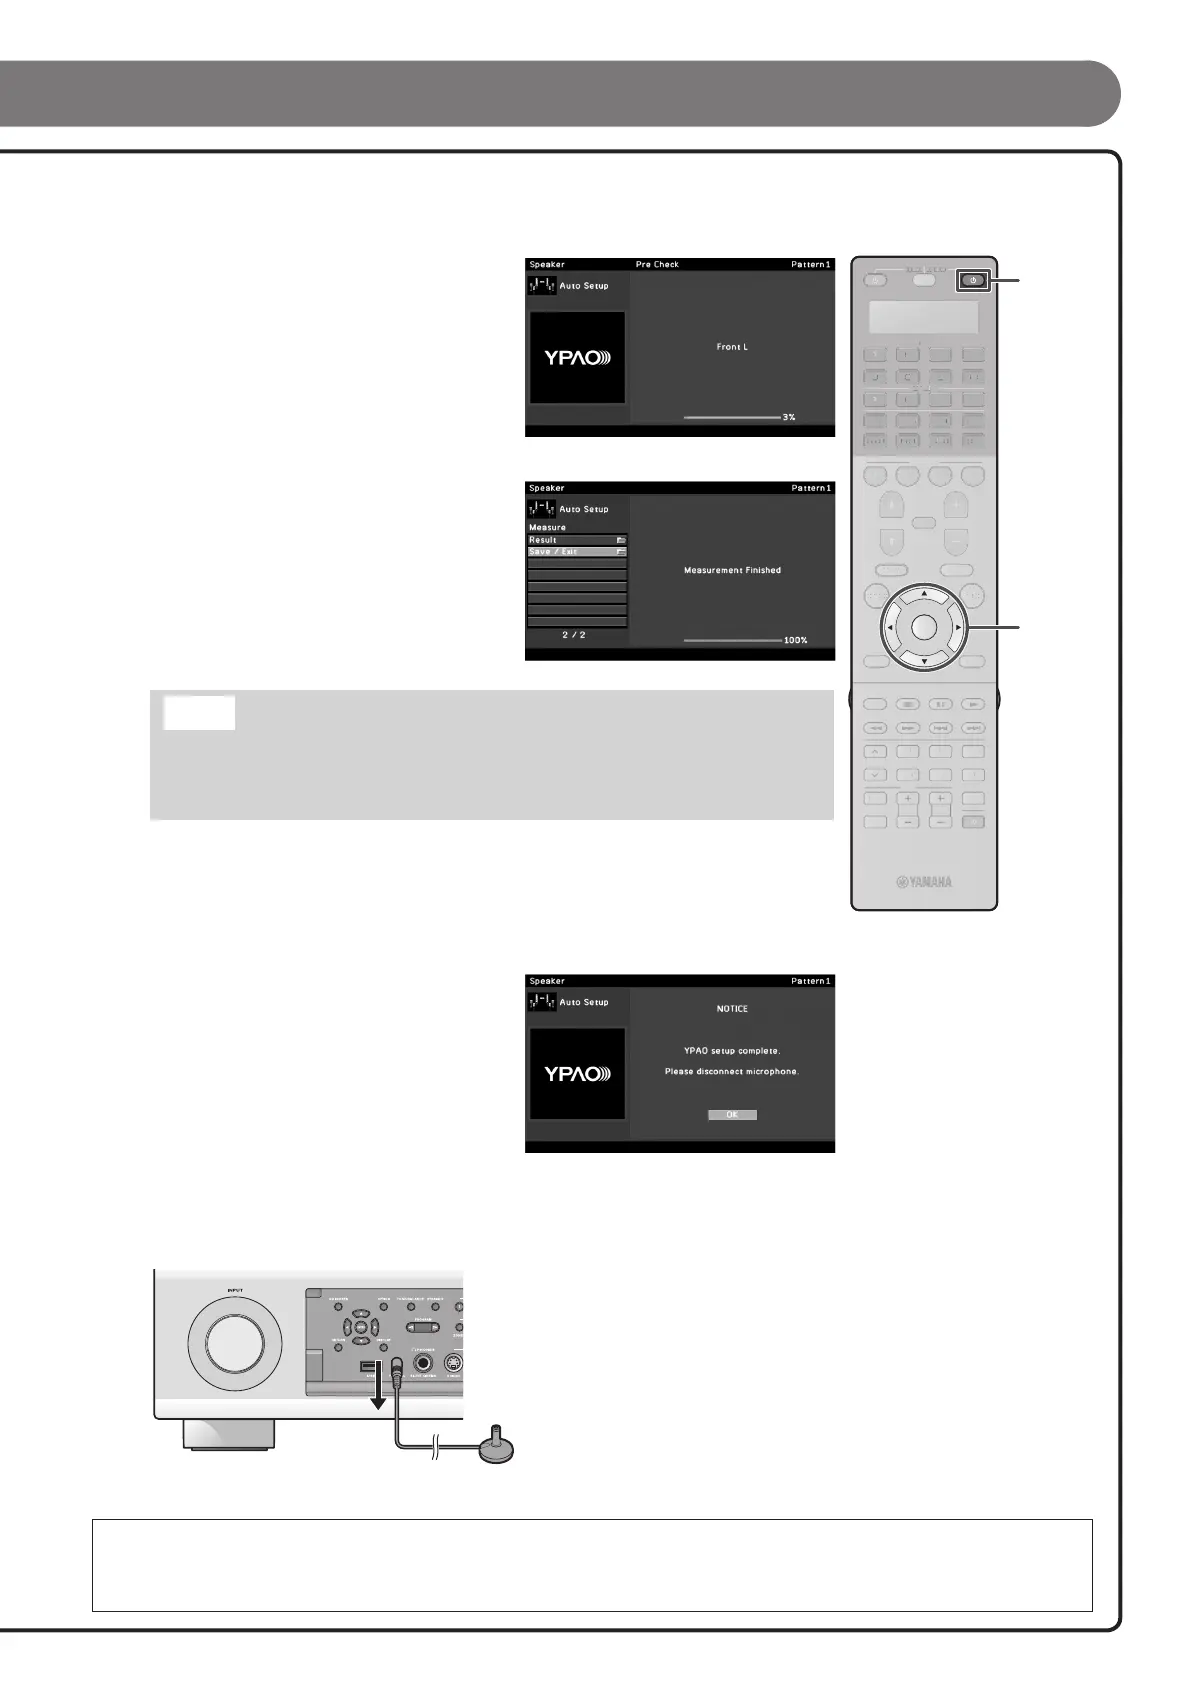
Use the cursor B/C to select the “Measure” and press ENTER to start
measurement.
When “Multi Position” is set to “Yes” (default), the
measurement of Multi Position continues. Refer to
“Setting up the speaker parameters automatically (YPAO)”
for details on “Multi Position” in the Owner’s Manual.
The display at right appears if measurement nishes
without any problems.
Result
Displays the results of automatic acoustics measurement.
For details, refer to “Reviewing the automatic setup
parameters” in the Owner’s Manual.
Save/Exit
Applies the result to the speaker setup and nishes the
automatic measurement.
Note
If a problem occurs, an error message or report is displayed either during or after acoustic
measurement. Refer to “When an error message is displayed during measurement,” or “When a
warning message is displayed after measurement” in the Owner’s Manual to resolve the problem
and measure acoustics with YPAO again.
6
Use the cursor B/C to select “Save/Exit” and press ENTER.
7
Use the cursor D/E to select “SAVE” and press ENTER.
When the display at right appears, the YPAO setup is
complete.
8
Press ENTER.
YPAO is terminated. Disconnect the YPAO microphone.
All the preparation is completed.
Enjoy the various functions provided by this unit. For details on the operations, refer to the Owner’s
Manual.

 Loading...