Tyros3
22
RUBBER CONTACT
13KEY
RUBBER CONTACT
12KEY A
RUBBER CONTACT
12KEY B
RUBBER CONTACT
12KEY C
RUBBER CONTACT
12KEY D
APPLICATION CIRCUIT BOARD
MK61L MK61L MK61L MKH-D MKH-D
REMOVE KEY STOPPER
L L, H L, H H 61
REMOVE KEY
C1-C2 C2-C3 C3-C4 C4-C5 C5-C6
Table 2
[250A] [250B]
[250B][250A]
EMKS-F
MK61L
MKH-D
MK61L
MKH-D
Connector
29-2 MK61L Circuit Board
(Time required: About 8 minutes)
29-2-1 Remove the keyboard assembly.
(See procedure 26.)
29-2-2 Remove the key stopper L and key stopper H. (Table 1,
Fig. 19)
29-2-3 Remove the keys and the key springs from C1 to C4.
(See procedure 27.)
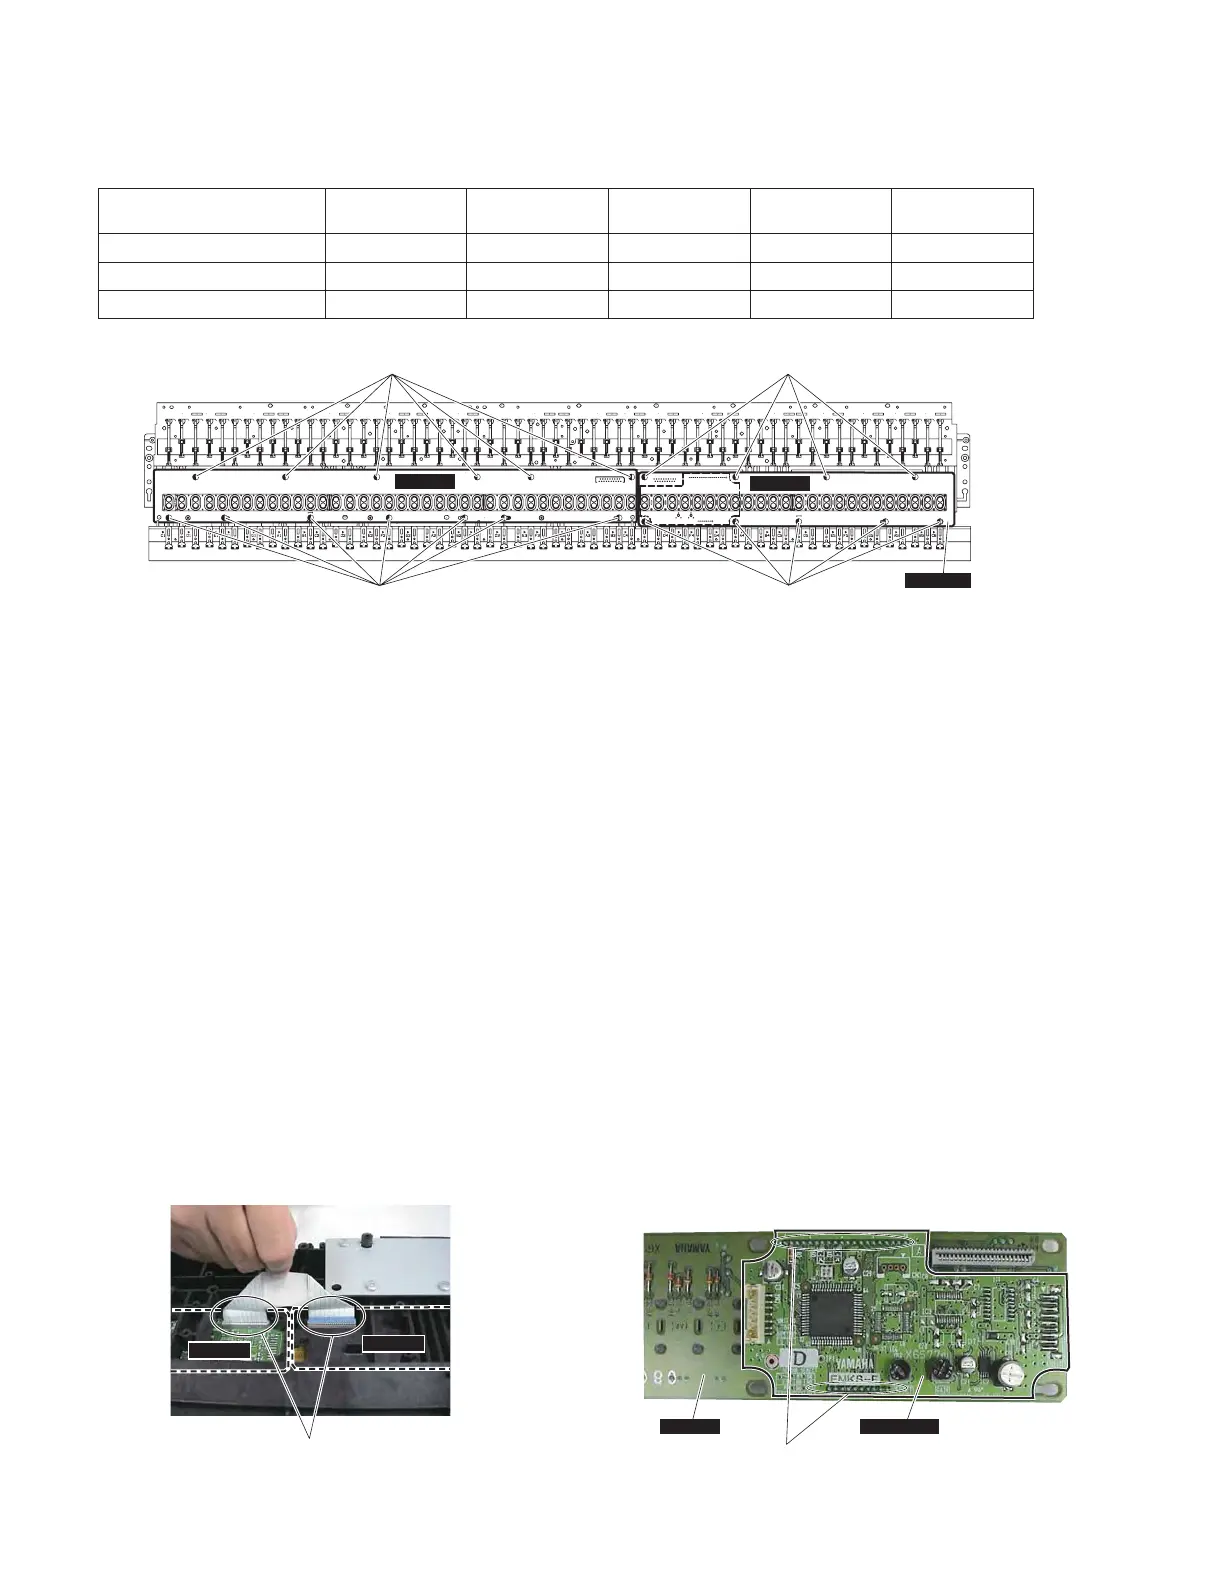
29-2-4 Remove the thirteen (13) screws marked [250A] and
disconnect the connector from the underside of the
keyboard unit. The MK61L circuit board can then be
removed. (Fig. 21, Photo 10)
* The rubber contacts are not parts of the MK61L
circuit board. When replacing the MK61L circuit
board, remove the rubber contacts from the circuit
board and install them to new circuit board.
29-3 MKH-D Circuit Board, EMKS-FD Circuit Board
(Time required: About 8 minutes)
29-3-1 Remove the keyboard assembly.
(See procedure 26.)
29-3-2 Remove the key stopper H and key stopper 61. (Table 1,
Fig. 19)
29-3-3 Remove the keys and key springs from C4 to C6.
(See procedure 27.)
29-3-4 Remove the nine (9) screws marked [250B] and
disconnect the connectors from the underside of the
keyboard. The MKH-D circuit board can then be
removed. (Fig. 21, Photo 10)
* The EMKS-FD circuit board is a part of the MKH-D
circuit board and is soldered to the MKH-D circuit
board at connectors. (Photo 11)
* The rubber contacts are not parts of the MKC circuit
board. When replacing the MKC circuit board,
remove the rubber contacts from the circuit board
and install them to new circuit board.
Fig.21
[250]:BINDHEADTAPPINGSCREW-P3.0X8MFZN2B3(WF266600)
Photo10 Photo11
Soldered
MKH-D EMKS-FD


 To Next Page