Periodic maintenance and adjustment
7-32
7
3. Fully loosen the locknut and the
drive chain slack adjusting nut on
both ends of the swingarm.
4. Loosen the axle nut.
5. Lift the rear wheel off the ground
according to the procedure on
page 7-29.
6. Remove the axle nut, washer and
drive chain puller on the left side,
and then pull the wheel axle out
together with the drive chain puller
from the right side.
7. Push the wheel forward, and then
remove the drive chain from the
rear sprocket.
The drive chain does not need to be
disassembled in order to remove and
install the wheel.
8. Remove the wheel.
To install the rear wheel
1. Install the drive chain onto the rear
sprocket.
2. Lift the rear wheel off the ground,
and then install the drive chain
puller and the wheel by inserting
the wheel axle from the right side.
3. Install the drive chain puller, wash-
er and axle nut.
4. Lower the rear wheel so that it is
on the ground, and then put the
sidestand down.
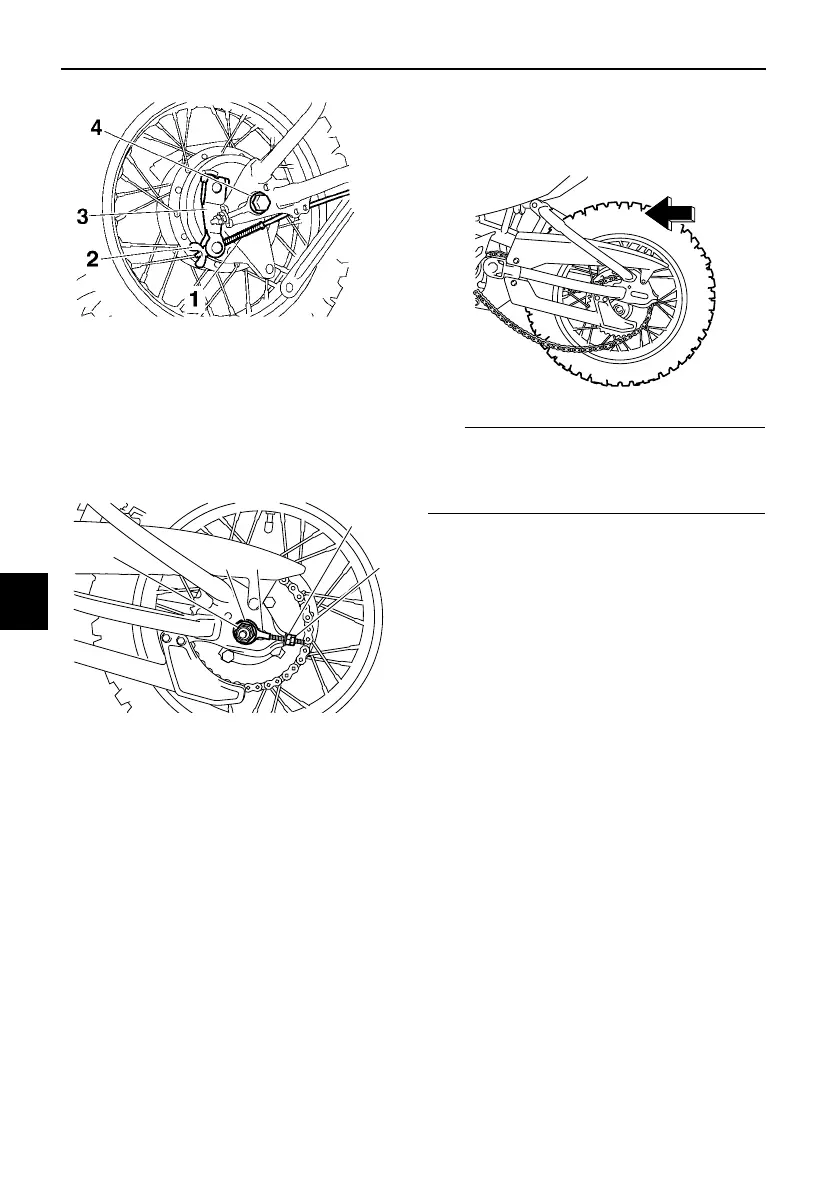
5. Install the brake rod onto the
brake camshaft lever, and then in-
stall the brake pedal free play ad-
justing nut onto the brake rod.
6. Connect the brake torque rod to
the brake shoe plate by installing
the bolt and nut, and then tighten
the nut to the specified torque.
1. Brake rod
2. Brake pedal free play adjusting nut
3. Brake camshaft lever
4. Wheel axle
1. Axle nut
2. Washer
3. Drive chain puller
4. Drive chain slack adjusting nut
5. Locknut
UB5186E0.book Page 32 Wednesday, April 22, 2020 9:11 AM
 Loading...