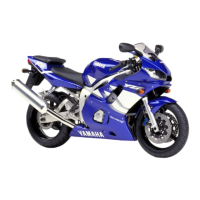
Do you have a question about the Yamaha YZF-R6 L 2000 and is the answer not in the manual?
Disclaimers and assumptions regarding mechanic's knowledge for repairs.
Highlights key information symbols like WARNING and CAUTION.
Failure to follow WARNING instructions could result in severe injury or death.
CAUTION indicates special precautions to avoid damage to the motorcycle.
A NOTE provides key information to make procedures easier or clearer.
Symbols 1 to 9 indicate the subject of each chapter for quick reference.
Symbols 10 to 17 indicate specific service actions or information types.
Symbols 18 to 23 indicate the types of lubricants and lubrication points in exploded diagrams.
Symbols 24 to 25 indicate specific part conditions or usage requirements.
Piston dimensions (B x T) and end gap specifications for the engine.
Crankshaft-journal-to-crankshaft-journal-bearing clearance specifications.
Carburetor ID mark, jet needle, and pilot screw turns out specifications.
Ignition timing specification at a specified RPM.
Primary and secondary coil resistance specifications for ignition coils.
Manufacturer details for oil level switch and fuel pump relay.
Routing instructions for throttle cables.
Routing instructions for the clutch cable.
Routing instructions for the left handlebar switch lead.
Routing instructions for the starter cable.
Routing instructions for the main switch lead.
Routing instructions for the front brake hose.
Routing instructions for the right handlebar switch lead.
Routing instructions for the horn lead.
Routing instructions for fuel pump lead and thermo switch lead.
Routing the clutch cable through the frame guide.
Routing coolant hoses under the heat protector plate.
Routing the rear brake switch lead to the footrest bracket.
Routing the throttle cable through the radiator bracket.
Fastening wireharness, radiator hose, and fan motor lead.
Routing fuel tank hoses and sender lead between components.
Routing rear turn signal light leads through the rear fender.
Routing fuel tank hoses through the reservoir tank holder.
Fastening sidestand switch lead and oil level sensor lead.
Routing reservoir tank breather hose, oil level switch, and sidestand switch leads.
Routing the starter cable between wireharness and switch lead.
Routing the clutch cable through the guide.
Fastening handlebar switch leads and main switch lead.
Routing ignition coil lead and handlebar switch leads.
Routing radiator hoses under the heat protector.
Fastening multiple electrical leads and wires together.
Routing leads to the carburetor.
Routing wireharness and neutral switch lead.
Routing starter motor lead under wireharness and battery negative lead.
Positioning rear turn signal and taillight connectors.
Installing the seatlock cable to the frame bracket.
Fastening starter relay lead and battery negative lead.
Fastening starter cable and wireharness to the frame.
Routing the headlight lead.
Routing starter cable over the heat protector.
Routing the temperature lead over the heat protector.
Routing reservoir tank breather hose over the heat protector.
Routing fuel tank hoses and sender lead.
Routing reservoir tank breather hose above wireharness.
Measure the clutch cable free play at the end of the clutch lever.
Adjust clutch cable free play using the adjusting bolt on the handlebar.
Adjust clutch cable free play using the adjusting nut on the engine side.
Procedure for removing and installing the drive sprocket.
General procedures related to engine overhaul.
Steps for removing the engine from the motorcycle.
Install engine mounting bolts, collars, and nuts, ensuring proper lubrication.
Tighten various engine mounting bolts to specified torque values.
Install the drive sprocket and its cover according to the manual.
Install the shift arm, ensuring correct alignment with the shift shaft.
Align and install the pickup coil rotor onto the crankshaft sprocket.
Apply sealant to the pickup coil lead grommet to prevent leaks.
Install the pickup coil cover, aligning pins and tightening bolts in stages.
Install the clutch cable holder and clutch cable.
Steps for removing the rear shock absorber assembly from the motorcycle.
Ensure the motorcycle is securely supported and the rear wheel is elevated.
Remove the rear wheel and the lower rear shock absorber assembly bolt.
Remove the upper rear shock absorber assembly bolt and the assembly itself.
Steps for removing the swingarm and drive chain.
Procedure for adjusting the pivot shaft adjust bolt.
Installation of drive chain, dust cover, oil seal, bushes, shim, guide, and bearings.
Lubricate bearings, spacers, dust covers, and pivot shaft before installation.
Install swingarm, pivot shaft, washer, and pivot shaft adjust bolt.
Install the rear shock absorber assembly and the rear wheel.
Adjust the drive chain slack to the specified range of 40-50 mm.
Explains the color codes used in the European wiring diagram.
List of numbered electrical components shown in the EUR wiring diagram.
Explains the color codes used in the Australian wiring diagram.
List of numbered electrical components shown in the AUS wiring diagram.
| Bore x Stroke | 65.5 mm x 44.5 mm |
|---|---|
| Compression Ratio | 12.4:1 |
| Ignition | Digital TCI |
| Transmission | 6-speed |
| Front Suspension | Telescopic fork |
| Front Tire | 120/60-ZR17 |
| Rear Tire | 180/55-ZR17 |
| Fuel Capacity | 17 liters |
| Seat Height | 820 mm |
| Frame Type | Aluminum Deltabox |
| Lubrication | Wet sump |
| Clutch Type | Wet, multiple-disc |
| Final Drive | Chain |
| Overall Width | 695 mm |
| Rear Suspension | Swingarm |
| Front Brakes | Dual hydraulic disc |
| Rear Brakes | Single disc |
| Overall Length | 2, 040 mm |
| Engine Type | Liquid-cooled, 4-stroke, DOHC, 4-valve |
| Wet Weight | 200 kg |
| Wheelbase | 1380 mm |