COOLING SYSTEM
7-14
BY Service Manual
Repair
11. Check level of power steering fluid or marine
gear oil and add if necessary.
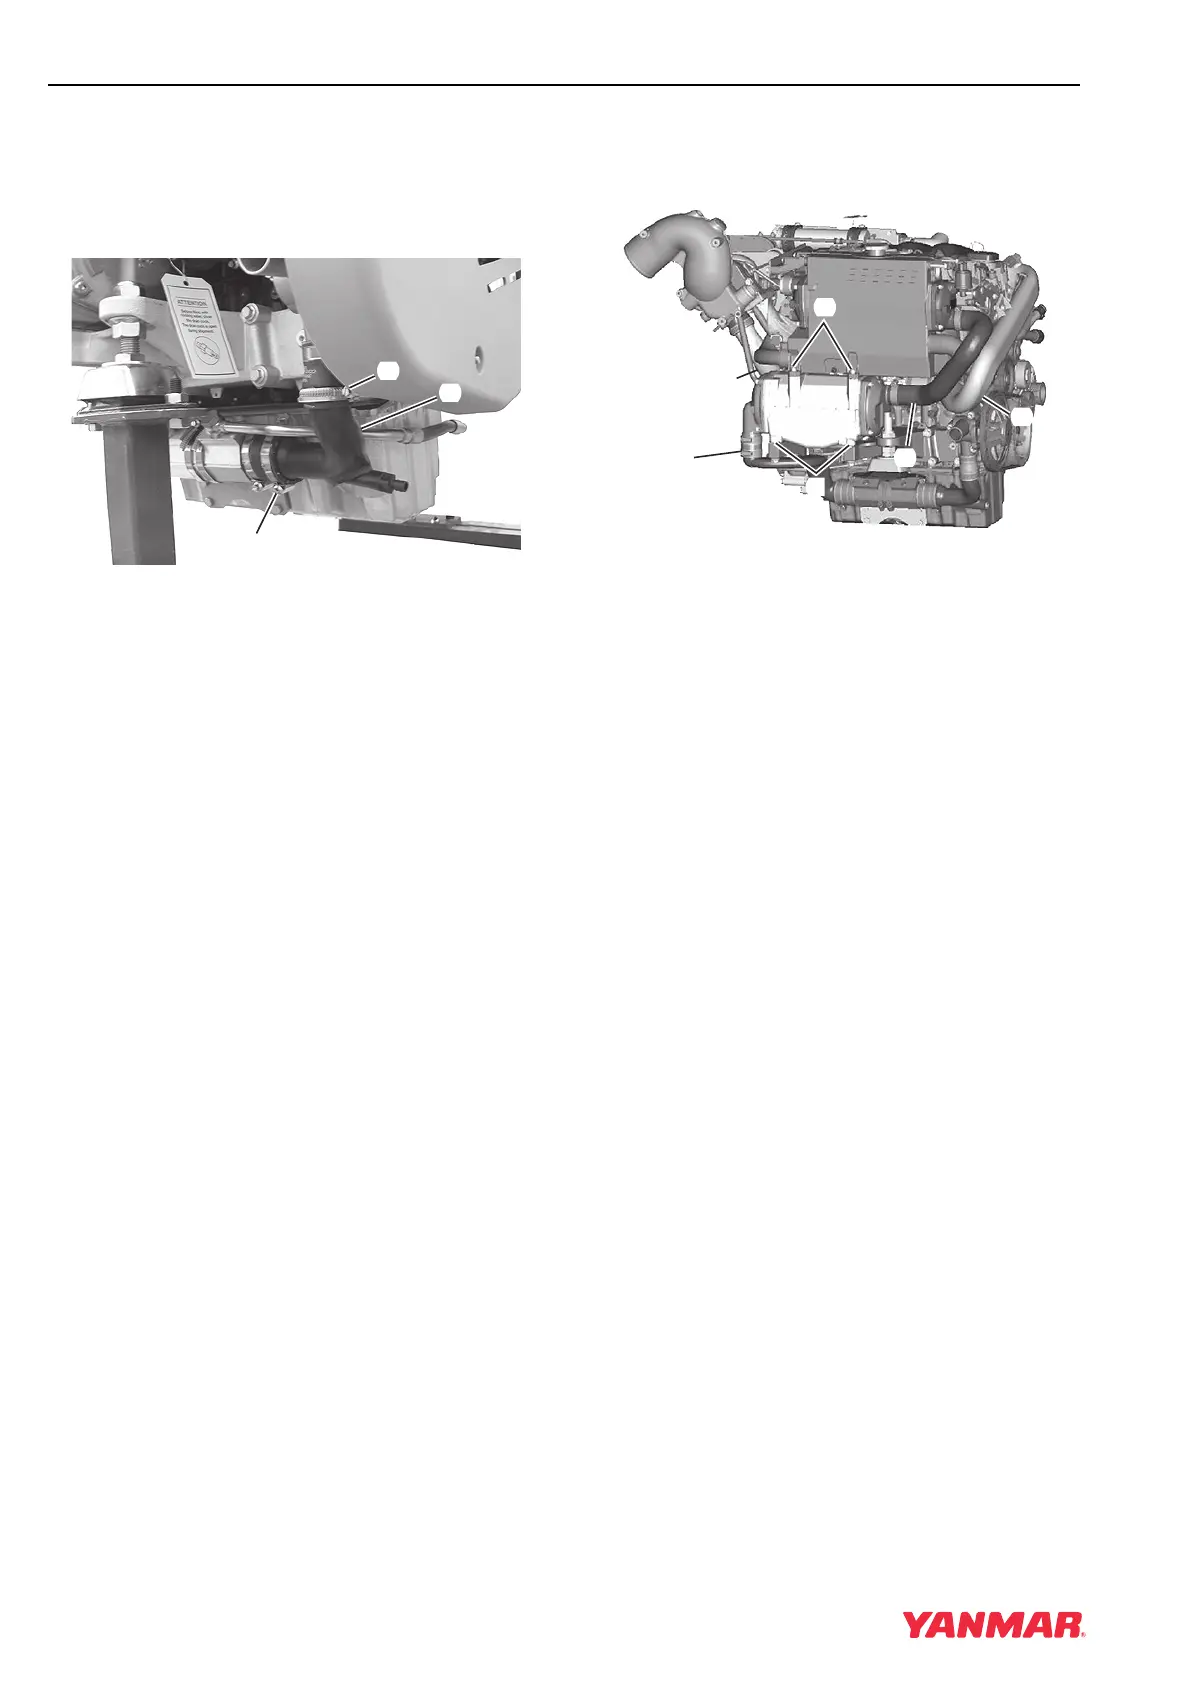
Inspect and Clean Hydraulic Oil
Cooler
Figure 7-11
1. Loosen clamps (Figure 7-11, (1)) and remove
seawater pipe (Figure 7-11, (2)).
2. Remove any loose debris from inside cooler.
3. Visually inspect cooling tubes for evidence of
debris, corrosion, or damage.
If the cooling tubes are plugged, remove cooler
and thoroughly backflush with water. NEVER
clean using a wooden dowel or wire brush.
Damage or inability to clean sufficiently will
require repair by a radiator shop or replacement
of oil cooler.
4. Install seawater pipe (Figure 7-11, (2)) and
tighten clamps (Figure 7-11, (1)).
5. Start engine and check for water leaks.
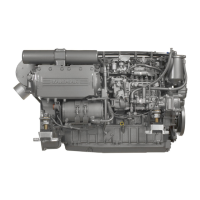
Remove and Install Charge Air
Cooler
Figure 7-12
1. Drain seawater system. See Drain Seawater
Cooling System on page 7-10.
2. Disconnect seawater pipe between hydraulic oil
cooler and charge air cooler (Figure 7-12, (1)).
3. Disconnect seawater pipe between charge air
cooler and heat exchanger (Figure 7-12, (2)).
4. Disconnect pipe between charge air cooler and
turbocharger (Figure 7-12, (3)).
5. Remove pipe between charge air cooler and
intake manifold (Figure 7-12, (4)).
6. Remove two bolts (Figure 7-12, (5)) that attach
heat exchanger to charge air cooler.
7. Remove four lower bolts (Figure 7-12, (6)) that
attach charge air cooler. Remove charge air
cooler assembly from engine.
8. Disassemble and repair as necessary. See
Disassemble and Assemble Charge Air Cooler
on page 7-15.
9. Install charge air cooler and start all bolts.
10. Tighten mounting bolts to 46 N·m (40 ft-lb).
11. Install pipe between intake manifold and charge
air cooler.
12. Connect seawater pipes to each end of charge
air cooler.
0003655A
(1)
(
1
)
(
2
)
0003659D
(1)
(
2
)
(3)
(
4
)
(
5
)
(
6
)