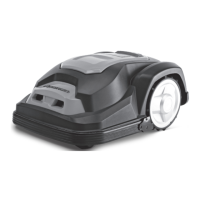
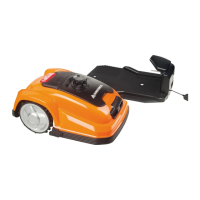
This document describes the SA900B Robotic Mower, an autonomous robot designed for cutting lawn grass. It operates within a designated boundary area, following a programmed schedule, and returns to its docking station as needed. The mower uses three sharp blades to ensure clean cuts with minimal damage to plants, leaving behind tiny grass snippets as natural fertilizer.
Technical Specifications:
- Model: SA900B
- Max cutting area: 900 m²
- Battery: Lithium-Ion battery, 28 V/2.9 Ah, 79.8Wh (part numbers: 862618 / 862622 / 1990608 18650-29E)
- Switching power supply: FY3201500S1 / FY3201500S2/FY3201500S3 (Input 100-240V AC, 50/60 Hz; Output 32 V DC, 1.5A)
- Typical mow time on one charge: 60 min
- Rated voltage: 28 V DC
- Rated power: 50 W
- No load cutting speed: 3500 min⁻¹
- Cutting width: 18 cm
- Blade model / part number: 846210
- Cutting height adjustment: 5 settings
- Cutting height, min-max: 20 mm-60 mm
- Wireless Frequency Range/Power: 2.4-2.4835 GHz/<0 dBm
- Charging time: 60 min
- Degree of protection (Robotic Mower): IP 24
- Degree of protection (Switching power supply): IP 67, PLUG IP 44
- Robotic Mower weight: 8.5 Kg
- Docking station weight: 2 Kg
- Frequency Band: 0-148.5 kHz
- Magnetic Field Strength: 72 dBμA/m
- Gross weight: 16.5 kg
- Measured sound pressure level (Lpa): 53 dB, K=3 dB
- Measured power pressure (Lwa): 64 dB, K=3 dB
Usage Features:
The Robotic Mower operates by choosing its working direction randomly, ensuring complete coverage of the lawn within the defined boundary. The work area is established by installing a supplied boundary wire, which must form a complete loop. When the mower detects the boundary wire, it stops, moves backward, and continues mowing in a different direction. Obstacles like garden ponds, trees, garden furniture, or flower beds can also be protected using the boundary wire. If the mower encounters an obstacle (person, tree, pet, etc.), it will stop, move backward, and change direction.
- Installation Guide: A draft of the lawn, including obstacles and their protection, is recommended to facilitate docking station placement and boundary wire routing. Tools like a hammer, wire cutters, pliers, or scissors may be needed.
- Cutting Limitations: The mower has collision sensors that detect rigid obstacles higher than 100 mm. Upon detection, it stops, reverses, and changes direction. Using the boundary wire for long-term protection of obstacles is recommended.
- Trees: Trees are treated as common obstacles. If tree roots are exposed and lower than 100mm, this area should be excluded with boundary wire to protect the roots, blades, or rear wheels.
- Stones: Small rocks and stones (less than 100 mm high) with round or sloped edges should be removed from the lawn, as the mower might attempt to climb them instead of recognizing them as barriers, potentially causing damage to the blades or requiring user intervention.
- Slopes: The mower can navigate slopes up to a maximum of 40% incline or decline. The boundary wire should not run perpendicular to a gradient greater than 10°. A corridor of at least 2m should be maintained between a 10° or steeper slope and the boundary wire to prevent overshooting, especially on wet ground.
- Paths, Driveways, and Roads: If an elevated driveway crosses the lawn, it should be kept outside the boundary wire, with a safety distance of 40 cm. If the driveway and lawn are at the same level, the boundary wire can create a corridor for the mower to cross.
- Uneven Lawn Surfaces: Uneven areas may cause blades to touch the ground. Leveling the lawn or excluding uneven areas with boundary wire is recommended.
- Flowerbeds: Boundary wire can exclude flowerbeds. Two options for parallel wires around a flowerbed:
- Distance > 10 cm: Mower recognizes the wire as an obstacle and "bounces" off it.
- Distance < 5 mm (no crossing): Mower does not recognize the wires and travels over them. An obstacle (rock, pole) must be placed on the boundary wire around the flowerbed, surrounded by a flat 1m x 1m area without slopes, to allow the mower to exit the circle.
- Ponds and Pools: Pools must be excluded from the cutting area using boundary wire. A fence around the pool is recommended for added safety.
- Boundary Corridor: If a corridor is created within the working area, it should be at least 2 m wide and a maximum of 8 m long. Narrower or longer corridors may prevent navigation.
- Docking Station Placement: The docking station (5) must be placed on a flat, ground-level surface. Allow 2m of straight wire in front and 1m to the side facing the cutting area for smooth return. A shaded location is beneficial for battery charging. Avoid placing near ponds, pools, or stairs. Protection from elements (e.g., robot port or garage) is recommended.
- Boundary Wire Installation: Mow the lawn to 60 mm or less before laying the boundary wire. Burying the wire is optional; closer to the ground reduces tripping/damage risk. The wire will be covered by grass quickly. The voltage is 32 V, posing no electric shock risk. Use fixing pegs (15) to mark the path, ensuring a 40 cm distance from obstacles. Pegs should be about 80 cm apart on straight lines, less on tight curves, with the hook and wire slit facing the outside of the boundary. Do not drive pegs fully in initially. Avoid right angles; use two 45° angles instead.
- Connecting to Docking Station: Use waterproof boundary wire connectors (17). Strip 10-15 mm insulation from each end of the boundary wire and twist the threads. Place the docking station so the wire runs lengthwise under its middle. Connect one end to the left (black) "F" connector and the other to the right (red) "B" connector.
- Testing Installation: After connecting "F" and "B" connectors, fix the docking station with pegs. Ensure an even surface, 2m straight boundary in front, <5% inclination, and surplus wire tucked under the station. Connect the extension cable (14) to the charging base and then to the mains. A blue LED on the docking station should light up. If not, check connections. Place the mower in the working area, a few meters from the station. Set the main power switch (11) to "ON". The mower will self-test. Press the STOP button (2) to open the cover, activate the "Home" button, and close the cover. The mower should return to the docking station, following the boundary wire anti-clockwise. A flashing symbol indicates correct charging.
- Working Time Setting: Default is 7 days/week. Daily working time can be adjusted using buttons (4H, 6H, 8H, 10H) based on recommended times (e.g., 3 hours for 300m², 9 hours for 900m²).
- Signal Setting: Two boundary signals (S1 or S2) are available to avoid interference with other robotic mowers. Ensure the same signal is selected for both the docking station and the mower using the control at the back of the docking station.
- Home & Start Button: Pressing START and closing the cover initiates cutting. The mower returns to the docking station after the programmed time. It will restart at the same time the next day. Pressing HOME and closing the lid sends the mower back for recharge; this does not stop current programming.
- STOP Button: Pressing STOP interrupts the automatic schedule, opens the cover, and closing it without pressing other buttons confirms interruption with five beeps.
- Edge Cutting: The first cutting action each day is trimming the lawn edge, following the boundary wire clockwise. This only engages when launching from the charging station.
- Charging Information: The mower returns to the docking station when the HOME button is pressed, when working time is over, or when battery charge is below 30%. If docking fails, it returns to the cutting area and retries. Charging stops if ambient temperature around the docking station exceeds 40°C to protect the battery.
- Rain Sensor: The mower is equipped with a rain sensor.
Maintenance Features:
- General Maintenance: Regularly check and clean the mower, replacing worn parts as needed. Use a dry brush, damp cloth, or sharpened wooden piece. Never use flushing water.
- Battery Life: The Li-ion battery is maintenance-free with an estimated life of over 2 years. To prolong battery life, it is recommended to charge the battery every 6 months during extended periods of non-use.
- Winter Storage: Store the mower, docking station, and power supply in a dry, frost-free place (shed, garage, or indoors). Fully recharge the battery, set the main power switch to "OFF", clean the mower thoroughly, unplug the power supply from the mains outlet and docking station. Disconnect boundary wire from the docking station, lift and clean the station. The boundary wire can remain outside but must be protected against corrosion with water-free grease or sealing tape. Repack in original packaging if available.
- Spring Preparation: After winter storage, clean the charging contacts on both the mower and docking station using fine abrasion paper or a brass brush for optimal charging efficiency.
- Cleaning: Keep the mower clean. Clean wheels improve slope navigation. Sharp blades require less power and provide cleaner cuts. Always turn off the main power switch (11) before maintenance. Wear protective gloves when handling blades. Never use a high-pressure washer, garden hose, or running water.
- Cleaning Mower Body: Remove rough dirt with a soft brush. For intensive cleaning, use a manual water spray with mild household detergent, wiping off residue with a moist rag.
- Cleaning Underside: Turn off the main power switch (11) and wear protective gloves. Turn the mower on its side. Clean the blade disc and frame with a soft brush or damp cloth. Rotate the blade disc to ensure free movement and check that blades turn freely without grass obstruction.
- Cleaning Contact Pins and Charging Strips: Use wire wool, metal cleaner, or very fine emery paper to clean the contact pins and charging strips on the mower and docking station, removing debris, leaves, or grass clippings.
- Reversing or Replacing Blades: The mower has three blades fixed to the blade disc, lasting up to five months with daily use if not damaged by hard obstacles. Weekly inspection of blades and fixing screws is required. Blades are double-edged; loosen the fixing screw, turn the blade upside down, and refix when one side is blunt. Ensure the blade rotates freely after tightening. A set of spare blades is included (part number 846210). Use only original spare parts. Replace or turn all three blades simultaneously for best performance and balance.
- Replacing Battery: Ensure the main power switch (11) is OFF. Clean the underside. Set the mower to the lowest cutting height. Turn the mower upside down. Remove the 5 screws fixing the battery compartment lid (one screw is partially covered by the blade protector and accessible through a service hole). Pull out and disconnect the battery. Carefully clean the lid and edges of the battery compartment to prevent water ingress. Connect and insert the replacement battery, close the compartment, and fix the lid with 5 screws. Do not turn on the mower before placing it back on its wheels.