59 support@yardistrystructures.com
#8 X 1/2” Pan Screws
Connects Continuous Hinge to
VENT ROOF PEAK and VENT ROOF PANEL
X36
#8 X 1/2” Pan Screws
Connects Continuous Hinge to
VENT ROOF PEAK and VENT ROOF PANEL
X36
Step 13: Vent Roof Peak Assembly
Part 5
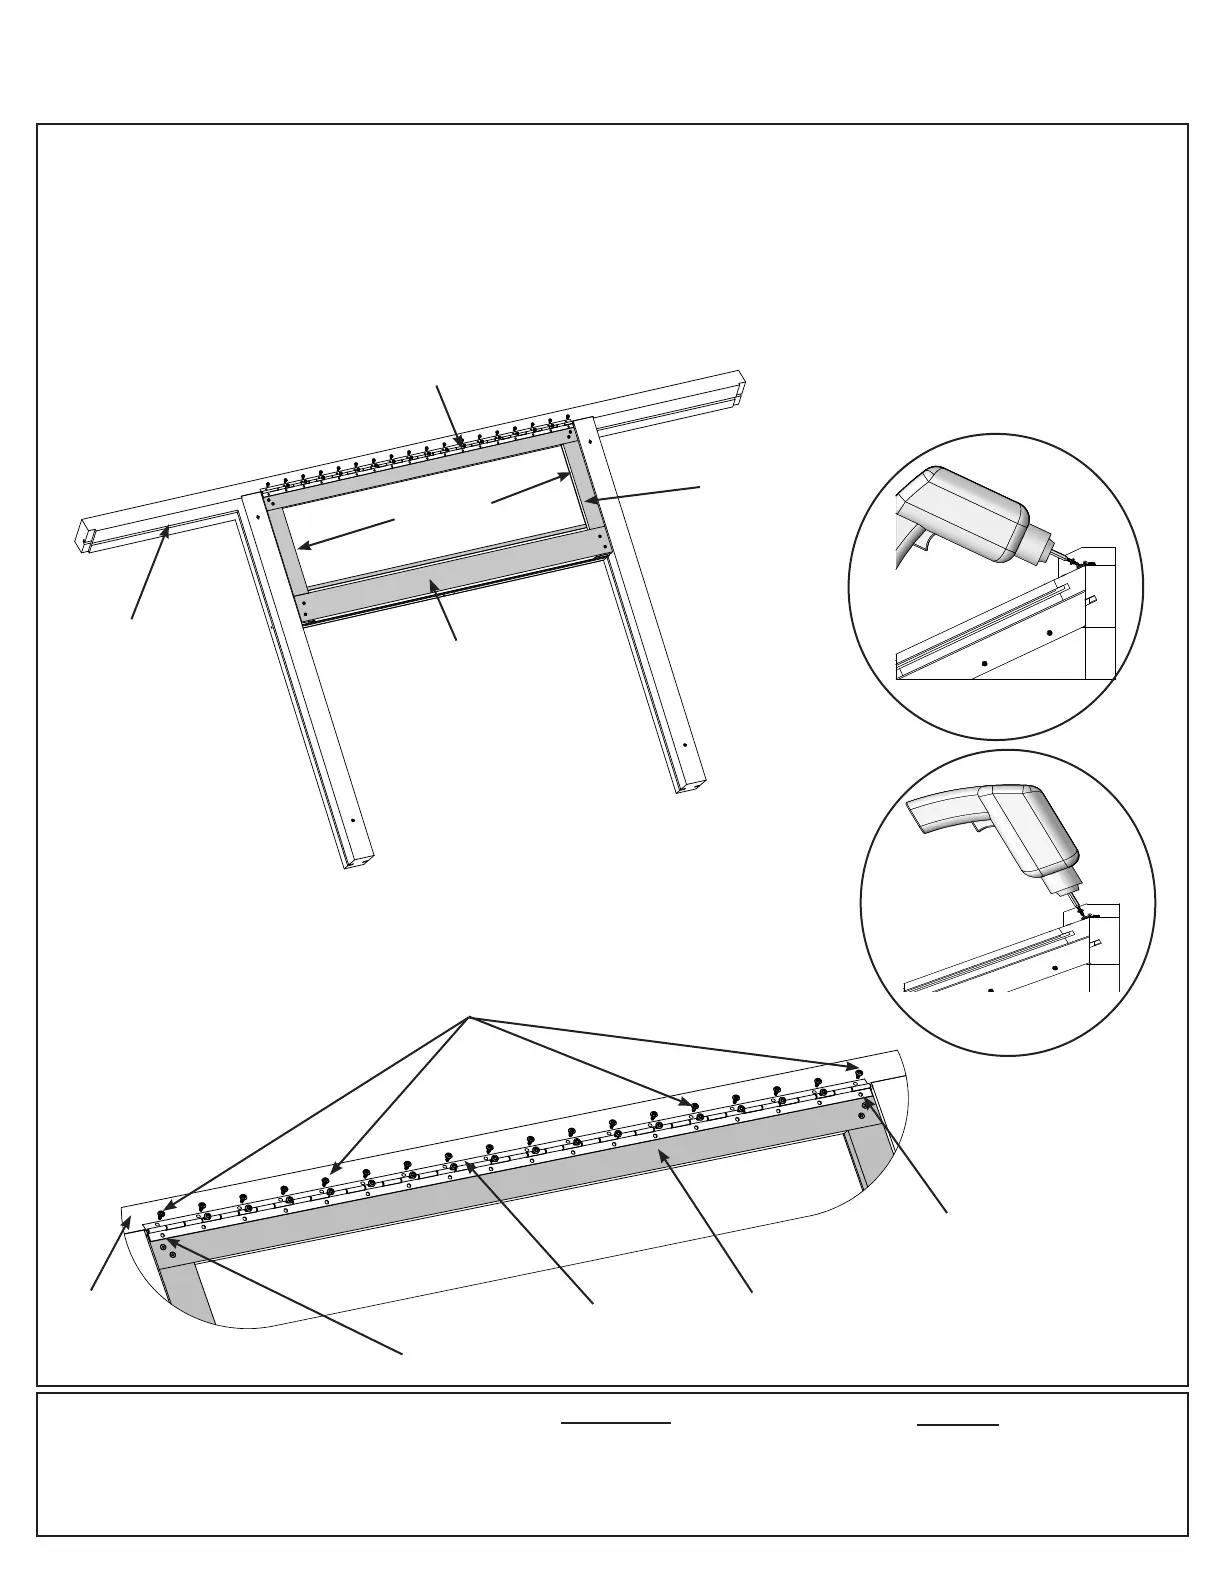
F: Flip over Vent Roof Peak Assembly and place (1170) Vent Roof Panel, with angled edge on top, over
(1126) Inside Vent Blocks and (1128) Bottom Vent Block and tight to (1124) Vent Roof Peak. (1187) Vent Roof
Panel Block faces down. (F13.9)
G: Place Continuous Hinge on (1124) Vent Roof Peak and (1170) Vent Roof Panel and attach with 34 #8 x
1/2” Pan Screws. Do not install screws at the end of the hinge on (1170) Vent Roof Panel. Note: Keep drill
perpendicular when installing screws. (F13.9, F13.10, F13.11 and F13.12)
(1126) Inside
Vent Block
(hidden)
(1124) Vent
Roof Peak
Hardware
34 x #8 x 1/2” Pan Screw
F13.9
#8 x 1/2”
Pan Screw
x 34
(1170) Vent
Roof Panel
No screw
installed here
(1124) Vent
Roof Peak
(1170) Vent
Roof Panel
(1128) Bottom
Vent Block
(hidden)
Continuous
Hinge
Continuous
Hinge
F13.10
Components
1 x Continuous Hinge
No screw
installed here
Add a circle with a slash through for instruction
F13.12
F13.11
Correct
Incorrect
X