19/32" x 3 x 26-5/8" (1,5 x 7,6 x 67,6 cm)
AH
19/32" x 3 x 39-3/8" (1,5 x 7,6 x 100 cm)
GEA
19/32" x 3 x 72" (1,5 x 7,6 x 183 cm)
You have nished securing your DOOR TRIM.
FINISH
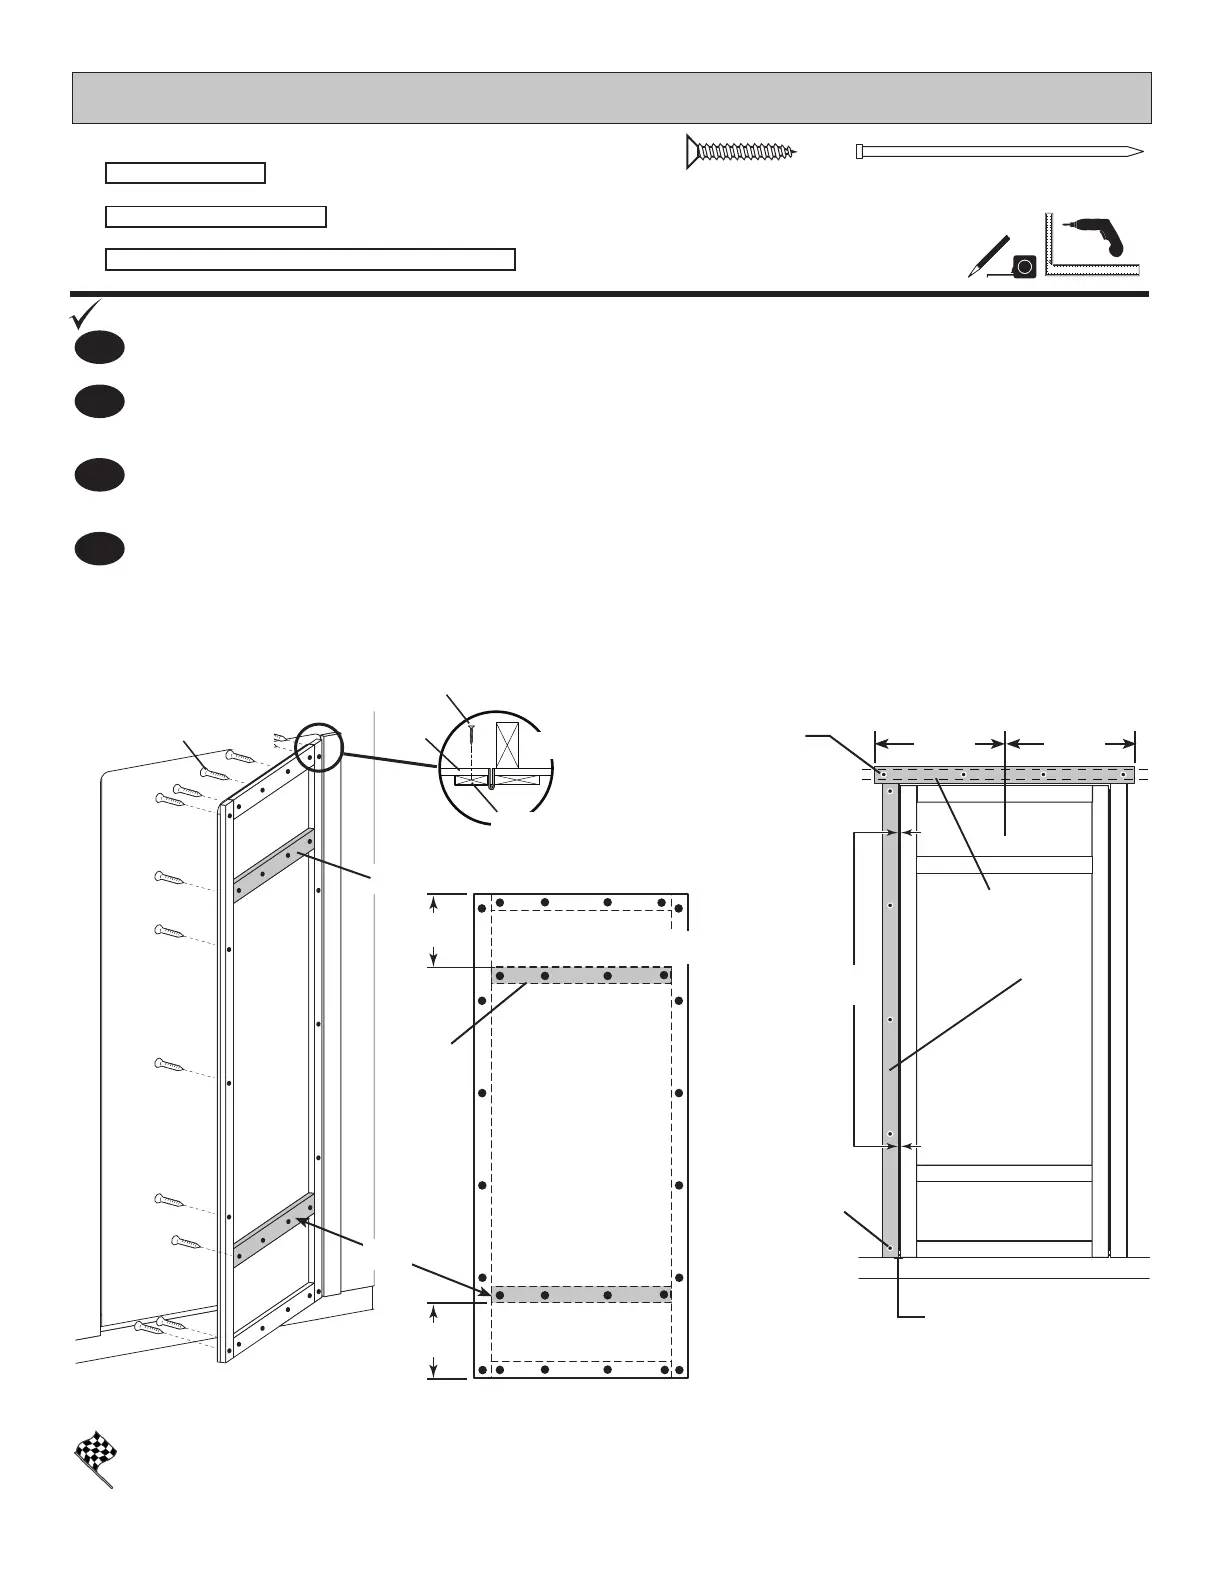
1
Attach upper and lower horizontal door rail AH using (4) 3/4" screws from inside of door .
3
Reinforce the door trim using 3/4" screws through door panel into trim .
Locate screws as shown in .
Flush with bottom of wall panel and door and secure using (5) 2" nish nails into framing
as shown. Ensure 3/8" measurement as shown ().
2" (5,1 cm)
3/8"
(1,0 cm)
CENTER CENTER
Flush
4
Center trim GEA over door and secure using (4) 2" nish nails into framing as shown .
11-1/2"
(29,2 cm)
11-1/2"
(29,2 cm)
AH
AH
AH
INSIDE
OF
DOOR
80
SINGLE DOOR - TRIM
PARTS REQUIRED:
3/4" (1,9 cm)
GEA
Door
Trim
Door
Panel
Screws from behind.
Screws from behind.
Finish Nails
Finish Nails