8
Two-Stage Snow Blower
»
Operator’s Manual
Assembly
|
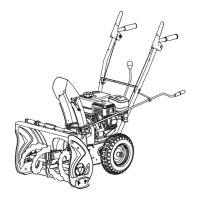
This snow blower was partially assembled at the factory. To assemble your machine follow the below instructions.
ASSEMBLY
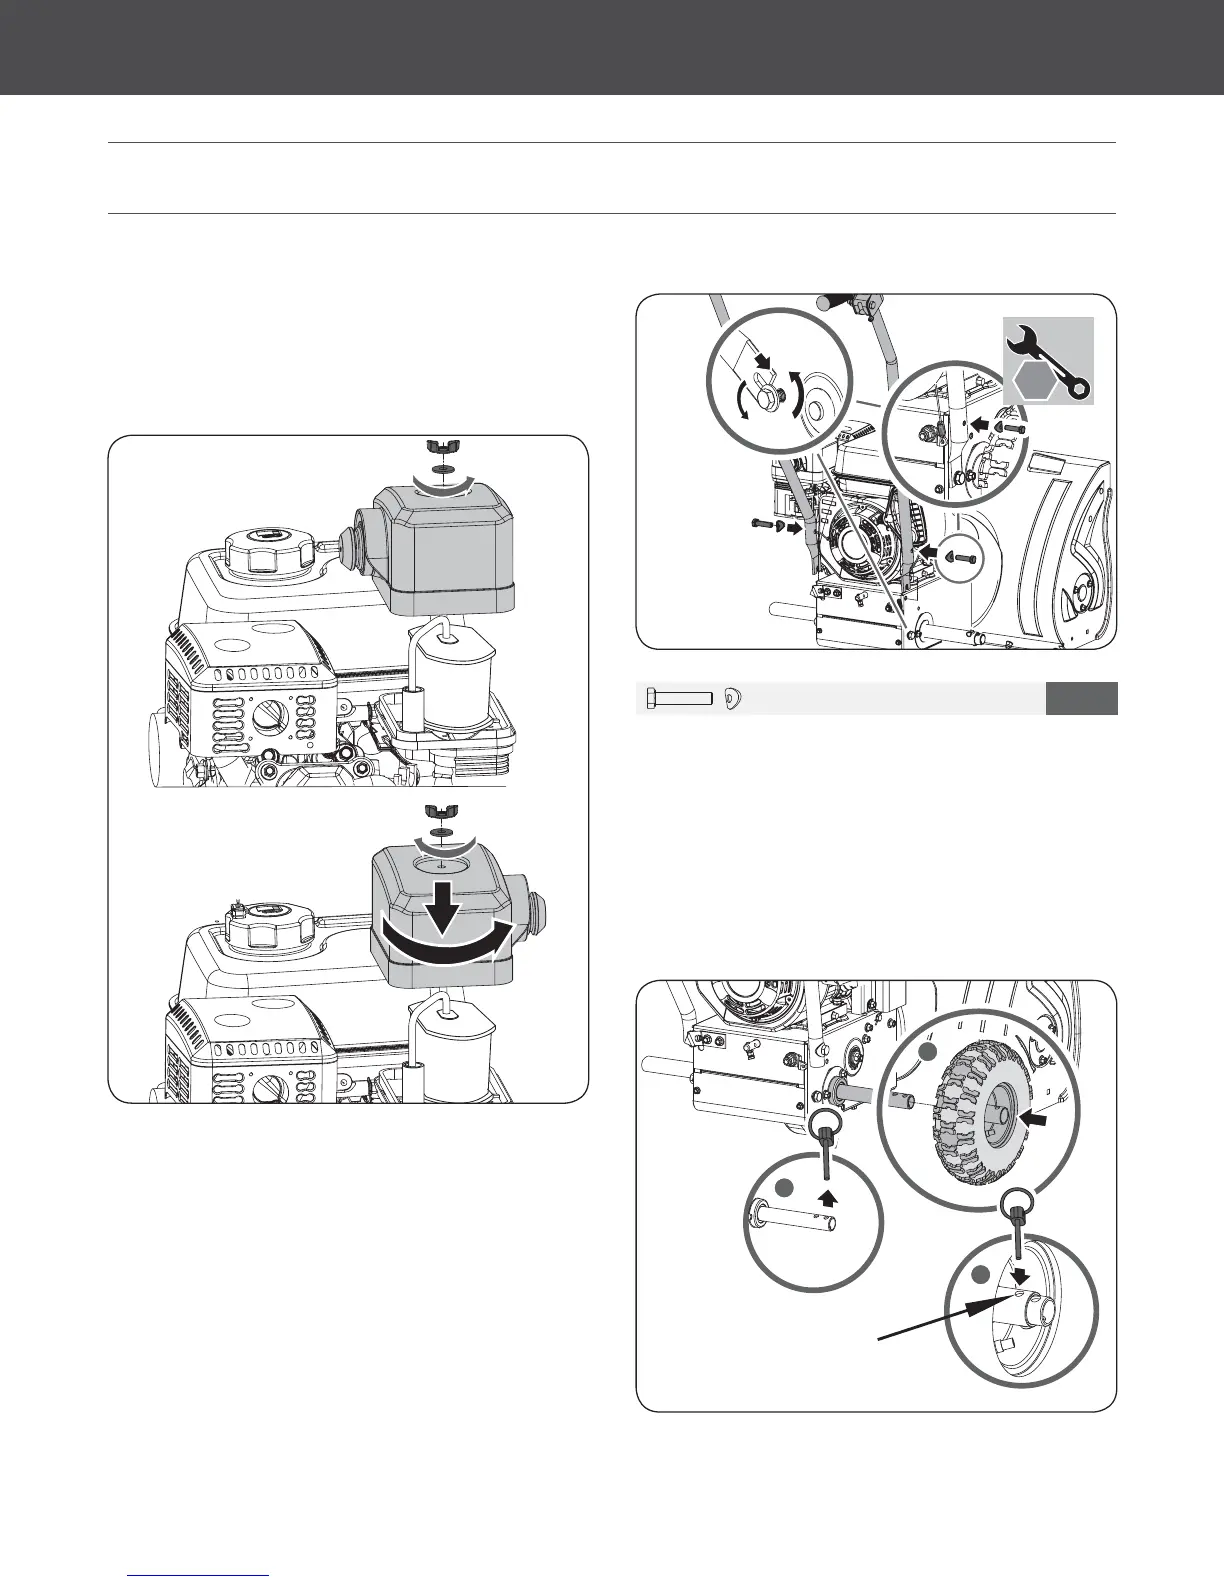
ENGINE AIR FILTER COVER
HANDLEBARS
WHEELS
5HPRYHZLQJQXWDQGZDVKHUIURPWKHDLUĆOWHUFRYHU
5RWDWHWKHDLUĆOWHUFRYHUE\rVRWKDWWKHSULPHUIDFHVRXWVLGH
,QVWDOODLUĆOWHUFRYHUDQGWLJKWHQZLQJQXW6HHFigure 1)
1. Remove the axle pin from the axle.
2. Slide the wheel on the axle.
3. Insert the axle pin through the hole in the wheel hub and
through the inside hole in the axle. When inserting the pin
into the wheel, place the hole side of the pin block towards the
outside for easier installation.
4. Follow the steps 1-3 to assemble the other wheel.
1. Loosen the two bolts on the sides of the transmission housing.
2. Slide the handlebar slots in-between the transmission housing
and the washer. Finger tighten the bolts to hold the handle
in place. The handle with the chute crank sticker should be
installed on the left side.
3. Align the holes in the handlebars with the upper holes on both
sides of the transmission housing. Insert the bolts and curved
ZDVKHUVDQGĆQJHUWLJKWHQWRKROGLQSODFH6HHFigure 2)
4. Ensure the handlebars are at the same height , then tighten all
four bolts from the previous steps.
M10 X 40 X 2
1
16
mm
Figure 1
Figure 3
Figure 2