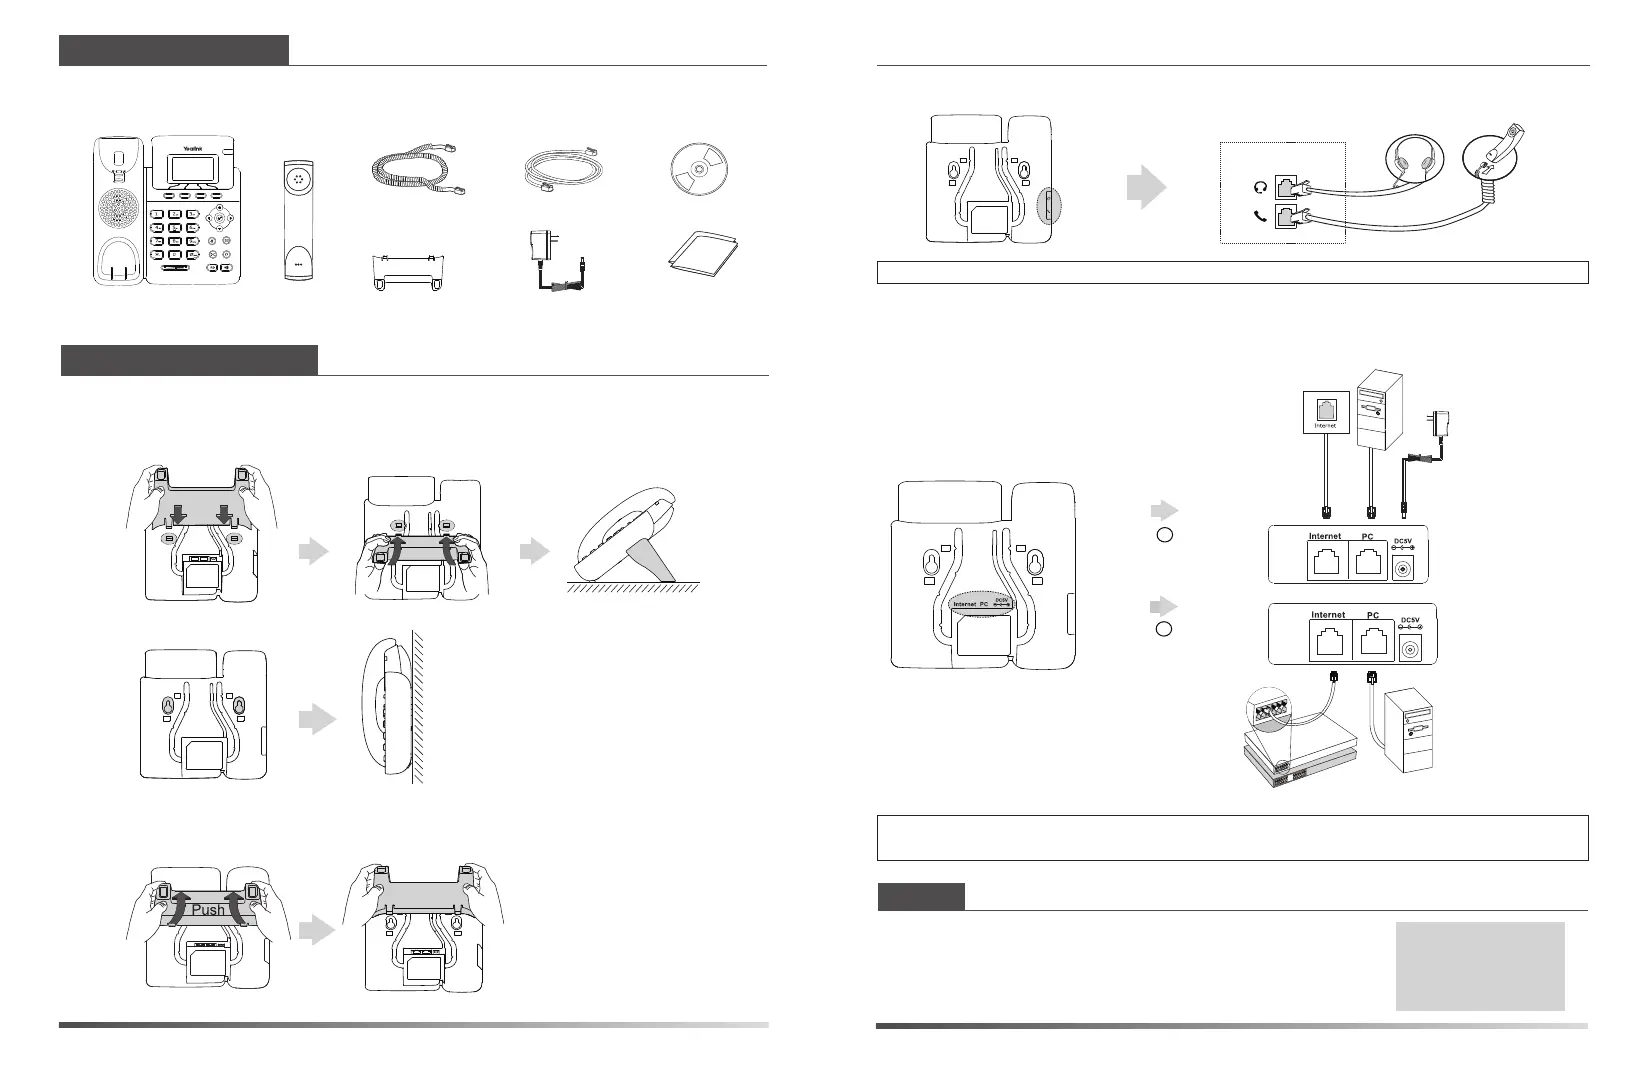
1. Attach and detach the stand, as shown below:
3. Connect the network and power, as shown below:
The following items are included in your package. If you find anything missing,
contact your system administrator.
Packaging Contents
Assembling the Phone
CD-ROM
Power Adapter
Handset Cord
Handset
IP Phone
Ethernet Cable
Quick Installation
Guide & Quick
Reference Guide
SIP-T19P Quick Installation Guide
www.yealink.com
You have two options for network and power connections. Your system administrator will
advise you on which one to use.
Note: If inline power (PoE) is provided, you don’t need to connect the power adapter. Make sure the
Etherne cable and hub/switch are PoE compliant.
After the IP phone is connected to the network and supplied
with power, it automatically begins the initialization process.
After startup, the phone is ready for use. You can configure
the phone via web user interface or phone user interfafce.
Welcome
Initializing... please wait
A
AC Power Option
B
PoE ( Power over
Ethernet ) Option
2. Connect the handset and optional headset, as shown below:
Note: The headset should be purchased separately.
Startup
b) Detach the stand:
Stand
a) Attach the stand:
Power Adapter
(DC 5V)
PC Connection
(Optional)
PC Connection
(Optional)
IEEE 802.3af compliant
PoE Hub/Switch
Wall Mount Method
Desk Mount Method
 Loading...