14. 15.
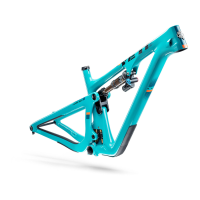
SHOCK SETUP
Inspect your shock for any visible damage.
If oil is leaking or you notice any damage to
the surfaces or seals, please contact the Fox
Racing Shox service center for repair at 800.
FOX.SHOX or your local bike shop.
Shock set-up can uctuate greatly based on
the rider. The set-up guide is intended as a
base line to get the rider started. Experiment
with your settings to nd the set-up that
works best for you.
We recommend starting out with 30% sag,
which is 17.5mm of shock stroke.
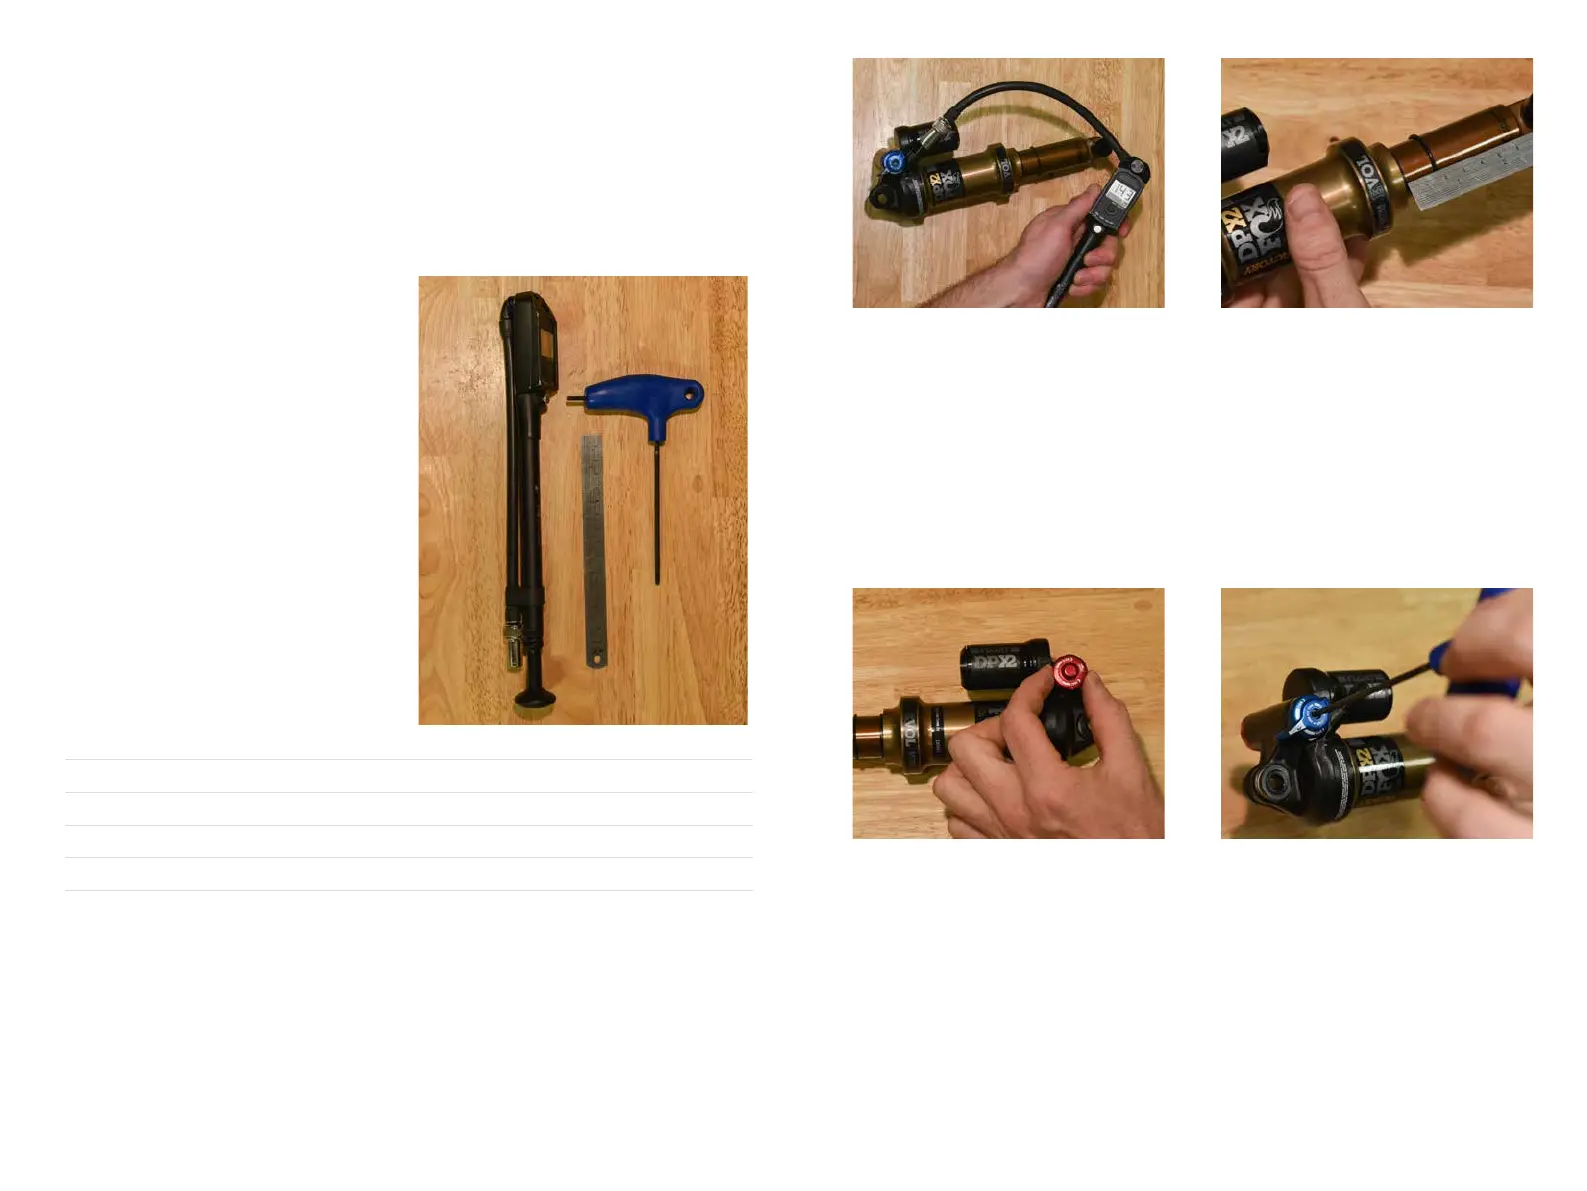
YETI TIPS TOOLS NEEDED
• Shock Pump
• Metric Tape Measure
• 2.5mm allen wrench
*All clicks are counted counter-clockwise, rotating from the
all the way “in” or clockwise dial position.
ADJUSTMENT SETTING
BASELINE AIR SPRING SETTING RIDER WEIGHT (PSI)
MEASURED SAG (MM) 17.5MM
REBOUND 7 CLICKS*
COMPRESSION ADJUSTMENT OPEN
QUICK START GUIDE
01. AIR PRESSURE 02. SAG
The main air spring controls sag. For the SB5.5
to ride properly it is important to setup the shock
with the correct amount of sag. To increase sag,
reduce the main spring air pressure. To reduce
sag, increase the main spring air pressure.
Always cycle the shock at least 10 times after
any pressure adjustment to equalize the EVOL
chamber before measuring sag.
The SB5.5 works best with 17.5MM of measured
sag. To measure the sag slide the travel indicator
(O-Ring) up against the shock body. With a friend
supporting the bike and with the compression
set “open,” sit on the saddle and allow your
body weight to compress the shock. Once you
have compressed the shock, get off the bike
and measure the distance between the shock
body and the new position of the travel indicator
(O-Ring). This is your sag.
03. REBOUND 04. COMPRESSION
Rebound is adjusted using the red knob located
on the drive side. Clockwise will slow the
rebound, counter clockwise will speed it up.
Rebound needs to be tuned to rider preference
and air spring pressure. This may take some
experimentation to dial in. Too slow and the bike
will feel like it is not ready for the next bump. Too
fast and it will feel like the bike is bucking you off
after an impact.
The blue lever on the non drive side has 3
positions: Open, Medium and Firm. For our bikes,
unless you are on pavement on the way to the
trail, we recommend using the “open” setting.
The Switch Innity design will do the rest!
Low-speed compression is adjusted using a
2.5mm allen wrench. It is located in the center of
the blue 3-position lever. There are 10 clicks on
this adjustment. This adjustment only effects the
the “open” position.
 Loading...