50 IM 04L41B01-02E
Wiring Procedure
A terminal cover is screwed in place on the measuring input terminal block on the rear
panel. A label indicating the terminal arrangement is affixed to the cover.
1
. Turn OFF the DX and remove the terminal cover.
2
. Connect the signal wires to the terminals.
3
. Replace the terminal cover and fasten it with screws. The proper torque for
tightening the screws is 0.6 N-m.
Note
Input signal wires of diameter less than or equal to 0.3 mm may not be secured firmly for
clamped terminals (/H2). Fold over the conducting section of the wire, for example, to make sure
that the wire is securely connected to the clamped terminal.
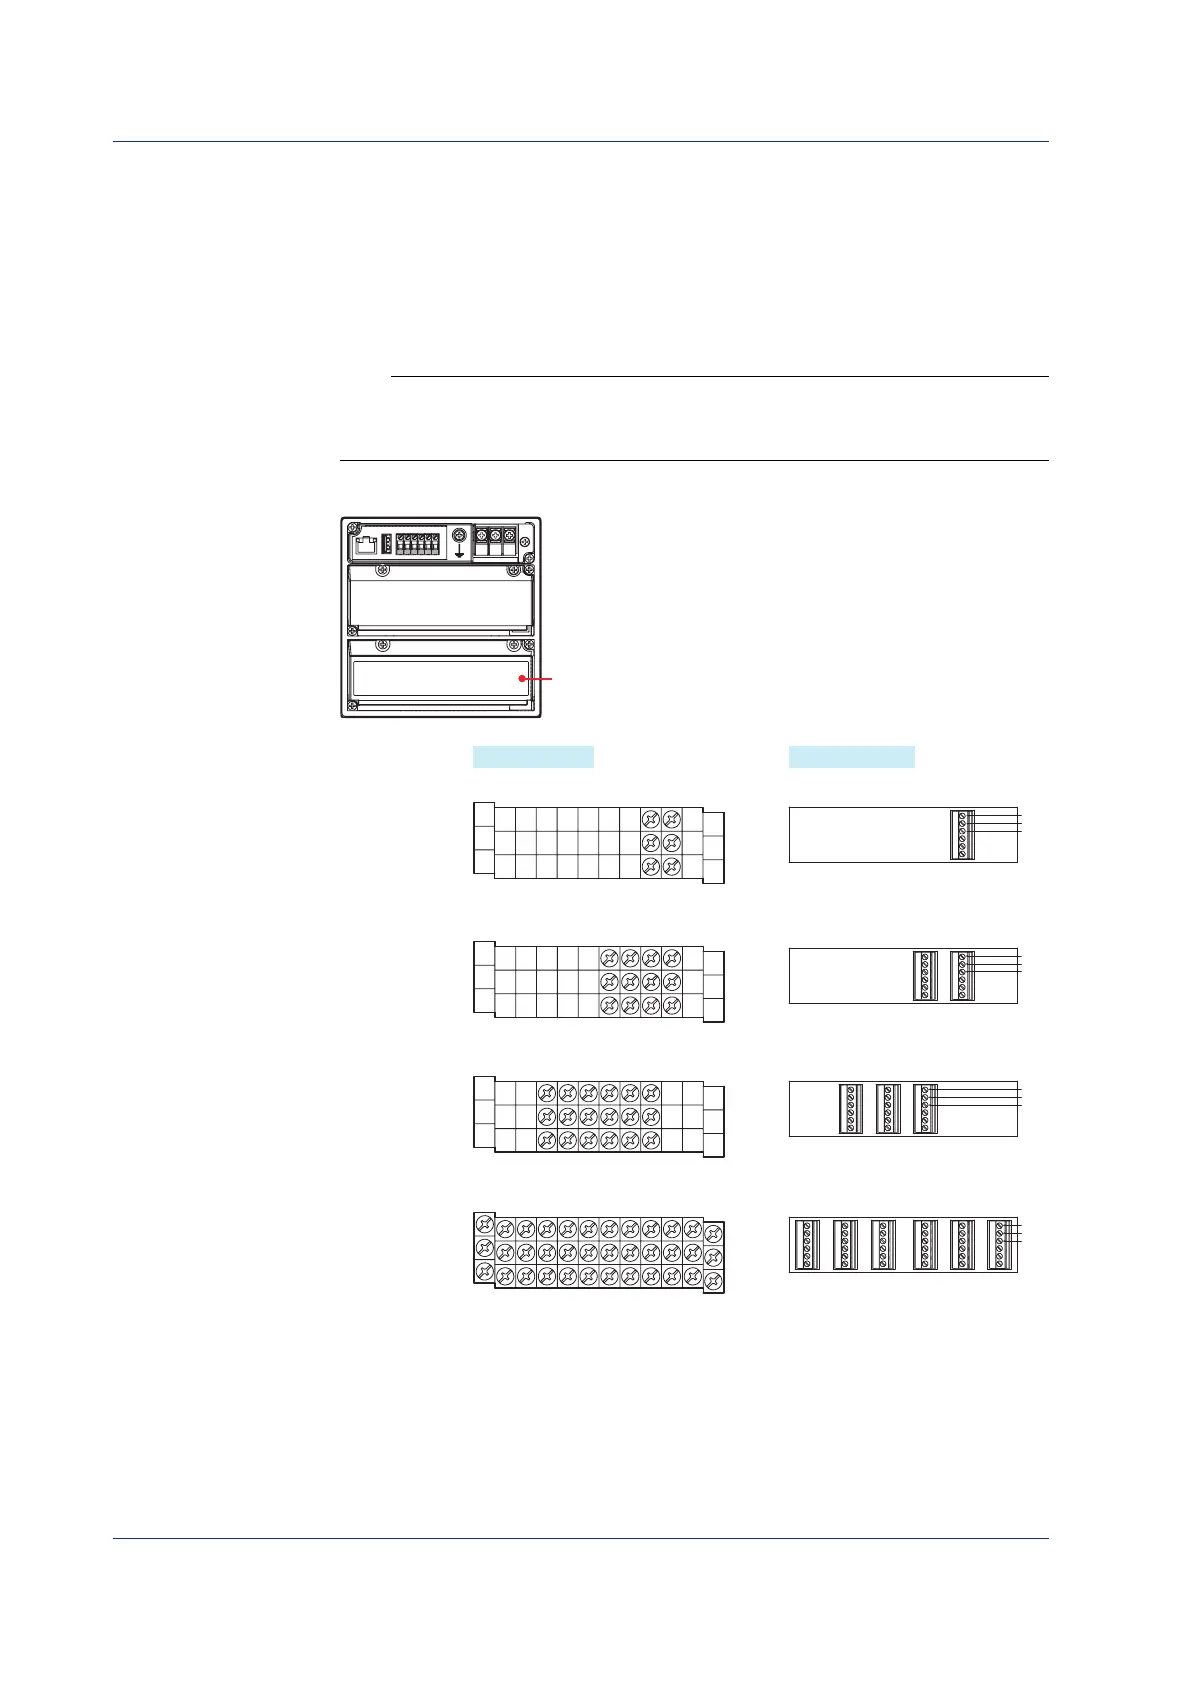
Arrangement of the Input Terminals
Input terminal block
+/A
/b
CH1
CH2
CH3
CH4
CH1
CH2
CH3
CH4
CH5
CH6
−/B
+/A
/b
−/B
CH1
CH2
CH5 CH3 CH1
CH6 CH4 CH2
CH3 CH1
CH4 CH2
/b
+/A
−/B
/b
+/A
−/B
/b
+/A
−/B
+/A
/b
CH1
CH2
−/B
Screw terminal
Input terminal block of
the DX1002 and DX1002N
Input terminal block of
the DX1004 and DX1004N
Input terminal block of
the DX1006 and DX1006N
Input terminal block of
the DX1012 and DX1012N
Clamp terminal
CH1
CH2
CH3
CH4
CH5
CH6
CH7
CH8
CH9CH11
CH10CH12
+/A
/b
−/B
CH5 CH3 CH1
CH6 CH4 CH2
CH9 CH7
CH10
CH11
CH12
CH8
/b
+/A
−/B
Installation and Wiring
 Loading...