The YoLink Garage Door Sensor 2 (model YS7706-UC) is a smart device designed to detect the opening and closing of your garage door, enabling alerts and triggering actions within the YoLink ecosystem. It offers real-time monitoring and control through the YoLink App, providing users with enhanced security and convenience.
Function Description
The primary function of the YoLink Garage Door Sensor 2 is to monitor the status of a garage door (open or closed). When a change in status is detected, the sensor can send alerts to your smartphone via the YoLink App or trigger actions with other YoLink devices through YoLink Control or Automation rules. This allows for remote monitoring and automated responses based on the garage door's state.
Usage Features
The YoLink Garage Door Sensor 2 offers a range of features that enhance its usability and integration into a smart home system:
- Check Status Anywhere: Users can monitor the real-time status of their garage door from anywhere using the YoLink App on their smartphone or tablet.
- Open Alert: The device can be configured to send reminders or alerts if the garage door remains open for a user-defined period, helping to prevent security oversights or energy waste.
- Long Range: The sensor boasts an impressive communication range of up to 1,000 feet between the sensor and the YoLink Hub, allowing for flexible placement even in larger properties.
- Battery Status: The YoLink App provides updates on the sensor's battery power level and sends low battery alerts, ensuring timely battery replacement and continuous operation.
- YoLink Control: This unique "device to device" control technology allows the Garage Door Sensor 2 to directly trigger actions on other YoLink devices (responders) without requiring an internet connection or the YoLink Hub. For example, when the garage door opens, a paired YoLink Plug Mini could automatically turn on a light in the garage.
- Automation: Users can set up "if this then do that" rules within the YoLink App. This enables more complex scenarios, such as turning on garage lights when the door opens, but only after sunset, or sending a notification if the door is left open on a specific day.
- IFTTT Integration: For advanced users, the sensor supports IFTTT (If This Then That) integration, allowing for even broader automation possibilities and connections with third-party services.
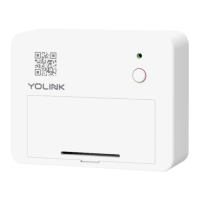
- Easy Setup: The setup process involves downloading the YoLink App, logging in or signing up for an account, and then adding the Garage Door Sensor 2 by scanning its QR code. Users can customize the device name, assign it to a room, and mark it as a favorite for quick access.
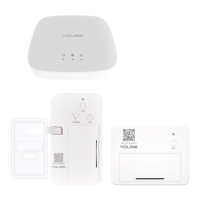
- Pairing with Controllers: For optimal user experience and to access features like real-time battery status, signal intensity, and real-time garage door status, it is recommended to pair the Garage Door Sensor 2 with a YoLink Finger or a YoLink Garage Door Controller.
- LED Status Indicators: The device features an LED light that communicates its current status:
- Red once: Indicates an alert.
- Blinking Green: Connecting to the cloud.
- Fast Blinking Green: Pairing with other devices (YoLink Control).
- Slow Blinking Green: Updating firmware.
- Fast Blinking Red: Unpairing with other devices (YoLink Control).
- Blinking Red and Green: Factory resetting.
- Flexible Installation: The sensor can be installed using double-sided tape on the top left inside of the garage door, ensuring the longer side is parallel to the floor. Alternatively, it can be mounted to the wall with screws (not included) after removing the battery cover.
Maintenance Features
The YoLink Garage Door Sensor 2 includes features to facilitate its ongoing maintenance and ensure optimal performance:
- Firmware Update: YoLink regularly releases firmware updates to improve user experience and add new functionalities. Users are encouraged to update their sensor's firmware through the YoLink App. The update process involves tapping "Firmware" in the device details and pressing the SET button on the sensor; the LED will slowly blink green during the update and stop when complete. Only reachable sensors with available updates will show this option.
- Battery Replacement: The sensor operates on 3V DC (2 - AAA batteries). The YoLink App provides alerts for low battery status, prompting users to replace the batteries when needed.
- Factory Reset: If necessary, the device can be factory reset. This erases all settings and returns the device to its default state, though it will remain in your YoLink account. A factory reset is performed by holding the SET button for 20-25 seconds until the LED blinks red and green alternately, then stops flashing.
- Troubleshooting Guide: The manual provides a troubleshooting section to address common issues such as the sensor being offline, incorrect installation, or alerts not functioning, offering solutions like reconnecting the hub, replacing batteries, or checking app settings.
- Customer Support: YoLink offers customer service and technical support via phone and email for assistance with any issues or questions regarding the device.