Press the SET button once to
turn on the device. Place where
wish to monitor the temperature
or humidity
1. Ensure your device is placed
on a stable surface or mounted
securely on a wall or other
surface.
2. Please refer to device
environmental operating range
information on part L. Use this
device outside the recommend
ranges at your own risk.
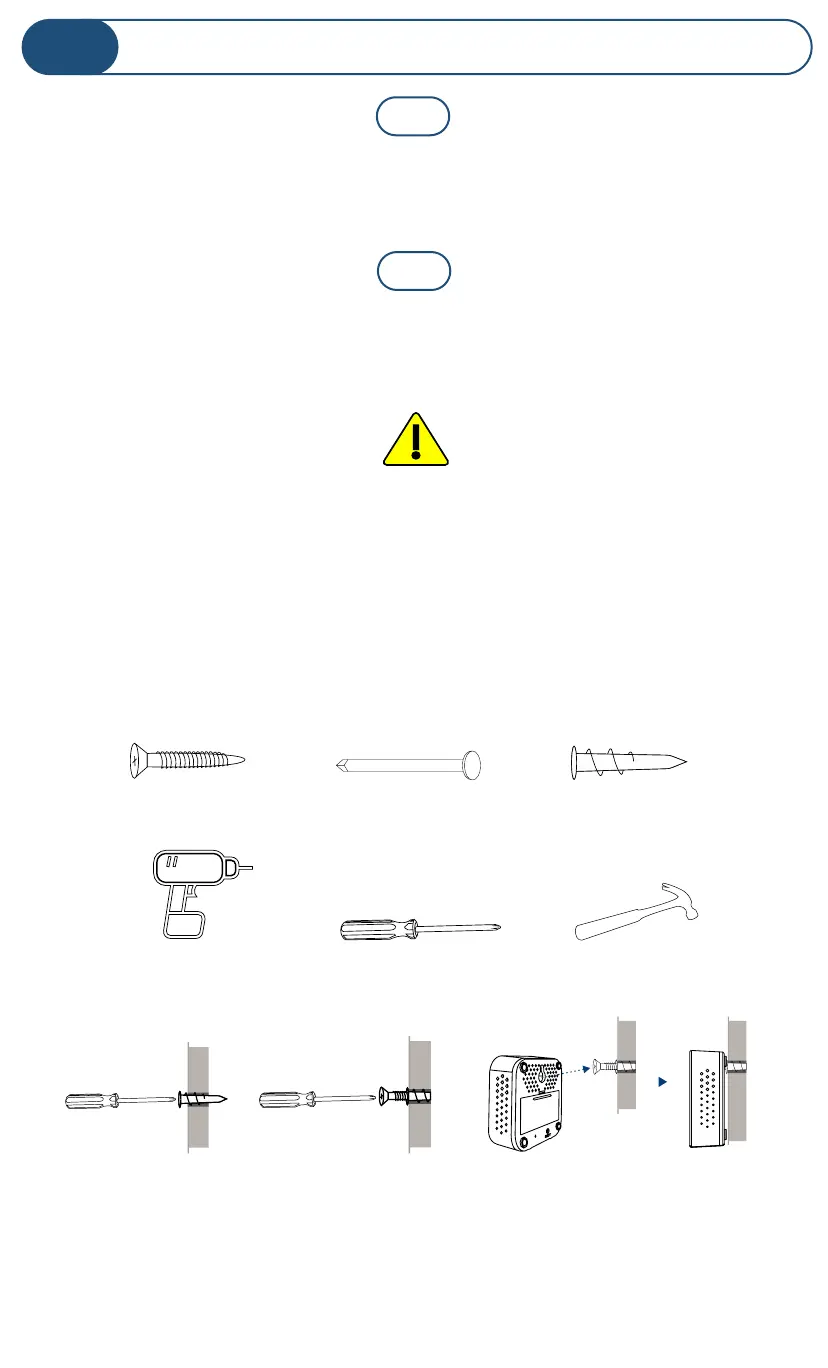
Wall-Mounting
Install wall anchor
in the wall
Install screw in anchor
(or nail in wall)
with about 1/8" gap left
Hang sensor on screw (or nail)
using the mounting slot
These items may be required for the wall-mounting:
Self-tapping screw
nail Wall anchor
HammerPhillips screwdriverDrill
Installation
F
8
 Loading...