Procedure
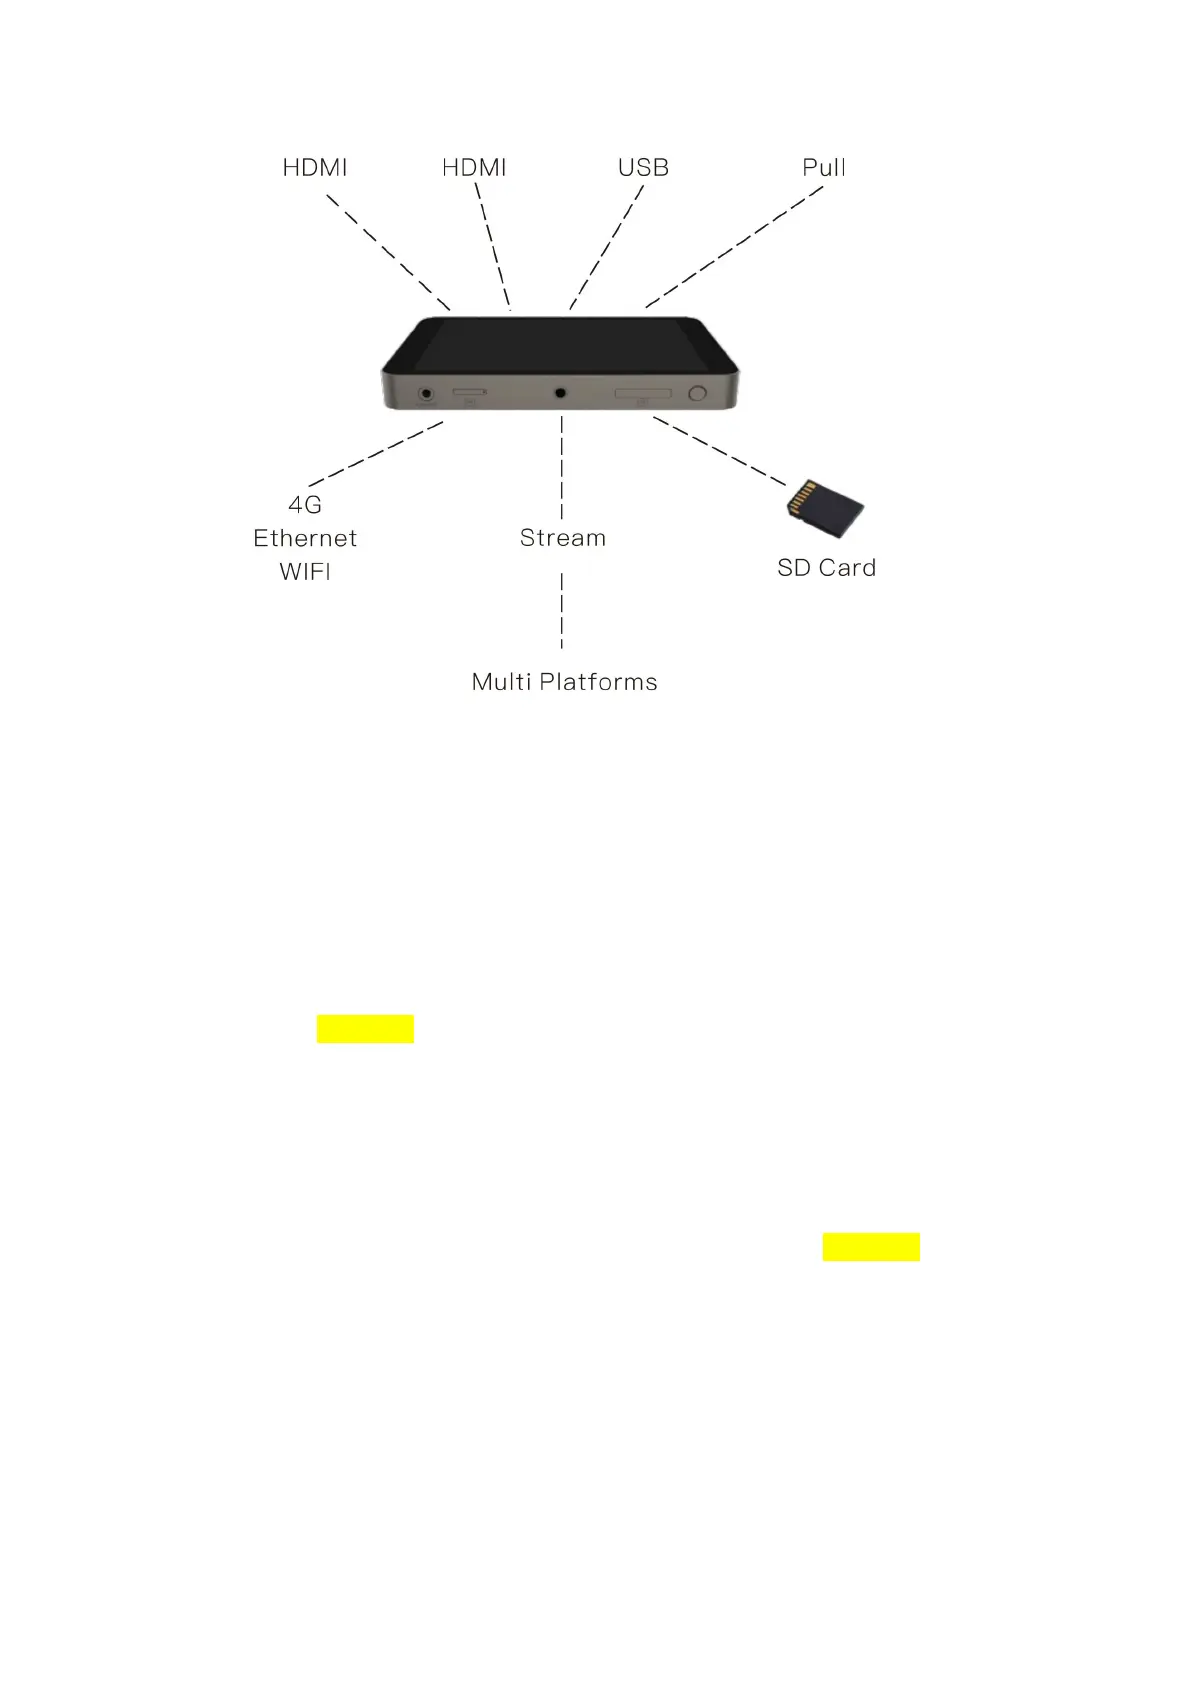
1. Turn on your camera or video source and connect the output to the HDMI input port on the
upside of the yolobox.
2. (Optional) Connect others video sources to another HDMI input port and the USB port on the
upside of the Yolobox, to add videos from SD-card through the SD-card port on the underside
of the Yolobox. Attention: when you first start your Yolobox, the video sources you've
connected to the HDMI-1 and HDMI-2 input ports appear automatically in their assigned
channels, along with the associated HDMI audio. If no video source is connected, a standard
No Signal screen displays.
3. (Optional) Connect the Ethernet cable to Yolobox and to your network. Attention: you can also
connect to the Internet via WI-FI or SIM card.
4. Attach the power cable and plug it into a power source.
5. Press the power button on the underside of Yolobox to turn on the system.
 Loading...