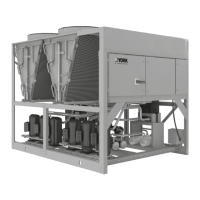
EasyManua.ls Logo

York YLAA0092 User Manual

York YLAA0092
178 pages
To Next Page IconTo Next Page
Page #1 background imageLoading...
Page #1 background image
YLAA0058 - YLAA0230
AIR-COOLED SCROLL CHILLERS
WITH BRAZED PLATE HEAT EXCHANGER
STYLE B (60 HZ) 4-10 FAN
55 - 230 TON
195 - 700 KW
R-410A
Issue Date:
December 29, 2017
AIR-COOLED SCROLL CHILLER
INSTALLATION, OPERATION, MAINTENANCE
Supersedes: 150.72-ICOM6 (817) Form 150.72-ICOM6 (1217)
Products are produced at a
f a c ilit y whose q u a l ity-
management systems are
ISO9001 certified.
035-23572-100

Table of Contents

Question and Answer IconNeed help?

Do you have a question about the York YLAA0092 and is the answer not in the manual?

York YLAA0092 Specifications

General IconGeneral
BrandYork
ModelYLAA0092
CategoryChiller
LanguageEnglish

Summary

SECTION 1 – GENERAL CHILLER INFORMATION AND SAFETY

WARRANTY

Details Johnson Controls' warranty terms, limitations, and claim requirements for the equipment.

SAFETY AND QUALITY

Information on safety standards compliance, ISO 9002 accreditation, and relevant industry codes.

MISUSE OF EQUIPMENT

Electrical

Safety requirements for electrical connections, grounding, and servicing.

SECTION 2 – PRODUCT DESCRIPTION

Brazed Plate Evaporator

Control Center

COMMUNICATIONS

Compressor, Piping, Evaporator Options

Sound Attenuation

PRODUCT IDENTIFICATION NUMBER (PIN)

SECTION 3 – HANDLING AND STORAGE

DELIVERY AND STORAGE

MOVING THE CHILLER

Guidelines for safely moving the chiller, emphasizing proper lifting points and avoiding damage.

SECTION 4 – INSTALLATION

INSTALLATION CHECKLIST

A checklist of steps to perform before placing the units into operation.

STARTUP/COMMISSIONING

Outlines detailed procedures for chiller installation and initial startup.

SPRING ISOLATORS (OPTIONAL)

CHILLED LIQUID PIPING

General guidelines for connecting chilled liquid piping, emphasizing cleanliness and simplicity.

PIPEWORK ARRANGEMENT

WIRING

Guidelines for field wiring, including power wiring, disconnect switches, and circuit breaker requirements.

RELIEF VALVES

SINGLE-POINT SUPPLY CONNECTION – TERMINAL BLOCK, NON-FUSED DISCONNECT SWITCH OR CIRCUIT BREAKER

Specification of Water

Thermal Dispersion Flow Switch

SECTION 5 – TECHNICAL DATA

OPERATIONAL LIMITATIONS

Provides tables detailing operating limits for temperatures, flows, and condenser air conditions.

PHYSICAL DATA (ENGLISH) 60 HZ

ELECTRICAL DATA

ELECTRICAL NOTES

ELECTRICAL NOTES AND LEGEND (CONT’D)

WIRING DIAGRAMS

ELEMENTARY WIRING DIAGRAMS

Introduces the elementary wiring diagrams for chiller systems.

FAN WIRING, STANDARD AIR FLOW

FIGURE 19 - FAN WIRING, HIGH AIR FLOW

FIGURE 19 - FAN WIRING, HIGH AIR FLOW (CONT’D)

SINGLE AND DUAL POINT WIRING OPTIONS

PUMP WIRING

CONNECTION - EEV OPTION

COMPRESSOR WIRING

POWER OPTIONS CONNECTION DIAGRAM

POWER PANEL

MICRO PANEL CONNECTIONS

FOUR FAN UNITS

FIVE FAN UNITS

SIX FAN UNITS

EIGHT FAN UNITS

TEN FAN UNITS

TWELVE FAN UNITS

WEIGHT DISTRIBUTION AND ISOLATOR MOUNTING POSITIONS

CLEARANCES

ISOLATOR LOCATIONS

FIVE and SIX FAN ISOLATOR LOCATIONS

TEN FAN ISOLATOR LOCATIONS

ISOLATOR INFORMATION

1 in. Deflection Spring Isolator Cross-reference

Cross-reference table for 1-inch deflection spring isolators, including part numbers and ratings.

1 IN. DEFLECTION SPRING ISOLATORS INSTALLATION INSTRUCTIONS

2 IN. DEFLECTION ISOLATOR CROSS-REFERENCE

RESTRAINED VIBRATION ISOLATOR FOR 2 INCH DEFLECTION

Details on 2-inch deflection restrained vibration isolators, including load ratings and color codes.

2 IN. DEFLECTION ISOLATOR INSTALLATION AND ADJUSTMENT

NEOPRENE ISOLATOR CROSS-REFERENCE

INSTALLATION OF NEOPRENE VIBRATION ISOLATORS

SECTION 6 – COMMISSIONING

Commissioning of this unit should only be carried out by Johnson Controls Authorized personnel.

States the requirement for commissioning to be performed by authorized Johnson Controls personnel.

PREPARATION – POWER OFF

Lists essential checks to perform before applying power to the unit.

Refrigerant Charge

Procedure for checking and charging the refrigerant system, including leak testing and vacuuming.

Charging Refrigerant

Step-by-step instructions for charging the refrigerant into the system after vacuuming.

Compressor Heaters

Compressor Oil

Step-by-step instructions for adding oil to the compressor circuits using a hand pump.

Switch Settings

Sporlan EEV Interface Board

PREPARATION – POWER ON

Commissioning steps to be performed after applying power to the chiller.

COMMISSIONING THE PUMP VFD

Step-by-step guide for commissioning the Variable Frequency Drive for the pump.

Programming the Drive

Setting up the ABB ACS255 VSD for the Low Ambient Kit

Instructions for configuring the VSD parameters for low ambient kit operation.

Setting the Adjustable Breaker

DETERMINING PROPER OIL LEVELS

INSTALLATION CHECKLIST

A. PRE-STARTUP

Pre-startup checks for the unit, including inspection and system checks before power application.

START-UP CHECKLIST

Checklist of tasks to complete during the chiller startup process.

B. COMPRESSOR HEATER

Procedure for ensuring compressor heaters are energized 24 hours before startup.

A. STARTUP

Panel checks (Power On - Both Unit Switch Off )

Checks to perform on the control panel after applying power with unit switches off.

A. CHECKING SUPERHEAT AND SUBCOOLING

B. LEAK CHECKING

Instructions for performing leak checks on compressors, fittings, and piping.

SECTION 7 – UNIT CONTROLS

IPU II AND I/O BOARDS

Description of the microprocessor (IPU II) and Input/Output boards comprising the controller.

KEYPAD

STATUS KEY

Unit Status

Explains how to use the STATUS key to determine current chiller operating status.

SYSTEM SAFETIES

UNIT SAFETIES

Unit Safeties

Motor Protector/High Pressure Cutout Fault

Explains fault conditions related to motor protector or high pressure cutout.

Unit Warning

Resetting System Lockout Faults

System Safety

Covers system safety faults that cause individual system shutdowns.

Discharge Pressure Cutout

Explains the discharge pressure cutout function and how it is programmed.

Suction Pressure Cutout

Explains the suction pressure cutout function to prevent evaporator freeze-up.

Motor Protector/High Pressure Cutout Fault

Motor Protector/High Pressure Cutout Inhibit

Explains inhibit conditions preventing system start due to motor protector or HP cutout.

High Motor Current

Explains safety shutdown due to high motor current, often related to motor protector faults.

Low Superheat Cutout (EEV Mode Only)

Explains the low superheat cutout function for systems using EEV expansion valves.

Sensor Failure Cutout (EEV Mode Only)

Explains the sensor failure cutout for systems using EEV expansion valves.

Anti-Vacuum Low Pressure Cutout

Explains the anti-vacuum low pressure cutout that prevents system shutdown due to low suction pressure.

Fault and Inhibit Codes and Reset

Refers to tables for fault codes and instructions on how to reset them.

The Display/Print keys allow the user to retrieve system and unit information...

Oper Data Key

Describes how to access unit and system operating parameters using the OPER DATA key.

Print Key

Operating Data Printout

Sample printout of current system operating parameters obtained via PRINT and OPER DATA keys.

History Printout

History Displays

L E A V I N G L I Q U I D T E M P C U T O U T = X X X . X ° F

ENTRY KEYS

Enter/Adv Key

Explains the function of the ENTER/ADV key for entering changes and advancing through menus.

Up and Down Arrow Keys

Describes the use of arrow keys for scrolling through screens and changing values.

SETPOINTS KEYS

Cooling Setpoints

Instructions for programming cooling setpoints, including setpoint and range adjustments.

Leaving Chilled Liquid Control

Describes adjusting the setpoint and range for leaving chilled liquid control.

Return Chilled Liquid Control

SCHEDULE/ADVANCE DAY KEY

Instructions for programming the seven-day schedule and holiday settings.

PROGRAM KEY

DISCHARGE PRESSURE CUTOUT

Displays the programmable discharge pressure cutout value.

SUCTION PRESSURE CUTOUT

Displays the programmable suction pressure cutout value.

LOW AMBIENT TEMP CUTOUT

Displays the programmable low ambient temperature cutout point.

LEAVING LIQUID TEMP CUTOUT

Displays the programmable leaving liquid temperature cutout point.

System Trip Volts

Unit Trip Volts

Explains programming for total chiller high current trip on 460 VAC chillers.

Service Mode

TABLE 18 - PROGRAM KEY LIMITS AND DEFAULT (CONT’D)

Selecting Low Temperature

Steps to enable low temperature operation, involving Service Mode and glycol settings.

UNIT KEYS

Options Key

Explains how to scroll through and program user-configurable options.

Option 3 – Ambient Control Type

Option 7 – Lead/Lag Type (two system units only)

Option 9 – Manual Override Mode

Describes enabling or disabling manual override mode for bypassing the daily schedule.

Option 11 – Power Fail Restart

Option 17 – Remote Temperature Reset

Option 18 – Pump Control

Describes pump control options for onboard or external pumps via dry contacts.

Option 19 – Pump Selection

Option 23 – Variable Water Outlet Mode

BACNET, MODBUS, N2, AND YORKTALK 2 COMMUNICATIONS

Table 20 - VALUES REQUIRED FOR BAS COMMUNICATION

BACnet and Modbus Communications

Details on reading/modifying BACnet/Modbus data via register addresses.

Communications Data Map Notes

SECTION 8 – UNIT OPERATION

Unit Operating Sequence

Describes the sequence of unit operation after power application, including compressor and fan staging.

CAPACITY CONTROL

Explains how the chiller controls capacity based on leaving/return chilled liquid temperature.

SUCTION PRESSURE LIMIT CONTROLS

DISCHARGE PRESSURE LIMIT CONTROLS

Details controls that unload the system before reaching safety limits due to high load or dirty coils.

LEAVING CHILLED LIQUID CONTROL

Explains how the unit controls leaving chilled liquid temperature within a setpoint and range.

Table 24 - SAMPLE COMPRESSOR STAGING FOR RETURN WATER CONTROL

LEAVING CHILLED LIQUID CONTROL OVERRIDE TO REDUCE CYCLING

Procedure to adjust setpoint upward temporarily to reduce compressor cycling and prevent short cycling.

LEAVING CHILLED LIQUID SYSTEM LEAD/LAG AND COMPRESSOR SEQUENCING

RETURN CHILLED LIQUID SYSTEM LEAD/ LAG AND COMPRESSOR SEQUENCING

Explains lead/lag options for equalizing run hours between systems and compressor sequencing.

ANTI-RECYCLE TIMER

Explains the programmable anti-recycle timer function to prevent short cycling.

EVAPORATOR PUMP CONTROL AND YORK HYDRO KIT PUMP CONTROL

Details the conditions under which evaporator and hydro kit pumps are energized.

EVAPORATOR HEATER CONTROL

PUMPDOWN CONTROL

Describes the pump-down feature for shutting off compressors and LLSV.

STANDARD CONDENSER FAN CONTROL

Explains standard condenser fan control based on discharge pressure.

VSD FAN

Details VSD fan control options and requirements for extending minimum ambient temperature.

CHANGING THE SWITCH POINT OF THE THERMAL DISPERSION FLOW SWITCH

Steps to change the factory-set LED 7 switch point on the thermal dispersion flow switch.

LOAD LIMITING

REMOTE BAS/EMS TEMPERATURE RESET USING A VOLTAGE OR CURRENT SIGNAL

SECTION 9 – SERVICE AND TROUBLESHOOTING

CLEARING HISTORY BUFFERS

Procedure for clearing the history buffers via the HISTORY and ENTER/ADV keys.

TROUBLESHOOTING

General guide for diagnosing and resolving common chiller problems.

RESETTING SYSTEM LOCKOUT FAULTS

Procedure for manually resetting system lockout faults by cycling the unit switch.

Service Mode

Instructions for entering and navigating Service Mode to view/modify unit parameters.

NO DISPLAY ON PANEL. UNIT WILL NOT OPERATE

Troubleshooting steps for issues where the panel has no display or the unit will not operate.

SERVICE MODE – OUTPUTS

Lists outputs viewable and modifiable in Service Mode, such as fan status and solenoid control.

FLOW SWITCH/REM STOP NO RUN PERMISSIVE

Troubleshooting steps for issues related to the flow switch or remote stop permissive.

LOW SUCTION PRESSURE FAULT

Troubleshooting steps for faults related to low suction pressure.

HIGH DISCHARGE PRESSURE FAULT

Troubleshooting steps for faults related to high discharge pressure.

SERVICE MODE – CHILLER CONFIGURATION

SERVICE MODE – ANALOG AND DIGITAL INPUTS

Explains how to view analog and digital inputs on the microboard in Service Mode.

CONTROL INPUTS/OUTPUTS

CHECKING INPUTS AND OUTPUTS

Digital Inputs

Explains digital input function, states (ON/OFF), and voltage references.

Analog Inputs – Temperature

Details analog inputs for temperature sensing, including connections and voltage variations.

Table 33 - ENTERING/LEAVING CHILLED LIQUID TEMP. SENSOR, TEMPERATURE/VOLTAGE CORRELATION

Analog Inputs – Pressure

Details analog inputs for pressure sensing, including connections and voltage references.

Table 34 - PRESSURE TRANSDUCERS

Digital Outputs

Explains digital outputs and their voltage requirements for controlling various components.

FIGURE 50 - I/O BOARD RELAY CONTACT ARCHITECTURE

Data Logging to Flash

Information on enabling data logging to an SD card and the structure of the logged data.

Enabling Data Logging to Flash

Steps to enable data logging via the unit setup mode, including ENABLED or SKIP UNCHANGED.

FIGURE 51 - PRINTER TO MICROBOARD ELECTRICAL CONNECTIONS

Obtaining a Printout

Procedure for obtaining printouts of chiller conditions or fault information.

LOW LIQUID TEMP FAULT

MP / HPCO FAULT

Troubleshooting steps for motor protector or high pressure cutout faults.

COMPRESSOR(S) WON’T START

Troubleshooting steps for issues where compressors are not starting.

LACK OF COOLING EFFECT

Troubleshooting steps for issues related to lack of cooling effect.

SECTION 10 – MAINTENANCE

COMPRESSORS

Maintenance procedures for compressors, including oil level checks and oil analysis.

Oil Level check

Instructions for testing compressor oil levels when running in stabilized conditions.

Oil Analysis

Guidance on taking oil samples to check for contaminants and prevent compressor failure.

MICROCHANNEL COIL CLEANING

Procedures for cleaning microchannel coils to maintain heat exchanger integrity and warranty.

Cleaning Procedure Required for Standard and Environment Guard Microchannel Coils

Cleaning Procedure for Environment Guard Premium Microchannel Coils

Cleaning procedures for premium environment guard coils, including salt reducer application.

OPERATING PARAMETERS

OVERALL UNIT INSPECTION

Guidelines for performing periodic overall inspections to ensure proper equipment operation.

Related product manuals