04 B
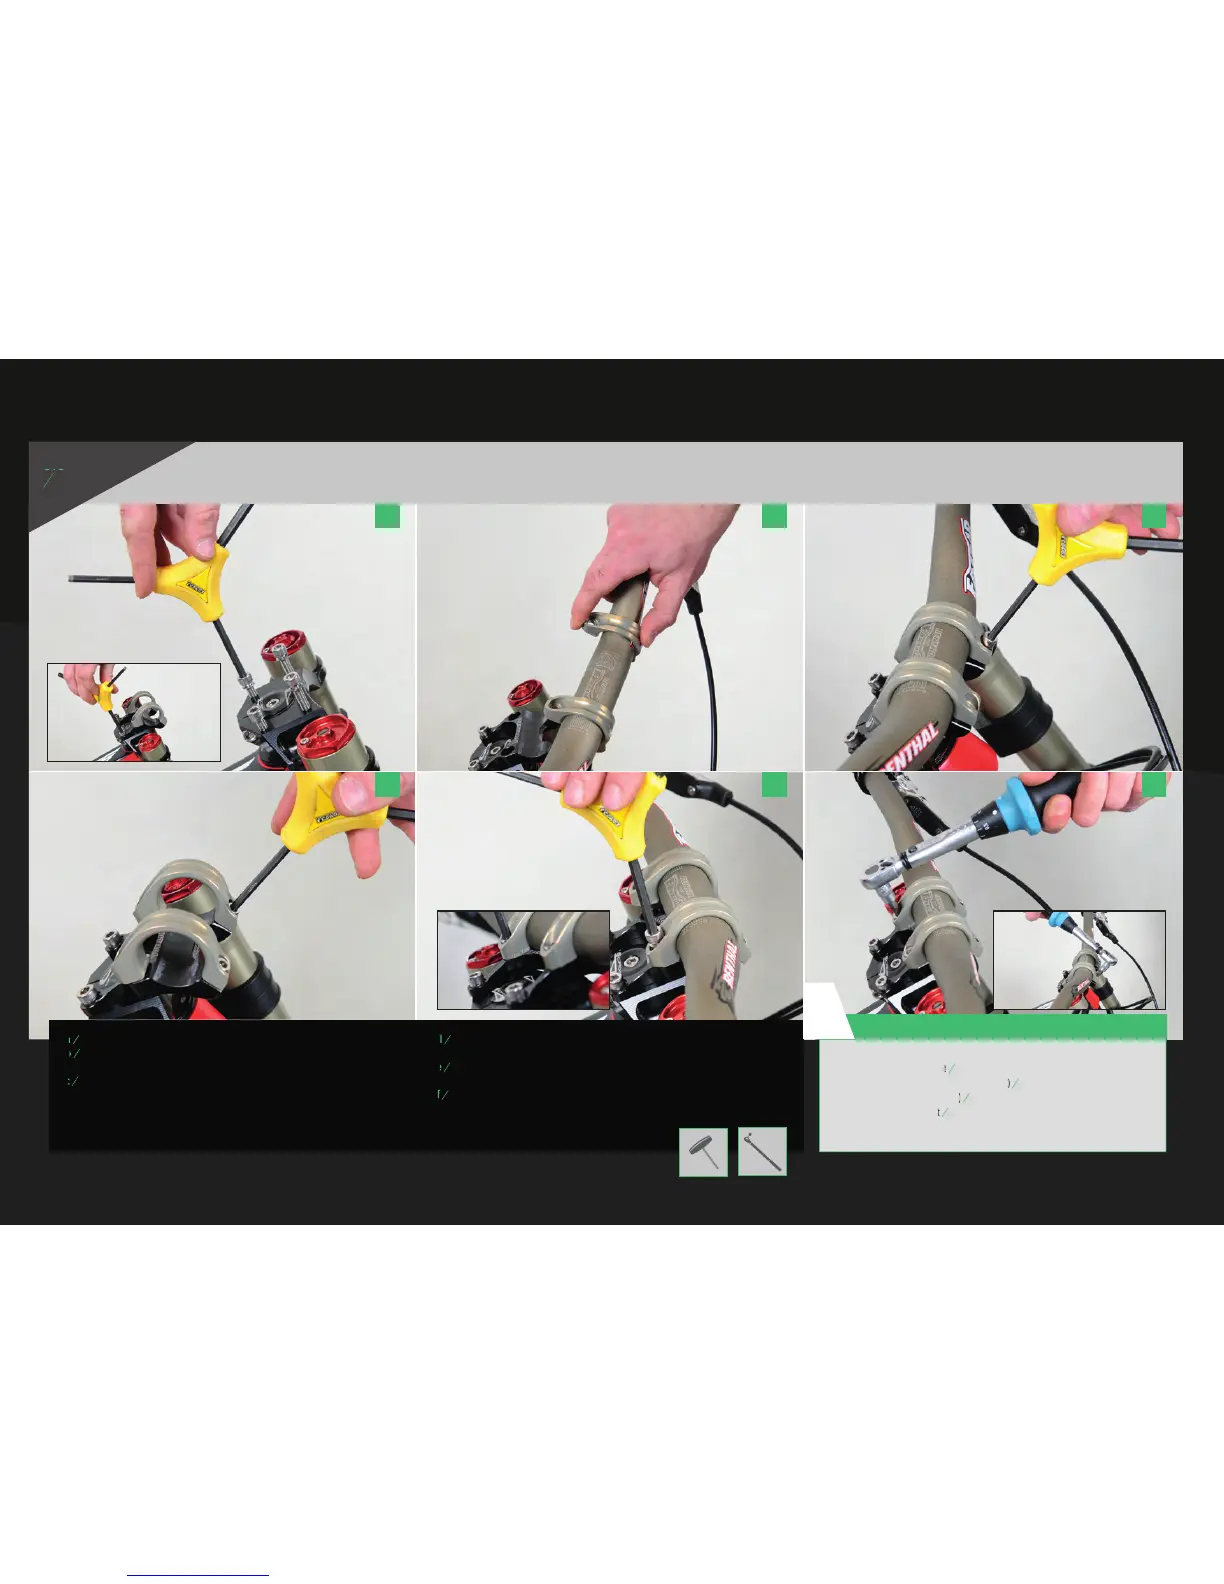
INSTALLING THE HANDLEBAR - RENTHAL INTEGRA II
a c e
f b d
During assembly, please adhere to the torque specifi cations of the manufacturers:
RaceFace Atlas Direct Mount
RaceFace Atlas Direct Mount
9Nm
Renthal Integra II: Fork crown screws (large)
Renthal Integra II: Fork crown screws (large)
10Nm;
Handlebar clamp screws (small)
Handlebar clamp screws (small)
6Nm
YT Industries Direct Mount
YT Industries Direct Mount
5Nm
(Last updated 2015)
CAUTION!
!
a
Remove the screws of the stem from the upper fork bridge (5 mm Allen wrench).
b
Remove the screws of the stem from the upper fork bridge (5 mm Allen wrench).
Remove the screws of the stem from the upper fork bridge (5 mm Allen wrench).
Install the 2 lower bolts of the stem, but do not tighten them at this point.
Remove the bolts holding the top clamps in place.
c
Remove the bolts holding the top clamps in place.
Slide the clamps sideways over the handlebar into the mounting position.
Attach the handlebar and the top clamps to the base of the stem
(on the top crown of the fork).
d
Start to tighten the four crown screws fi rst.
Make sure there is no gap between the baseplate and the clamp.
e
Make sure there is no gap between the baseplate and the clamp.
Tighten the two front screws and make sure the handlebar is centered
and inserted correctly. The adjustment lines will help you with this.
f
and inserted correctly. The adjustment lines will help you with this.
Respect the torque recommendations of the manufacturer of the handlebar and stem.
ASSEMBLY INSTRUCTIONS