This document is a user manual for a Zanussi microwave combi-oven, covering models ZVEEM6X3, ZVEIM6KN, ZVEKM6KN, ZVEKM6XN, ZVENM6K3, ZVENM6X3, and ZVEWM6X3. It provides comprehensive instructions for installation, operation, maintenance, and troubleshooting.
Function Description
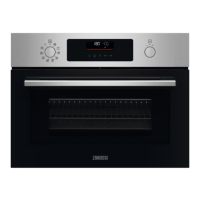
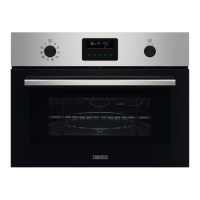
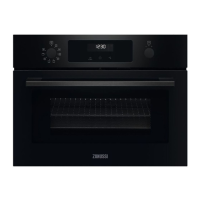
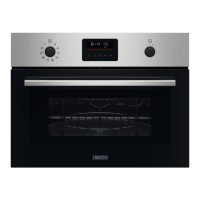
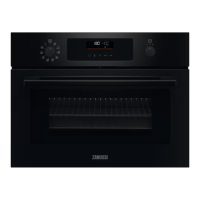
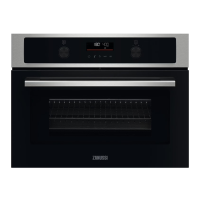
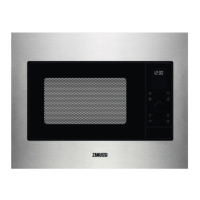
The Zanussi microwave combi-oven is designed for cooking, baking, roasting, and defrosting food. It combines conventional oven functions with microwave capabilities, offering a versatile cooking experience. The appliance features various heating functions, including:
- True Fan Cooking: For baking on up to two shelf positions simultaneously and drying food. Recommended temperature is 20-40°C lower than for Conventional Cooking.
- Conventional Cooking: For baking and roasting food on one shelf position.
- Turbo Grilling: For roasting large meat joints or poultry with bones on one shelf position, making gratins, and browning.
- Pizza Function: For baking pizza, achieving intensive browning and a crispy bottom.
- Turbo Grilling + MW: Combines grilling with microwave boost (100-600 W) for roasting large meat pieces and browning.
- True Fan Cooking + MW: Combines fan cooking with microwave boost (100-600 W) for baking and roasting on one shelf position.
- Defrost: For defrosting meat, fish, and cakes using microwave power (100-200 W).
- Reheat: For heating up pre-prepared meals and delicate food (300-700 W).
- Microwave: For heating up and cooking food (100-1000 W).
- Assisted Cooking: A submenu offering additional functions and pre-set dishes with recommended heating functions, temperatures, and times. This allows for quick preparation with default settings, which can be adjusted during cooking. Some dishes in Assisted Cooking also support "Weight Automatic" functionality.
The appliance also includes clock functions such as:
- Minute Minder: A timer that signals when the set time ends.
- Cooking Time: Stops the heating function when the set time ends.
- Time Delay: Allows postponing the start and/or end of cooking.
- Uptimer: A counter that tracks the duration of cooking, up to 23 hours and 59 minutes.
Important Technical Specifications
- Cabinet Minimum Height: 444 mm (460 mm if under the worktop).
- Cabinet Width: 560 mm.
- Cabinet Depth: 550 mm (550 mm).
- Height of the Front of the Appliance: 455 mm.
- Height of the Back of the Appliance: 440 mm.
- Width of the Front of the Appliance: 595 mm.
- Width of the Back of the Appliance: 559 mm.
- Depth of the Appliance: 567 mm.
- Built-in Depth of the Appliance: 546 mm.
- Depth with Open Door: 882 mm.
- Ventilation Opening Minimum Size: 560x20 mm (located on the bottom rear side).
- Mains Supply Cable Length: 1500 mm (cable placed in the right corner of the back side).
- Mounting Screws: 3.5x25 mm.
- Microwave Power Levels: Ranging from 100 W to 1000 W, with maximum cooking times varying based on power (e.g., 59:55 for 100-600 W, 7 minutes for >600 W).
- Automatic Switch-off: For safety, the appliance automatically turns off after a certain period if no settings are changed while a heating function is active. For example, 12.5 hours for temperatures 30-115°C, and 5.5 hours for 200-230°C. This feature does not apply to Light or Time Delay functions.
- Internal Lighting: The product contains a light source of energy efficiency class G. The lamp is a 300°C heat-resistant halogen lamp.
Usage Features
- Control Panel: Features retractable knobs for selecting heating functions and adjusting settings, a display for information, and a control knob for fine-tuning.
- Retractable Knobs: Press the knob to make it come out for use. Turn the heating function knob to the "off" position to turn off the appliance.
- Display Indicators: Includes basic indicators for Lock, Assisted Cooking, Settings, Microwave function, and timer indicators for Minute Minder, End Time, Time Delay, and Uptimer. A progress bar indicates temperature or time, turning fully red when the set temperature is reached.
- Fast Heat Up: A function that can be activated by pressing and holding the ">>" button, available for some oven functions.
- Accessories:
- Wire Shelf: For cookware, cake tins, roasts. Designed with indentations and a high rim for safety and to prevent slipping.
- Baking Tray: For cakes and biscuits.
- Microwave Bottom Glass Plate: Used specifically for microwave functions, placed at the bottom of the cavity. Food can be placed directly on it. Not suitable for combined microwave functions (e.g., microwave grilling).
- Lock Function: Prevents accidental changes to appliance functions. It can be activated when the appliance is on (locking the control panel while cooking continues) or off (preventing the appliance from being turned on).
- Cooling Fan: Automatically turns on during operation to keep surfaces cool and may continue to operate after the appliance is turned off until it cools down.
- Microwave Cooking Recommendations:
- Cook food covered, unless a crust is desired.
- Avoid overcooking by setting appropriate power and time.
- Do not cook eggs in shells or snails. Pierce the yolk of fried eggs before reheating.
- Pierce food with skin or peel several times before cooking.
- Cut vegetables into similar-sized pieces.
- Allow food to stand for a few minutes after cooking for even heat distribution.
- Use microwave-safe cookware and materials (refer to the provided table for guidance).
- Stir or turn food halfway through defrosting and cooking.
- Stir liquid dishes periodically.
- Cover food for cooking and reheating.
- Place a spoon in bottles or glasses when heating drinks for better heat distribution.
- Only use microwave-safe packaging for ready meals.
- Energy Saving Tips:
- Keep the appliance door closed during operation and avoid opening it too often.
- Keep the door gasket clean and properly fixed.
- Use metal cookware for non-microwave functions to improve energy saving.
- Preheat only when necessary.
- Minimize breaks between baking multiple dishes.
- Use fan-assisted cooking functions when possible.
- Utilize residual heat to keep food warm or continue cooking by reducing temperature 3-10 minutes before the end of longer cooking durations.
- Turn off the lamp during cooking and only turn it on when needed.
Maintenance Features
- Initial Cleaning: Before first use, clean the empty appliance and set the time.
- General Cleaning:
- Deactivate the appliance and disconnect from mains before maintenance.
- Ensure the appliance is cold before cleaning to avoid glass panel breakage.
- Wipe the cavity and door dry after each use to prevent corrosion from steam condensation.
- Clean regularly to prevent deterioration of surface material and to avoid fire/electric arcing from fat and food residue.
- Use a moist soft cloth and neutral detergents. Avoid abrasive products, abrasive cleaning pads, solvents, or metal objects.
- If using oven spray, follow safety instructions on its packaging.
- Clean the front of the appliance with a microfibre cloth, warm water, and mild detergent.
- Use a cleaning solution for metal surfaces and mild detergent for stains.
- Clean the appliance ceiling carefully from residue and fat.
- Do not store food in the appliance for more than 20 minutes; dry the cavity with a microfibre cloth after each use.
- Accessory Cleaning:
- Clean all accessories after each use and let them dry.
- Use a microfibre cloth with warm water and a mild detergent.
- Do not clean accessories in a dishwasher.
- Do not use abrasive cleaner or sharp-edged objects on non-stick accessories.
- Removing Shelf Supports: Shelf supports can be removed for easier oven cleaning. Instructions are provided for careful removal and reinstallation.
- Replacing the Lamp:
- Turn off the oven and wait until it is cold.
- Disconnect the oven from the mains.
- Place a cloth on the bottom of the cavity.
- Remove the glass cover, clean it, and replace the lamp with a suitable 300°C heat-resistant lamp.
- Always handle the halogen lamp with a cloth to prevent grease residue from burning.