11
Introduction
Getting Started
Using the
Printer
Troubleshooting
Accessories
Contact Us
RW Series
Quick Start Guide
Using the Accessories
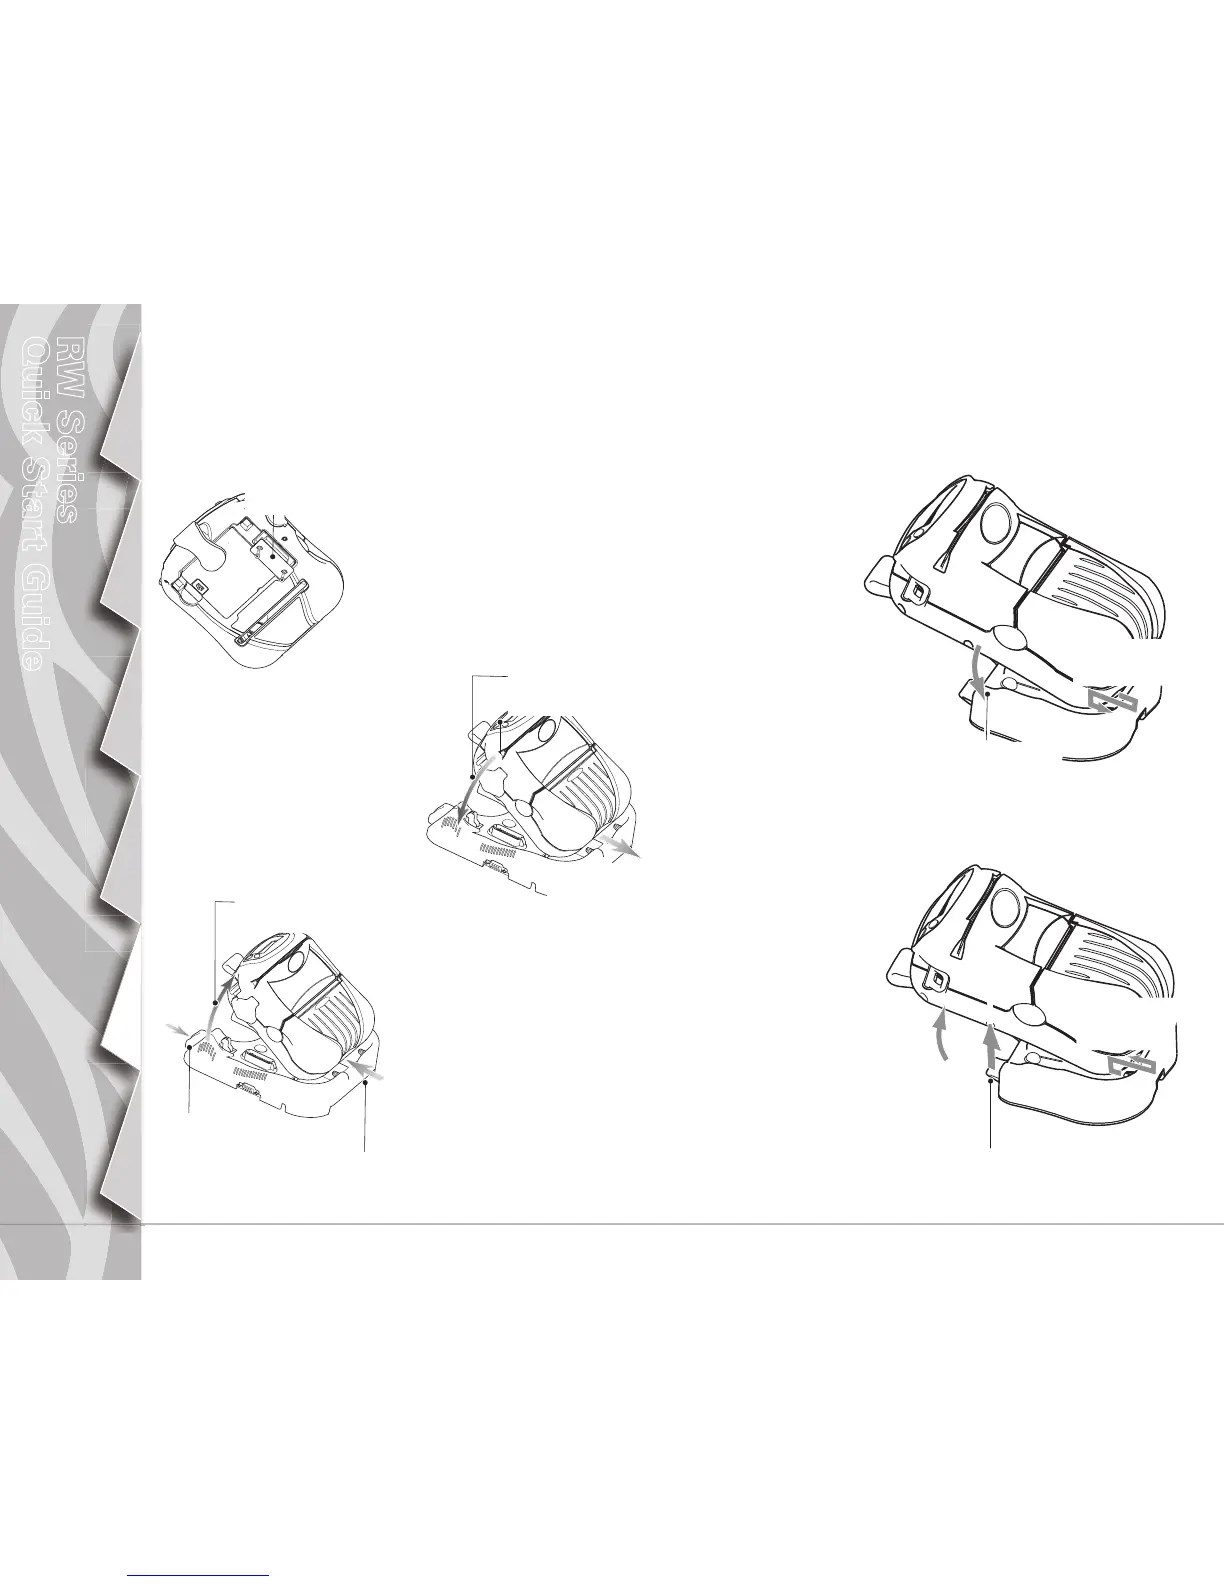
RW 420 Vehicle Cradle
When the RW 420 Printer is “docked” in the Vehicle Cradle it can
print, receive and transmit data and the cradle can charge the
printer’s batteries. Refer to the documentation either in the Users
Guide or supplied with the Cradle for more information.
Installing the Printer
• As a safety precaution, remove the
shoulder strap prior to docking the
printer.
• Remove the Docking Connector Cover
from the bottom of the printer, and re-
tain it for future use.
• Place the bottom of the printer
over the two pins in the Cradle.
• Rock the top of the printer into
the Cradle and press firmly until
it latches in place.
• When the power indicator on
the Cradle is lit turn the printer
on.
RW 220 Vehicle Cradle
The RW 220 can be used in conjunction with a docking Cradle. When
the Printer is “docked” it can be powered by either its own battery or
one of the RCLI series of external chargers. Refer to the documenta-
tion supplied with the Cradle for more information.
Removing the Printer
• Turn the Printer off.
• Push on the latch on the
Cradle and rotate the
Printer away from the
Cradle.
• Lift the Printer free of
the cradle locating
pins and out from
the Cradle.
Installing the Printer
• Place the bottom of
the printer over the
two pins in the Cra-
dle.
• Rock the top of
the printer into the
Cradle and press
firmly until it latches in
place.
Removing the Printer
• Turn the printer off.
• Push on the latch on the Cradle
and rock the top of the printer
away from the Cradle.
• Lift the printer out from the
Cradle.
Replace the Docking Connec-
tor Cover if you will be using the
printer for an extended period of
time away from the Cradle.
Place the printer
over the retaining
pins in the Cradle.
Press the Latch
button to release
the printer.
Rock the printer into
the Cradle to latch it
in position.
Lift the printer
free of the
locating pins.
Remove and retain
the Docking Connec-
tor Cover
Rotate the printer
out of the Cradle.
Place the Printer
over the retaining
pins in the Cradle.
Lift the printer
free of the
retaining pins.
Lift the latch
button to
release the
printer.
Rotate the printer
out of the Cradle.
Rock the Printer into
the Cradle to latch it
in position.
 Loading...

