Mains power connection:
The VECTOR T3A is powered via the ‘MAINS INPUT’ (11)
connector that must be connected to a 230V/50Hz a.c. power
source. The unit is activated with the ‘POWER ON’ switch
(10). The ‘POWER ON’ LED (9) indicates that the unit is
ready for operation. Immediately after the unit has been
turned on and before the speakers are internally connected,
a control logic circuit checks all internal supply voltages and
switch positions for safety status. During these initial
4 seconds, the ‘LIMITER ACTIVE’ LED (7) remains lit.
6. Module cavity
The module cavity allows for connection of additional
modules which are currently in preparation. These modules
include: d.a.i.sy wireless receiver module, monitor module
and line delay module.
7. Technical specifications
Integrated Class-D-Verstärker for 12“ speaker
Output power . . . . . . . . . . . . . . . . . . . . . . . . . .300W RMS
Distortion . . . . . . . . . . . . . . . . . . . . . . . . . . . . . . . . . . .<1%
Integrated Class-AB-Verstärker for 1“ tweeter
Output power . . . . . . . . . . . . . . . . . . . . . . . . . . .60W RMS
Distortion . . . . . . . . . . . . . . . . . . . . . . . . . . . . . . . . . .<0,1%
Sound pressure level . . . . . . . . . . . . . . . . . . . . . . . . .123dB
Frequency range . . . . . . . . . . . . . . . . . . . . . .55Hz - 20kHz
Coverage . . . . . . . . . . . . . . . . . . . . . . . . . . . . . . . .90° x 75°
Crossover frequency . . . . . . . . . . . . . . . . . . .1,8kHz (activ)
Dimensions (w x h x d) . . . . . . . . . . . . . . .39 x 62 x 31,2cm
Weight . . . . . . . . . . . . . . . . . . . . . . . . . . . . . . . . . . . . .19kg
8. Hints for speaker safety
For maximum speaker protection, the following situation
should be avoided:
- acoustic feedback via microphones
- prolonged distorted sound at high levels
- switching noise from operating or connecting other
equipment that is connected to the VECTOR T3A
9. Accesories & mounting hardware
VECA1: Tilt protection for monitor use
This plug-in plastic foot cares for stable
operation of the VECTOR T3A in monitor
position.
VEC12M1: Mounting bracket
for vertical positioning
Rugged fixture, mounts
directly to walls.
VEC12M2: Mounting bracket
for horizontal postioning
Rugged fixture, mounts directly
to walls.
If an additonal VEC12M3 adaptor
is used, this bracket can directly
fixed to truss systems or similar
setups. It also allows for vertical
tilting of the cabinet.
If an additonal VEC12M4 adaptor
is used, this bracket can be used
directly on a high-stand. It also
allows for vertical tilting of the
cabinet.
VEC12M5: Wallmount
This fixture is attached to walls
with two screws and allows for
tilting of the cabinet in two
directions.
M10: Fly-mount eyelet
This heavy-duty eyelet serves as an
additional protection when the VECTOR
T3A is suspended.
VEC12COVER: Protective cover
This synthetic-leather cover protects the
VECTOR T3A against scratches and
11
VECTOR T3A
owner´s manual VECTOR T3A © Zeck Audio
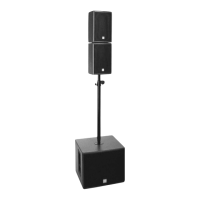
Abb.5
VECTOR
T3A
VECTOR
S3A
Balanced Input
Insert
System
Connector
fullrange
Input signal