12
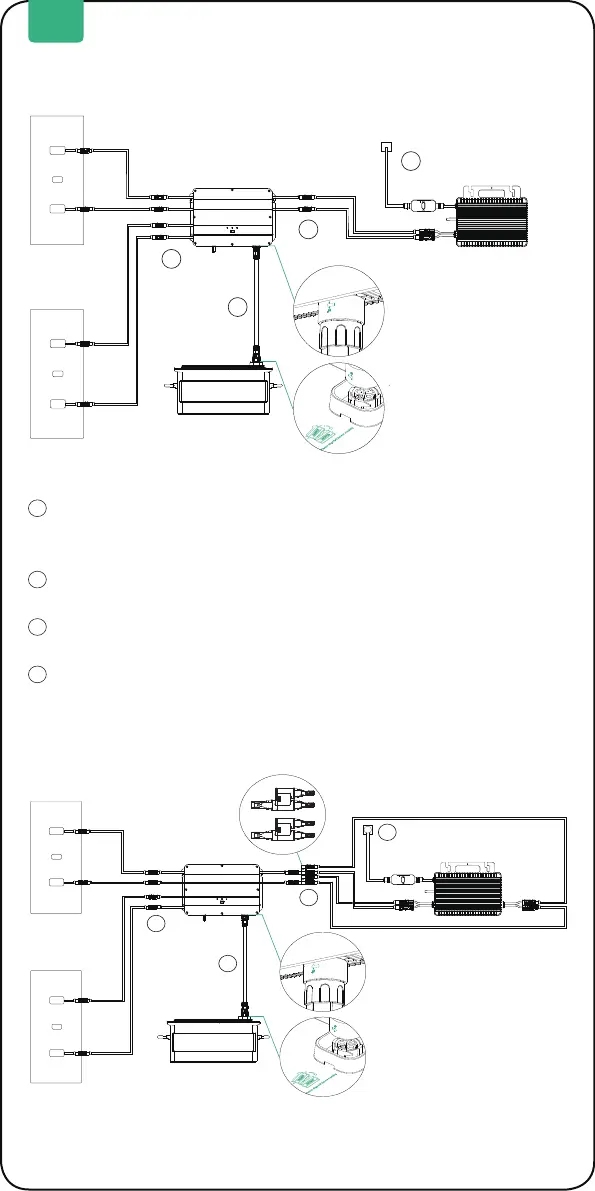
5.3.7 Mit Kabeln anschließen
Kabelverbindung für 1-in-1-Mikro-Inverter
1
2
4
3
Home Socket
The arrow on the battery
cable is in the front.
MC4 Y connector 1-to-2
The arrow on the battery
connector and the "note" on
the top of the AB1000 are on
one side.
1
2
4
3
Home Socket
The arrow on the battery
cable is in the front.
The arrow on the battery
connector and the "note" on
the top of the AB1000 are on
one side.
Der Pfeil am Akkukabel
bendet sich vorne.
Der Pfeil am Akkuanschluss
und der Hinweis an der
Oberseite des AB1000
benden sich auf einer
Seite.
3
Schließen Sie den AB1000 mit dem Akkukable an Smart PVHub an. Die
Anschlüsse des Akkukabels rasten mit einem Klickgeräusch automatisch
ein, wenn Sie das Akkukabel richtig angeschlossen haben.
Verbinden Sie Smart PVHub über das Mikro-Inverter-Kabel mit dem
Mikro-Inverter.
Verbinden Sie den Mikro-Inverter mit Ihrem originalen Kabel mit einer
heimischen Steckdose.
Schließen Sie das Solarmodul an Smart PVHub an.
1
2
4
Sie müssen zunächst AB1000 und dann die Solarmodule
verbinden.
Kabelverbindung für 2-in-1-Mikro-Inverter
Hinweis:
Der Pfeil am Akkuanschluss
und der Hinweis an der
Oberseite des AB1000 benden
sich auf einer Seite.
Heimische Steckdose
Heimische
Der Pfeil am Akkukabel
bendet sich vorne.
DE
MC4-Y-Anschluss
1-auf-2
 Loading...