5
After SolarFlow installation, it will take about 5 minutes before it can
be connected to the grid, and the data will be synchronized to the
Zendure App within 20 minutes.
Before setting the output to microinverter, please conrm the rated
power of your microinverter, the output to microinverter should not
be greater than the rated power of your microinverter.
Please turn off the device(press and hold the IOT button on Smart
PVHub for 6 seconds )before removing or installing battery AB1000.
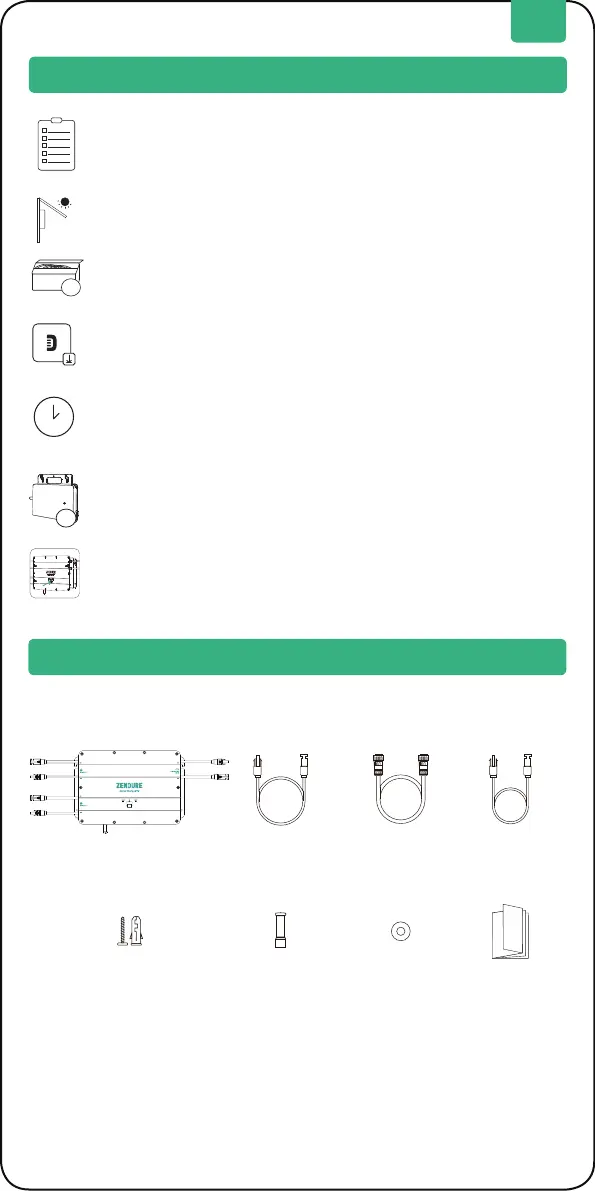
1 * Smart PVHub 4 * Solar Cable 3m 2 * Microinverter
Cable 0.6m
6 * Mounting Screws
M4.7 * 39mm
2 * Flat
Washeret
User Manual1 * Aerial
1 * Battery Cable
1.5m
1. Solar Cable: Used for solar panels connection.
2. Battery Cable: Used for AB1000 connection.
3. Microinverter Cable: Used for microinverter connection
4. Mounting Screws: Hooking up PVHub and Microinverter
5. Flat Washeret: used to xed the micro-inverter
5. Getting Started
!
5.1 What’s in The Box
EN
After the installation, please rst download the Zendure App to
check electricity produced and set the power to the microinverter.
4. Important Tips
The solar PV system is grid-tied. Please check if it is allowed in your
area. Depending on the region,ofcial approval may be required
before or after installation.
Please check the accessories before installation, some accessories
need to be purchased separately.
Smart PVHub and AB1000 should be protected from direct sunlight to
prevent rapid temperature increase.
√
√
√
√
√
€
 Loading...