4
1-800-892-3986 IS19172-I2
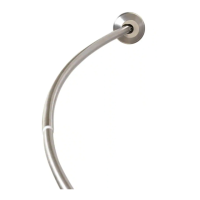
Step 3A - Tension Installation
• Turn the rod (A) upside down and locate the screw position areas.
• Using the included allen wrench (E), LOOSEN the attached set screws (F) to allow rods to expand smoothly.
• NOTE: Do not remove the set screws (F).
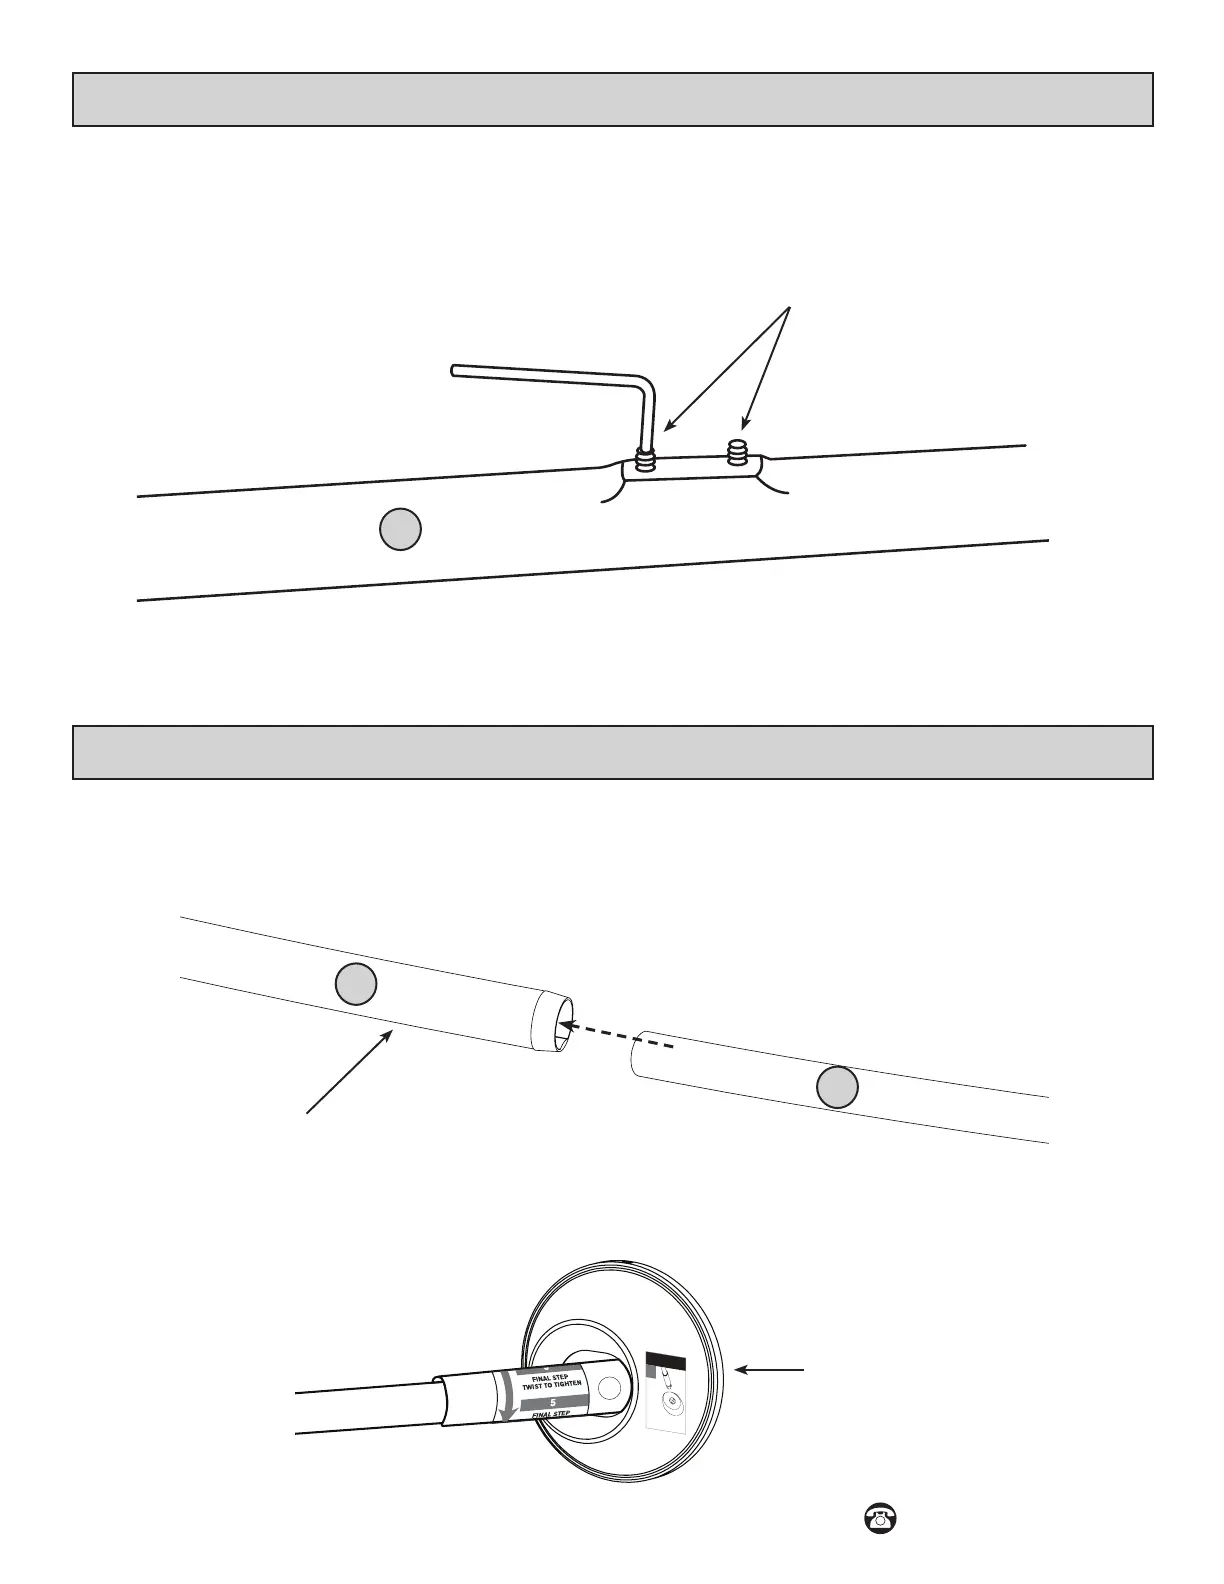
Step 3B - Tension Installation
• Insert the end of the 7/8 in. diameter tube assembly (B) into the end of the 1 in. diameter tube (A), g1.
• Once connected, wipe the rubber pad on each mounting bracket (A and B) clean, g2.
A
loosen set screws (F)
A
B
g.1
TOP B
B
PUSH AGA
INST
F LOO
R
g.2
set screws
facing DOWN
Wipe the rubber pad on each
mounting bracket (A and B) clean.
 Loading...