82
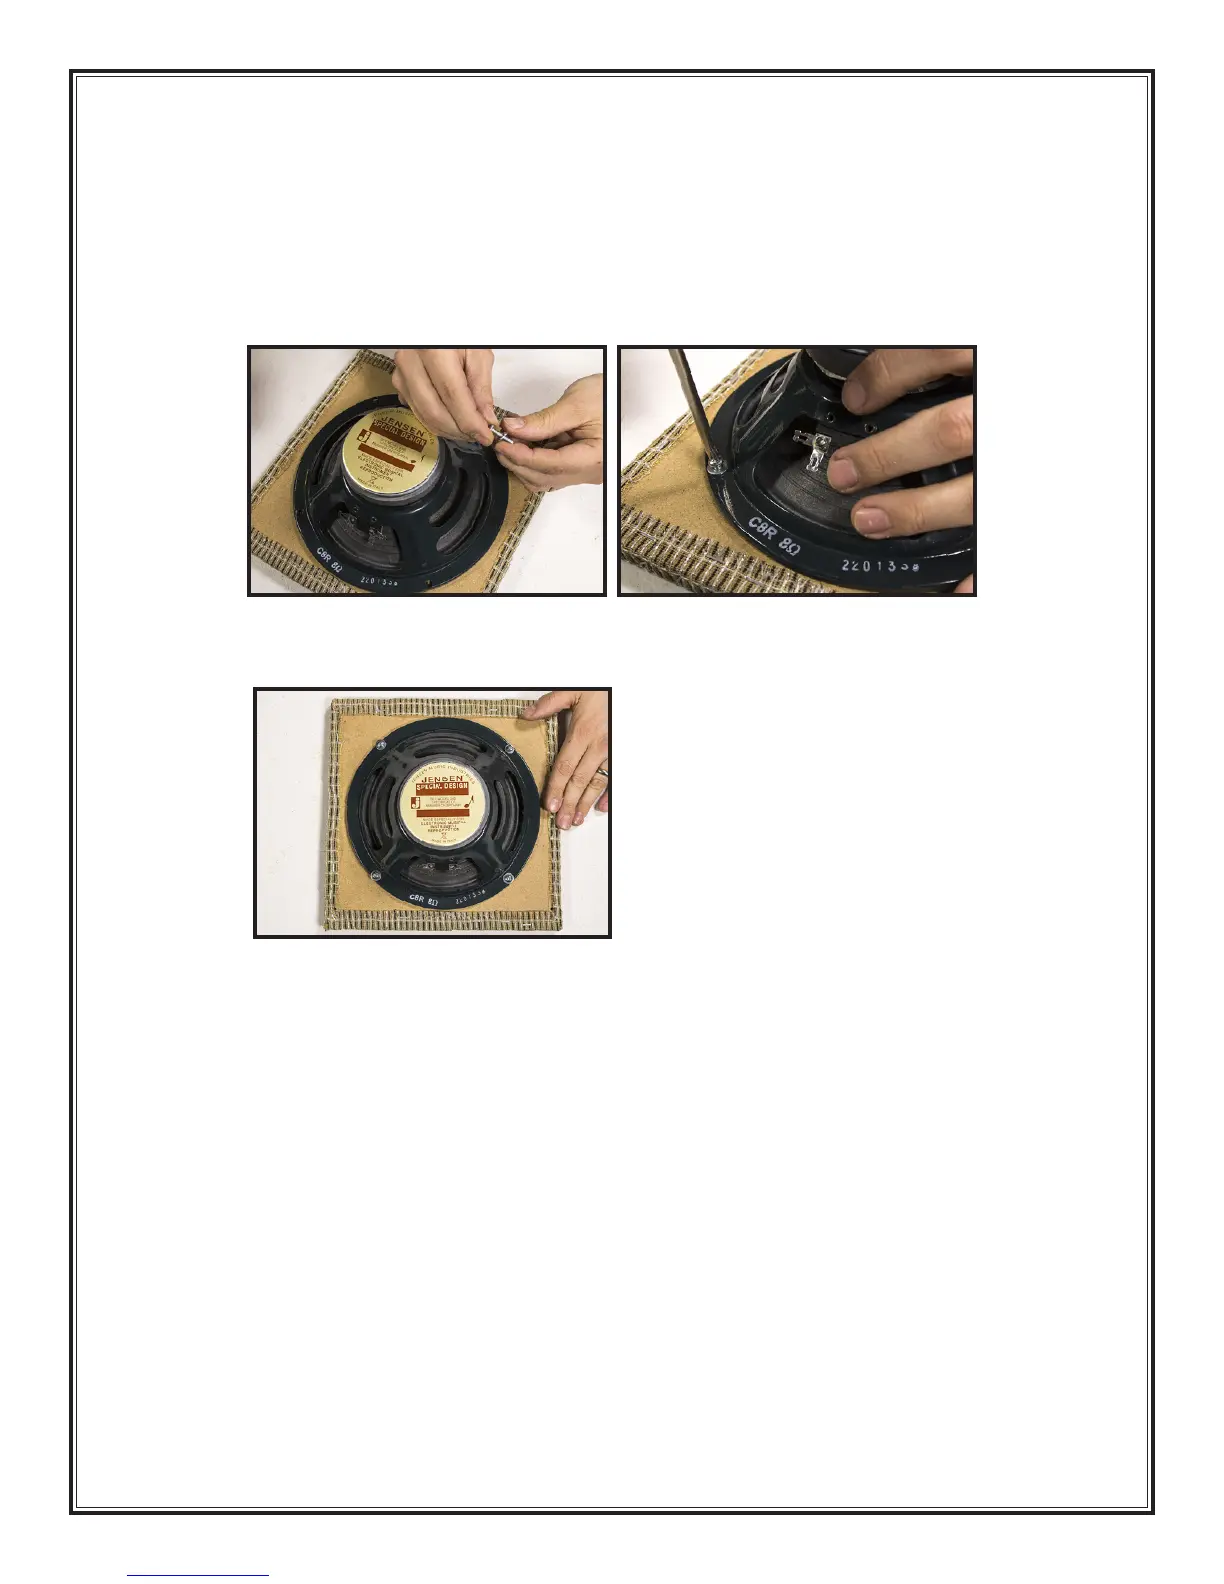
19. Place a #8 Flat Washer (Part # WA06) on the shaft of a #8x3/4 machine screw (Part #
SC13)
281
and run it through the speaker rim and into one of the t-nuts.
282
Be careful not to cross-
thread the nut and screw; it should screw in easily. Also, be careful not to press down too hard
on the screw as you tighten it, otherwise it might push out the t-nut from baffle board. Leave it
slightly loose.
20. Repeat for the remaining three screws and washers. Now tighten them all down securely.
283
21. Now tin the terminals on the speaker and solder your previously-fabricated speaker cable to the
speaker terminals.
284
Be careful to solder the ribbed wire to the negative terminal (the one
marked with a “-”).
285
Solder the wire with writing on it to the positive terminal (marked with
“+”).
286
Also be careful not to drip molten solder onto the speaker cone!
CAUTION: Solder fumes are not healthy for you. The fumes consist of vaporized flux, which
can irritate your nose, lungs, and even your skin. You MUST work in a space where the air
drifts away from you as you work, so fumes do not rise straight onto your face.
CAUTION: Solder residue usually contains lead, which is poisonous if you ingest it. Do not
breathe the fumes, do not eat the supplies, wash your hands after you handle solder, and
sweep and wipe up your work space after EVERY USE.
281 282
283