24
ASSEMBLY MANUAL
CAUTION! Follow the steps below during the assembly and use tools supplied with the product.
Prepare sufficient space for the assembly operation.
It is advisable to assemble the product with another person because of the weight of some elements.
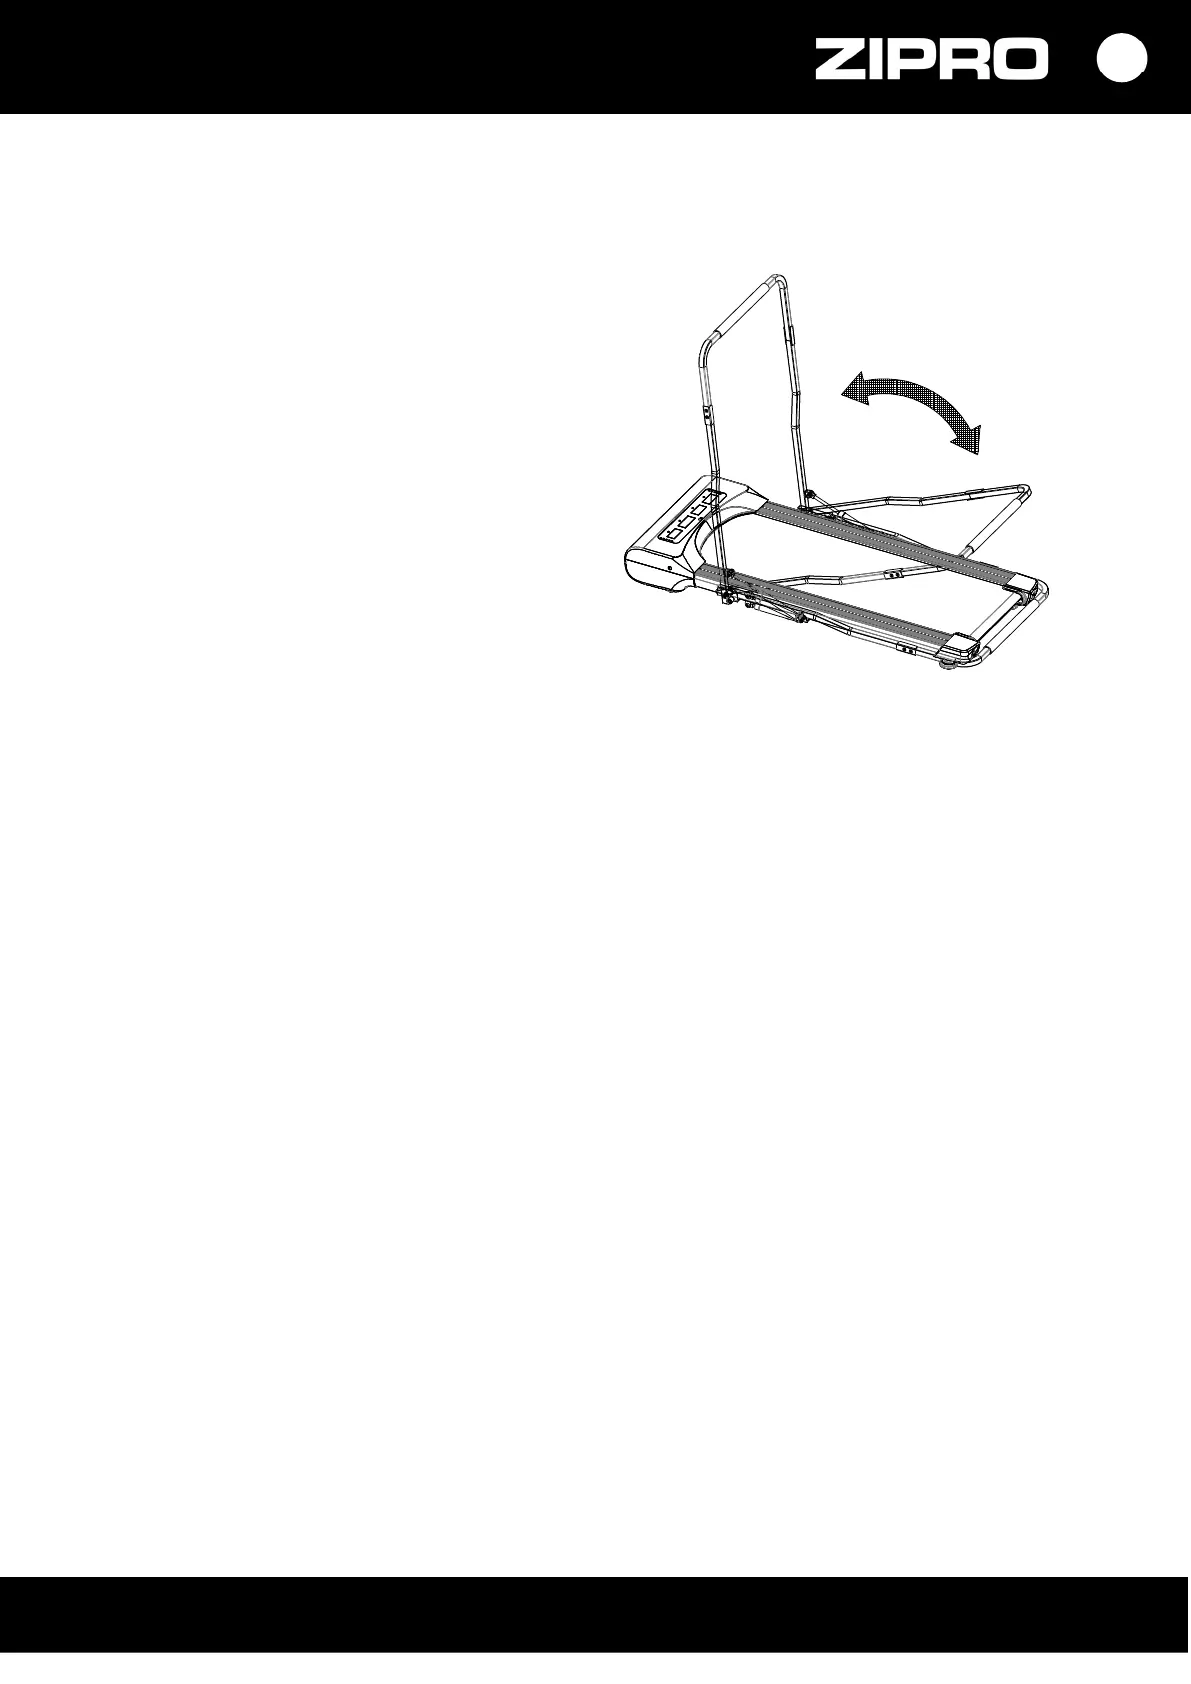
Before you start using the treadmill, raise the handrail
arm upwards as high as possible.
After you finish your workout, lower it.
PLEASE NOTE: Do not use the treadmill with the
lowered handrail.
PLEASE NOTE: Before you use the treadmill, read the
manual carefully.
Congratulations! You have assembled the treadmill!
Read the manual carefully before using the treadmill.
BELT TENSION ADJUSTMENT
WHEN SHOULD I INCREASE BELT TENSION?
As a result of regular use, the running belt may require tensioning.
A too loose belt may stop despite a running motor.
Do not overtension the belt as it may damage the motor, shaft, or bearings.
A correctly stretched belt can be lifted on the sides up to about 5–7.5 cm. It is easily verifiable.
The belt is tensioned correctly if you can fit three fingers under it.
The belt needs to be tensioned when it starts to slip, slide sideways, or curl during training.
Place the treadmill on a flat surface. Run the treadmill at about 6–8 km/h and note the deviation of the
running belt.
INCREASING BELT TENSION
A special wrench was included in the delivery. Place it in the left belt adjustment bolt in the rear of the
treadmill. Rotate the wrench 90 degrees clockwise (Fig. C). This way, you stretch the rear roller and increase
belt tension. Repeat for the right bolt. Make sure the bolts are tightened equally.
Repeat on both sides until the belt tension is correct.
REDUCING BELT TENSION
Belt tension is reduced in a similar way to how it is increased. Rotate the wrench counterclockwise.