15
INSTALLATION
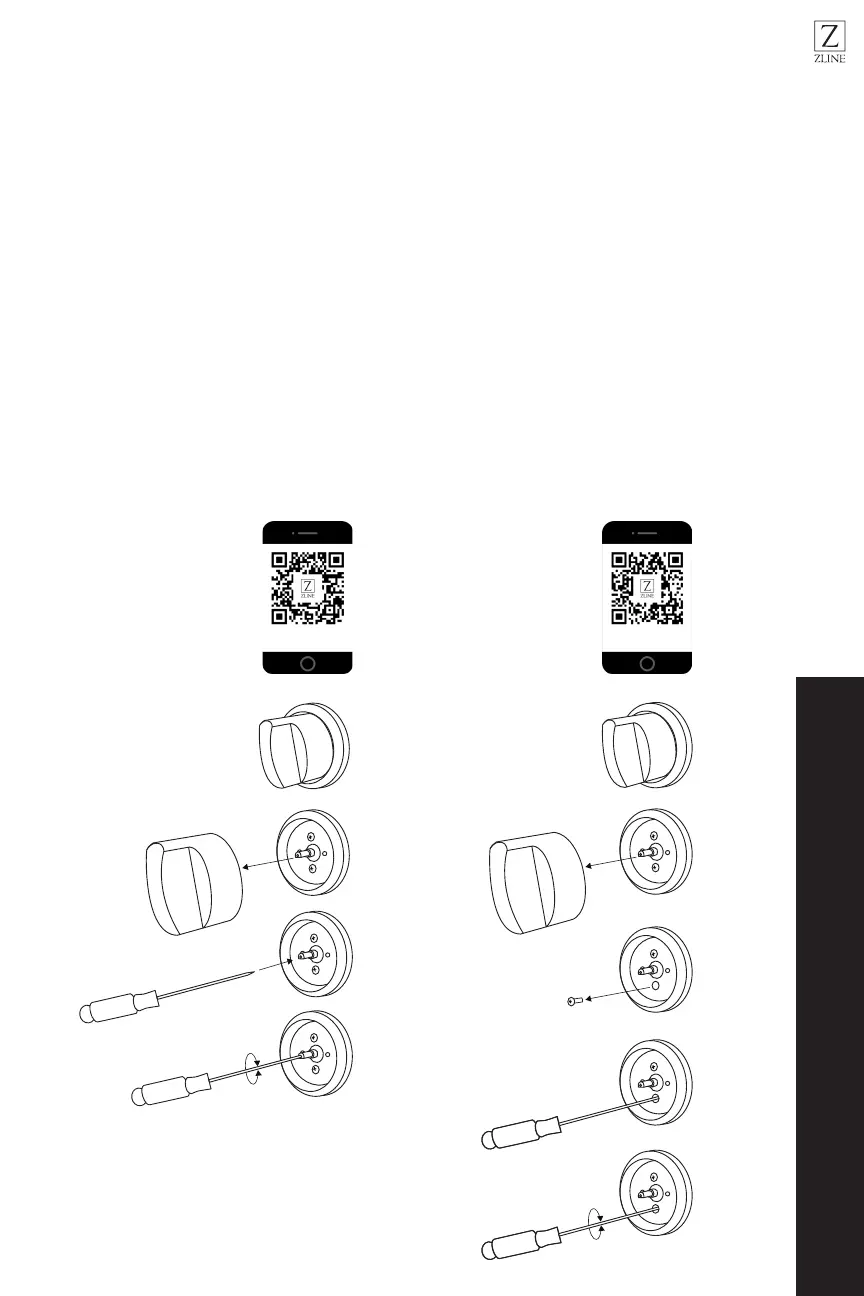
STEP 3: FLAME ADJUSTMENT
1. Light one burner at a time and set it to the MINIMUM position (small flame).
2. Remove the knob.
3. The range is equipped with a safety valve. Using a small-size flathead
screwdriver, locate the choke screw (see diagram below) and turn to the right or
left until the burner flame is adjusted to desired minimum.
4. Make sure that the flame does not go out when switching quickly from the
MAXIMUM to the MINIMUM position.
The high flame setting cannot be adjusted to be lower. If the height is too high, revisit
the conversion set up. A step may have been missed.
Flame Adjustment
WIRING DIAGRAM
DW7714-18 & DW7713-24
18” & 24“ Panel-Ready Dishwasher
0.0.0.
FLAME ADJUSTMENT
Germania
RA series, RG series
zlinekitchen.com 1-614-777-5004 0.0.0.zlinekitchen.com 1-614-777-5004
2.0 x 50 mm
2.0 x 50 mm
If the customer flame control valve looks like this (left), then they will not be able to adjust the
flame without removing one of the screws. These new ranges are already fielded, so please
do not process returns for this issue. The valves are different from the previous ones and are
not interchangeable.
SCAN ME SCAN ME
2.0 x 50 mm
2.0 x 50 mm