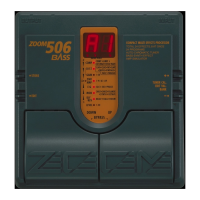
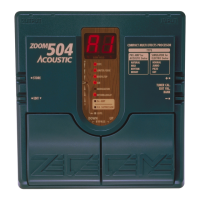
Thank you for selecting the ZOOM 506 (hereafter simply called the "506").
Please take the time to read this manual carefully so as to get the most out of
your 506 and to ensure optimum performance and reliability. Retain this manual
for future reference.
ZOOM CORPORATION
NOAH Bldg., 2-10-2, Miyanishi-cho, Fuchu-shi, Tokyo 183, Japan
PHONE: 0423-69-7111 FAX: 0423-69-7115
Printed in Japan 506-5000
• 24 individual built-in effects provide maximum flexibility.
Up to 8 effects can be used simultaneously in any combination.
• Memory capacity for up to 24 user-programmable patches.
• Integrated auto-chromatic bass guitar tuner for simple and precise tuning
anywhere.
• Optional foot controller FP01 can be used for pedal wah or pedal pitch, and
volume control is also possible.
• Optional foot switch FS01 can be used for bank switching, resulting in
enhanced playability.
• Dual power supply principle allows the unit to be powered from an alkaline
battery or an AC adapter.
• New DSP (digital signal processor) ZFx-2 developed by Zoom produces
high-quality effects from an amazingly compact package.
USAGE AND SAFETY PRECAUTIONS
In this manual, symbols are used to highlight warnings and
cautions for you to read so that accidents can be prevented. The
meanings of these symbols are as follows:
Please observe the following safety tips and precautions to ensure
hazard-free use of the 506.
Since power consumption of this unit is fairly high, we
recommend the use of an AC adapter whenever possible.
When powering the unit from a battery, use only an alkaline
type.
AC adapter operation
• Be sure to use only an AC adapter which supplies 9 V DC,
300 mA and is equipped with a "center minus" plug (Zoom
AD-0006). The use of an adapter other than the specified type
may damage the unit and pose a safety hazard.
• Connect the AC adapter only to an AC outlet that supplies the
rated voltage required by the adapter.
• When disconnecting the AC adapter from the AC outlet,
always grasp the adapter itself and do not pull at the cable.
• If the unit is not to be used for a long time, disconnect the AC
adapter from the outlet.
Battery operation
• Use only a 9 V (alkaline) battery (6LR61).
• The 506 cannot be used for recharging.
Pay close attention to the labelling of the battery to make sure
you choose the correct type.
• If the 506 is not to be used for an extended period of time,
remove the battery from the unit.
• If battery leakage has occurred, wipe the battery compartment
and the battery terminals carefully to remove all remnants of
battery fluid.
• While using the unit, the battery compartment cover should
be closed.
Avoid using your 506 in environments where it will be
exposed to:
• Extreme temperature
• High humidity or moisture
• Excessive dust or sand
• Excessive vibration or shock
• The 506 is a precision instrument. Except for the foot
switches, do not push other parts with your feet or subject
them to strong force.
• Take care that no foreign objects (coins or pins etc.) or liquids
can enter the unit.
• Be sure to turn the power to all equipment off before making
connections.
• Before moving the unit, turn the power off, and disconnect all
cables and the AC adapter.
Never open the case of the 506 or attempt to modify the
product in any way since this can result in damage to the unit.
Usage precautions
For safety considerations, the 506 has been designed to provide
maximum protection against the emission of electromagnetic
radiation from inside the device, and from external
interference.However, equipment that is very susceptible to
interference or that emits powerful electromagnetic waves
should not be placed near the 506, as the possibility of
interference cannot be ruled out entirely.
Whatever the type of digital control device, the 506 included,
electromagnetic damage can cause malfunctioning, and can
corrupt or destroy data. Since this is an ever-present danger,
thorough care should be taken to minimize the risk of damage.
Use a soft, dry cloth to clean the 506. If necessary, slightly
moisten the cloth. Do not use abrasive cleanser, wax, or
solvents (such as paint thinner or cleaning alcohol), since these
may dull the finish or damage the surface.
Connecting cables and input and output jacks
You should always turn off the power to the 506 and all other
equipment before connecting or disconnecting any cables. Also
make sure to disconnect all cables and the AC adapter before
moving the 506.
Major Features
Safety Precautions
Warning
This symbol indicates explanations about extremely
dangerous matters. If users ignore this symbol and
handle the device the wrong way, serious injury or
death could result.
Caution
This symbol indicates explanations about dangerous
matters. If users ignore this symbol and handle the
device the wrong way, bodily injury and damage to the
equipment could result.
Warning
About power
Caution
Environment
Caution
Handling
Caution
Alterations
Electrical interference
Cleaning
1
2
Operation Manual